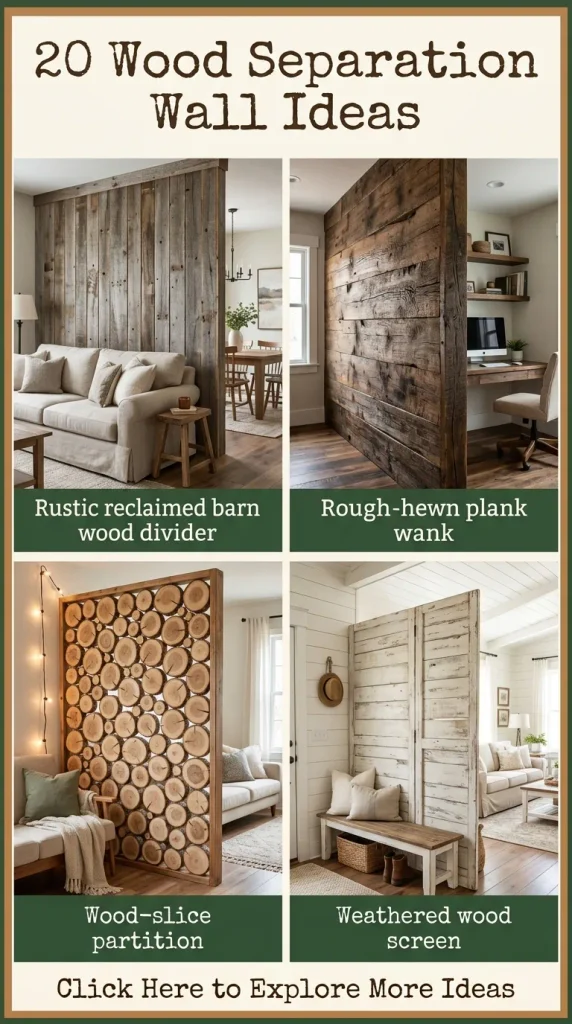
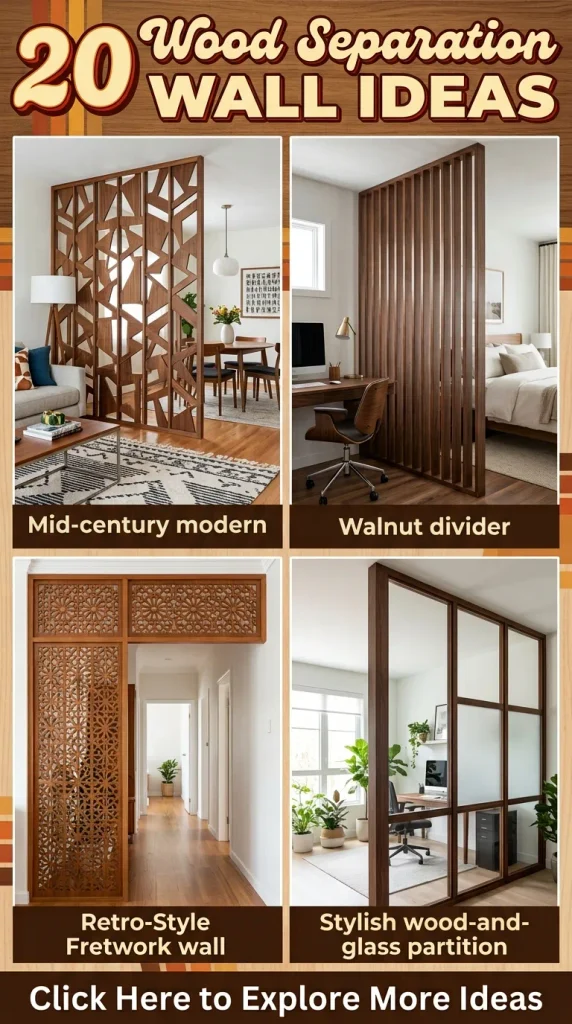
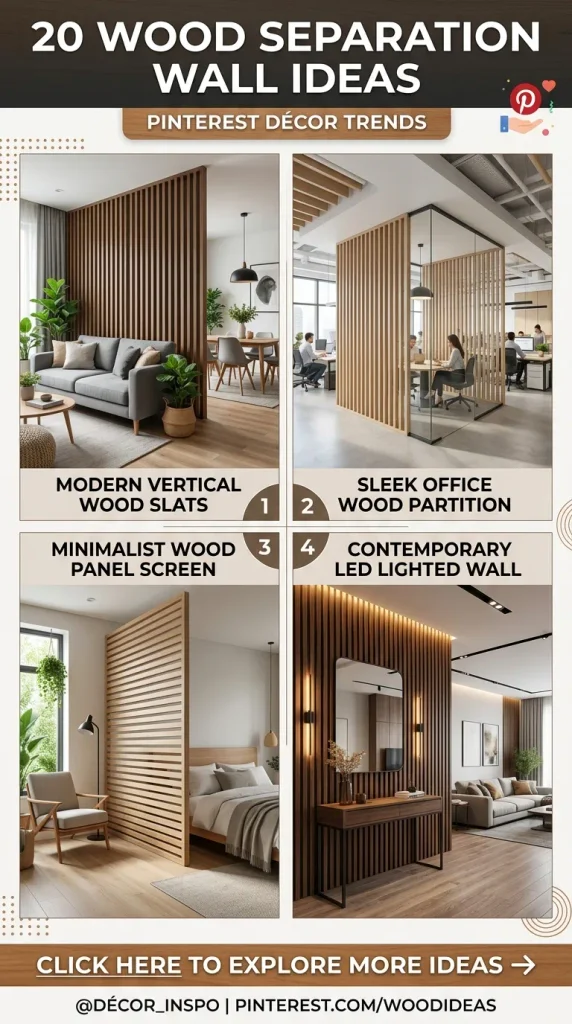
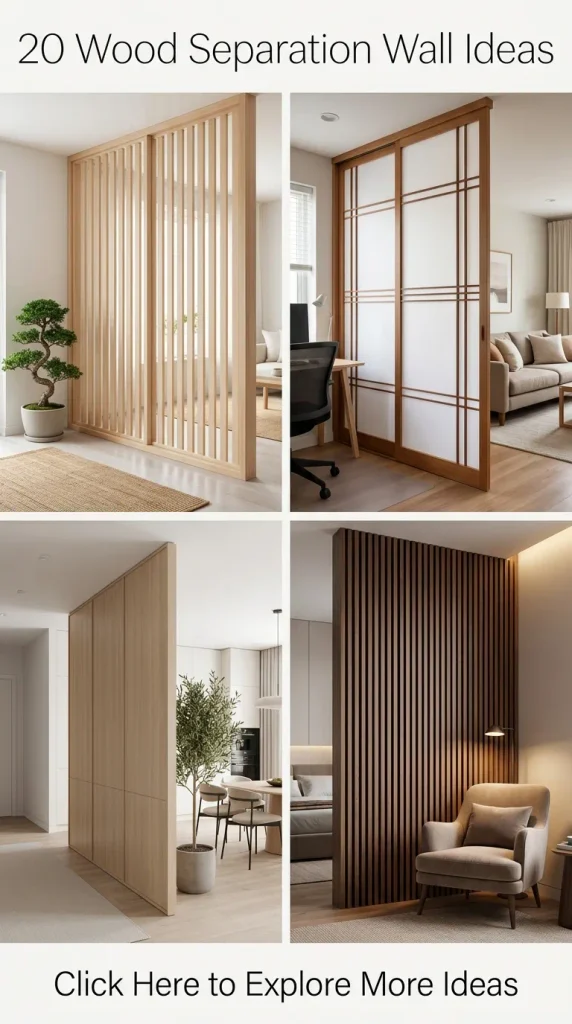
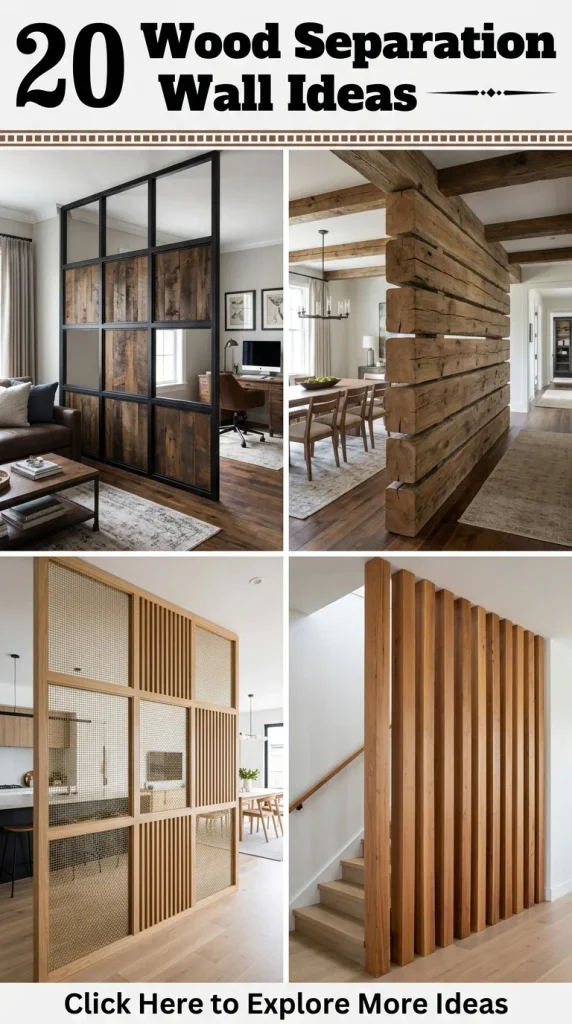
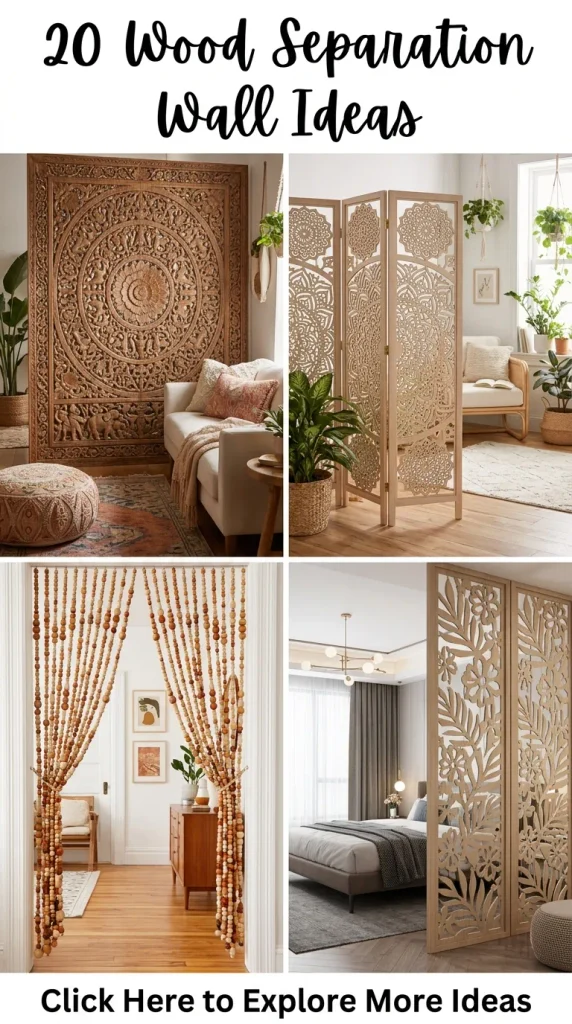
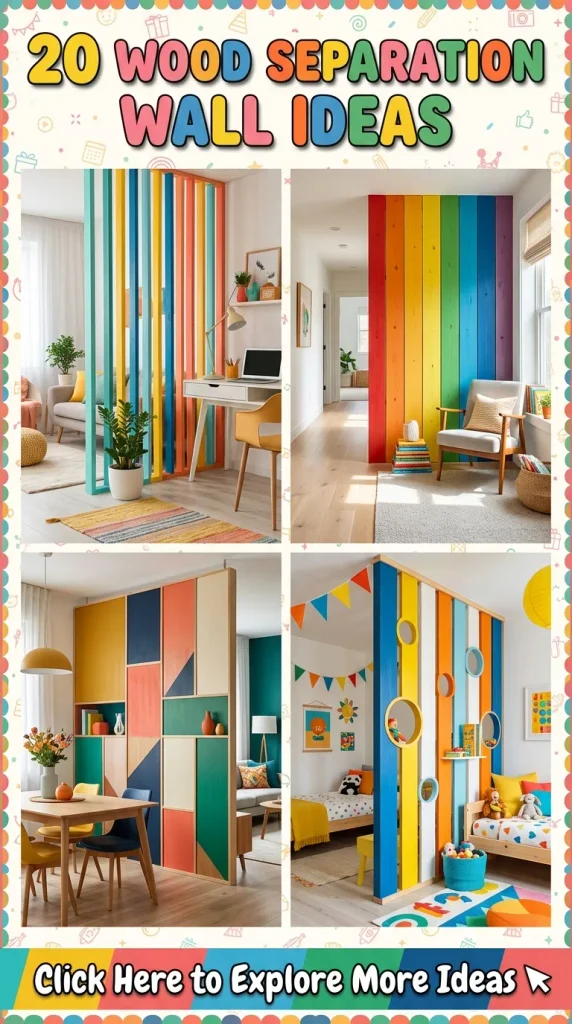
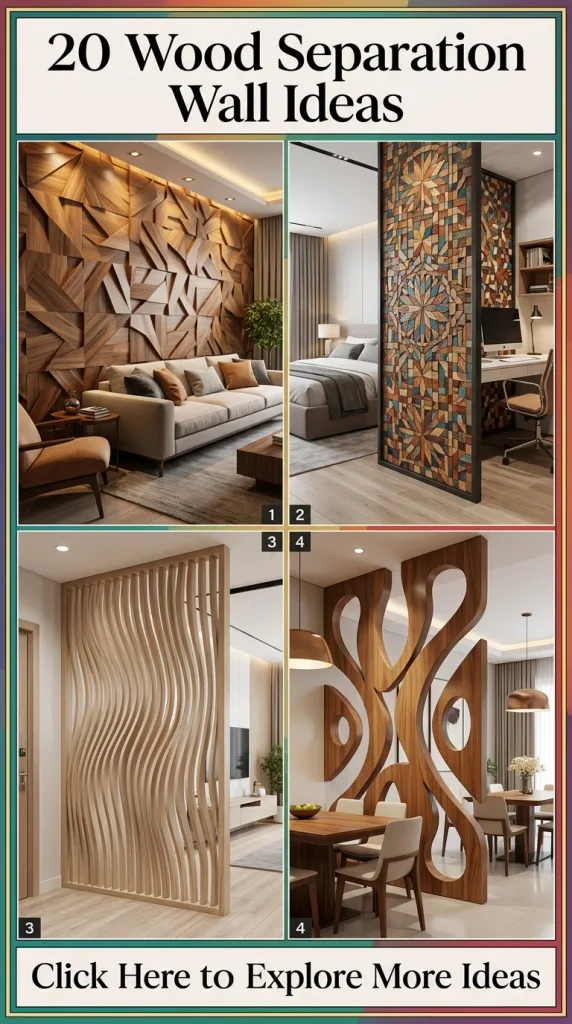
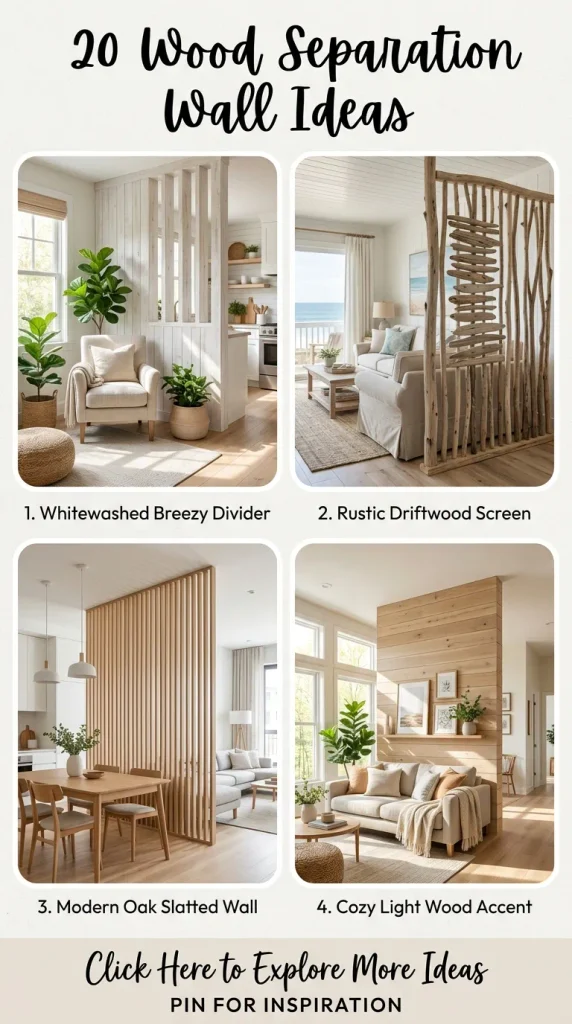
Open floor plans offer bright, airy expanses, but modern living often demands intentional zones for rest, productivity, dining, and connection. A wooden separation wall provides the ideal architectural solution, introducing warmth, texture, and acoustic dampening without closing off light or airflow.
Whether you are designing a compact studio apartment, carving out a home office within an open living room, or adding organic depth to a minimalist loft, here are 20 aesthetic wood partition wall ideas, complete with construction guidance, styling tips, and material lists.
1. Floor-to-Ceiling Vertical Oak Slat Wall
Introduction
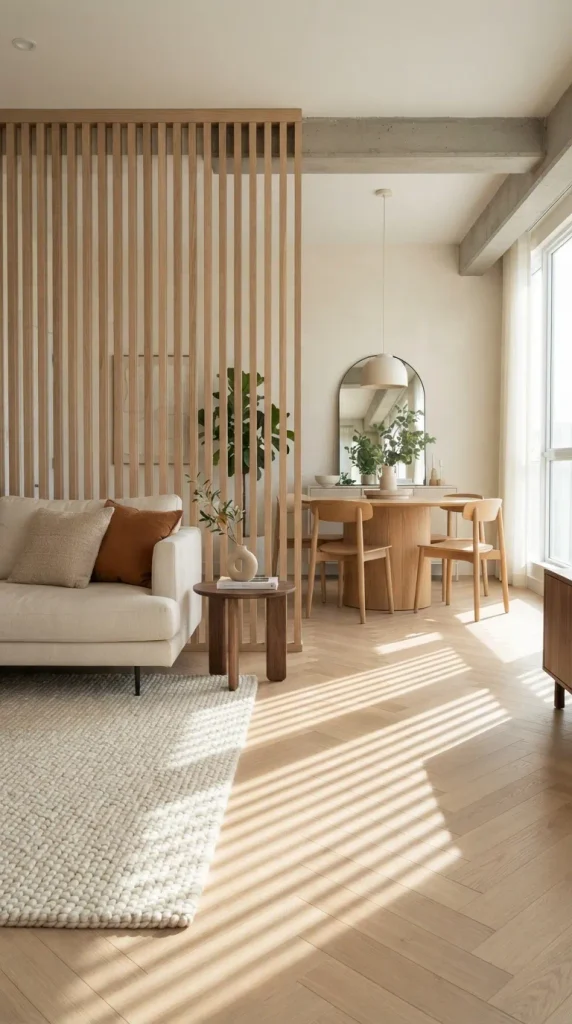
The vertical slat wall is an interior design staple that merges Scandinavian warmth with Japanese minimalism (Japandi). It creates a distinct boundary between functional areas while maintaining a continuous visual sightline throughout the home.
What This Idea Means
This design utilizes evenly spaced vertical timber slats anchored to horizontal top and bottom plates. The open intervals allow natural daylight to filter through, casting dynamic shadow patterns across the room throughout the day while defining separate functional spaces.
How to Make It
- Measure ceiling height at three points (left, middle, right) to identify uneven flooring or ceiling settling.
- Cut top and bottom mounting plates from matching oak boards (typically 1×4 or 2×4 lumber).
- Pre-drill recessed counterbore holes in the top and bottom plates at calculated intervals (typically 1.5 to 2 inches apart) for the vertical slats.
- Cut individual oak slats (2×2 or 1×3 dimensions) precisely to fit between the top and bottom plates.
- Secure top and bottom plates to ceiling joists and subflooring using heavy-duty wood screws or toggle bolts.
- Slide vertical slats into place and secure through the pre-drilled pilot holes with countersunk screws, concealing screw heads with matching wood plugs.
- Sand all surfaces smooth and apply a matte polyurethane or hardwax oil finish.
Tips and Variations
- Spacing: A 1:1 slat-to-gap ratio offers maximum transparency; a 2:1 ratio enhances privacy.
- Finish: Keep the oak natural with a clear matte sealant, or opt for a light white-wash stain for a modern Nordic aesthetic.
- Concealed Lighting: Rout a narrow channel into the top plate to house a recessed LED strip facing downward along the slats.
Materials & Tools Needed
- White oak or red oak lumber (2x2s or 1x3s for slats, 1x4s for plates)
- Miter saw and table saw
- Cordless drill, drill bits, and countersink bits
- Stud finder, 4-foot spirit level, and measuring tape
- Wood glue, wood plugs, and 3-inch structural screws
- Sandpaper (120, 180, and 220 grit)
- Hardwax oil or water-based matte polyurethane
2. Fluted Architectural Timber Pillar Divider
Introduction
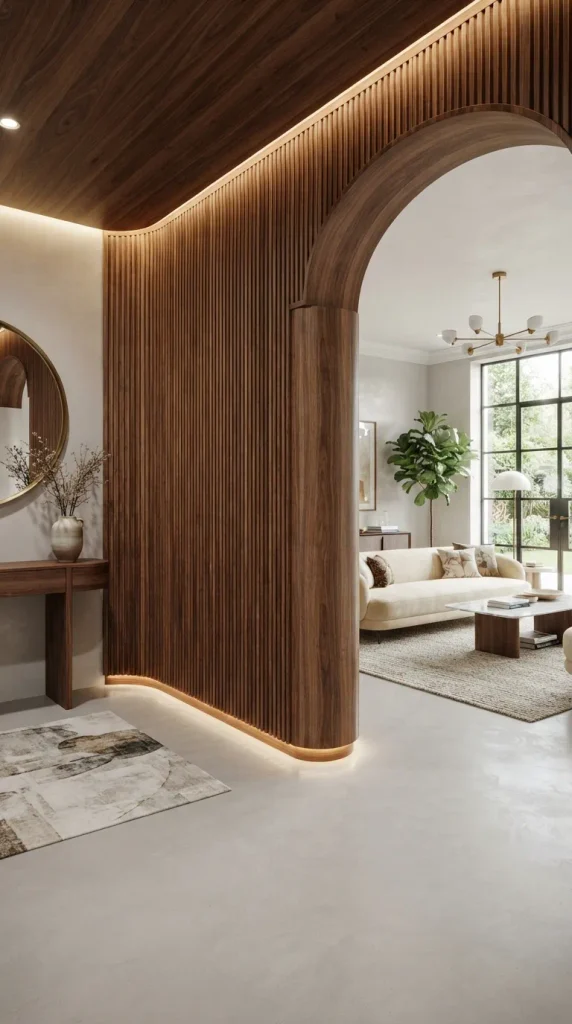
Fluted woodwork brings tactile richness and subtle mid-century luxury to interior boundaries. A fluted separation wall acts like an architectural column cluster, softening room transitions with rounded, reeded contours.
What This Idea Means
Instead of flat lumber, this partition incorporates curved half-round dowels, fluted millwork, or flexible tambour panels attached to a sturdy timber substructure. The grooved relief catches ambient light, turning a simple divider into a sculptural focal point.
How to Make It
- Construct an internal timber framework using standard 2×4 framing studs, securing the base to the floor and the header to the ceiling joists.
- Sheath both sides of the frame with 1/2-inch birch or MDF plywood to create a solid, flat backing substrate.
- Measure and cut fluted wood panels or individual solid half-round wood moldings to vertical length.
- Apply heavy-duty construction adhesive across the plywood face.
- Pin each fluted molding piece onto the substrate with an 18-gauge brad nailer, ensuring tight seam alignment.
- Add solid hardwood trim capping along the top and exposed sides for a seamless edge profile.
- Fill micro-nail holes with matching color-matched wood putty, lightly sand, and apply a satin lacquer or deep walnut stain.
Tips and Variations
- Radius Corners: Curve the outer edge of the partition wall using bendable plywood before applying flexible tambour sheets for an organic waterfall silhouette.
- Color Palette: Warm walnut, espresso, or painted sage green accents enhance the play of shadow along the vertical ridges.
Materials & Tools Needed
- 2×4 framing timber and 1/2-inch structural plywood
- Half-round solid wood moldings or flexible fluted tambour sheets
- 18-gauge brad nailer and 1-1/4 inch brad nails
- Polyurethane construction adhesive and caulking gun
- Miter saw, level, and tape measure
- Wood filler, sander, and satin wood finish
3. Biophilic Wood Partition with Integrated Planters
Introduction
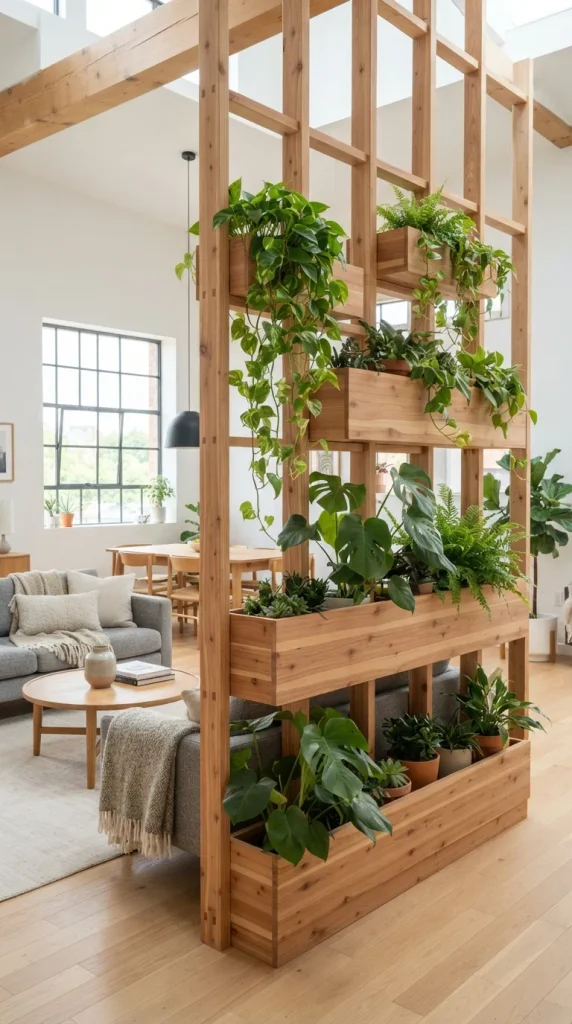
Integrating living vegetation directly into interior woodwork bridges the gap between indoor architecture and the natural world. A biophilic partition wall divides space while cleaning the air and softening geometric interior lines.
What This Idea Means
This concept combines an open structural wood frame with built-in wooden planting troughs, floating shelves, or trellis slats designed to support trailing plants like pothos, philodendron, and monstera.
How to Make It
- Build a sturdy rectangular outer frame using 2×6 cedar, teak, or moisture-resistant treated hardwood.
- Build open planter boxes using matching lumber, lining the interior with waterproof rubber pond liners or inserting pre-formed plastic drip trays.
- Fasten horizontal planter boxes between the vertical uprights at staggered heights (e.g., knee height, waist height, and shoulder height).
- Install vertical or cross-hatch interior climbing dowels between the planter tiers.
- Fasten the completed structural unit securely into floor and ceiling anchors.
- Seal all exterior wood surfaces with a marine-grade water-resistant oil or polyurethane to protect against moisture from watering.
- Place potted plants inside the lined boxes, adding a top layer of preserved sheet moss to hide nursery pots.
Tips and Variations
- Lighting: Install full-spectrum LED grow light pucks concealed under upper shelving tiers to keep plants thriving in low-light rooms.
- Plant Selection: Combine upright snake plants on bottom tiers with cascading devil’s ivy on top tiers for layered density.
Materials & Tools Needed
- Cedar, white oak, or teak lumber (2×4, 2×6, and 1×8 stock)
- Heavy-duty pocket hole jig and 2-1/2 inch exterior-grade pocket screws
- Waterproof plastic planter liners or EPDM pond liner sheets
- Brad nailer, miter saw, and cordless driver
- Marine polyurethane or teak oil finish
- Moisture meter and spirit level
4. Reclaimed Barn Wood Accent Screen with Steel Framing
Introduction
Infusing spaces with history and rustic texture, a reclaimed barn wood divider framed in industrial steel delivers bold visual weight and tactile contrast, making it an ideal choice for urban lofts and modern industrial residences.
What This Idea Means
A contrast between raw structural metal and aged, weathered wood planks. The weathered gray and amber tones of historic timber balance the clean, dark lines of metal framing.
How to Make It
- Weld or assemble a modular steel tube frame (1.5-inch square steel tubing) with pre-drilled mounting tabs around the inner perimeter.
- Source authentic reclaimed barn wood or distressed salvaged boards, ensuring timber is kiln-dried and pest-treated.
- Clean timber using a nylon-bristle wire brush to remove debris without stripping natural aged patina.
- Plane the back of the boards to uniform thickness while preserving original saw marks and weathered surfaces on the face.
- Mill tongue-and-groove or shiplap edges on the timber planks for smooth interlocking.
- Fit wood planks into the steel frame, fastening them through the pre-drilled steel tabs using heavy-duty black oxide screws.
- Apply matte penetrating wax or dead-flat varnish to seal the wood without adding synthetic shine.
Tips and Variations
- Partial Openings: Leave staggered cutouts in the plank arrangement to create display portals for vintage ceramics or glassware.
- Metal Alternatives: If welding steel is not an option, build the perimeter frame from 2×4 lumber finished with matte black iron-look paint and decorative corner brackets.
Materials & Tools Needed
- 1.5-inch square metal tubing (or 2×4 framing lumber painted matte black)
- Reclaimed weathered barn wood boards (1-inch nominal thickness)
- Nylon wire brush and orbital sander
- Miter saw, table saw, and drill
- Black oxide self-tapping screws
- Matte natural wax or dead-flat clear wood sealant
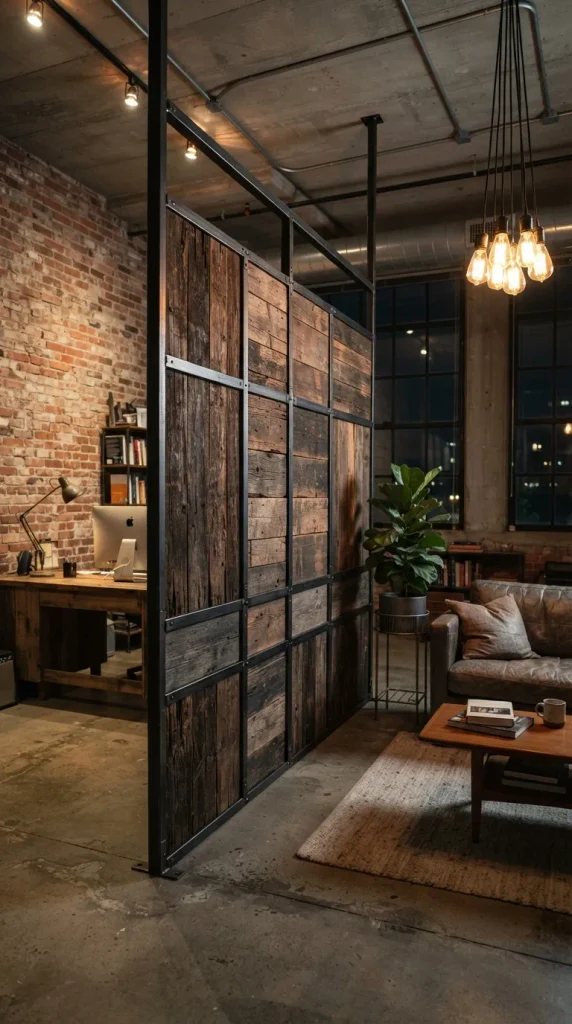
5. CNC-Carved Wooden Geometric Lattice (Jali Screen)
Introduction
Lattice screens, inspired by traditional Indian Jali and Middle Eastern Mashrabiya architecture, offer intricate micro-shadows and ventilation. Modern CNC carving allows these historical patterns to be executed in contemporary geometric forms.
What This Idea Means
A decorative wood panel featuring intricate, repeating geometric or organic cutouts. It functions as a lightweight partition that diffuses sunlight, maintains air circulation, and provides semi-private spatial zoning.
How to Make It
- Select high-density hardwood plywood (such as Baltic Birch or Walnut-veneered MDF) in 3/4-inch thickness to prevent panel warping.
- Design or select a geometric vector pattern and cut using a CNC router or laser cutting service.
- Sand the micro-edges of every cutout meticulously using sanding sponges and flap wheels.
- Construct a solid hardwood perimeter frame with an internal routed groove sized to receive the 3/4-inch carved panel.
- Insert the carved panel into the frame groove, securing with interior wood glue and concealed pin nails.
- Install floor-to-ceiling pivot pins or attach directly to surrounding structural walls using concealed mounting brackets.
- Finish with sprayed matte clear lacquer to evenly coat internal cutout crevices without pooling.
Tips and Variations
- Pattern Scale: Opt for dense micro-patterns in bedrooms for greater privacy, and expansive macro-geometric patterns in living areas for maximum light transmission.
- Dual Layering: Sandwich a translucent rice paper or frosted acrylic sheet between two identical carved wood panels for an illuminated lantern effect.
Materials & Tools Needed
- 3/4-inch Baltic Birch plywood panel or walnut-veneered MDF
- Solid hardwood framing lumber (2×2 or 2×3 stock)
- Router with 3/4-inch straight slot-cutting bit
- Fine sanding sponges and detail finishing files
- HVLP spray gun or high-grade aerosol lacquer
- Mounting brackets or vertical pivot hardware
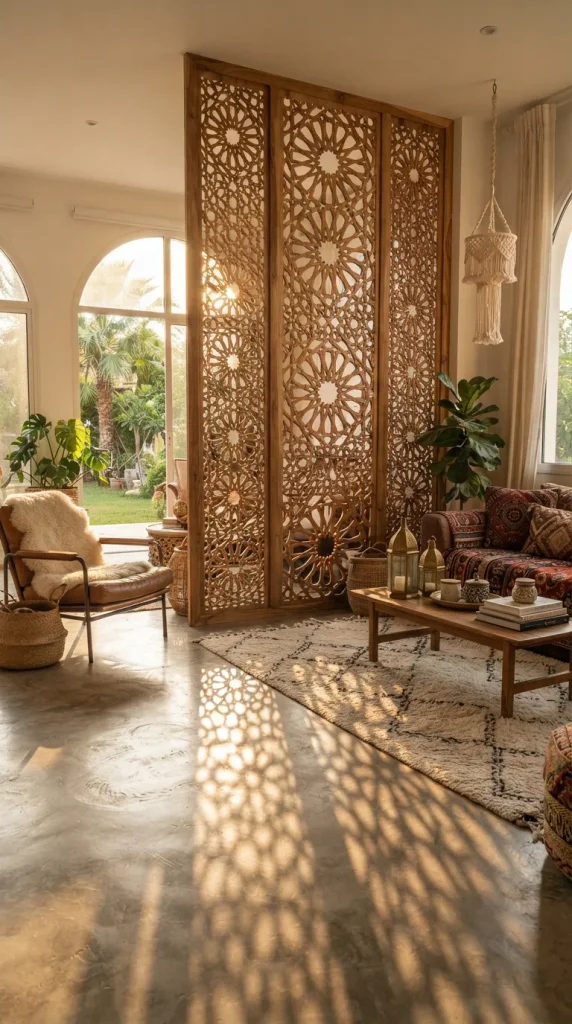
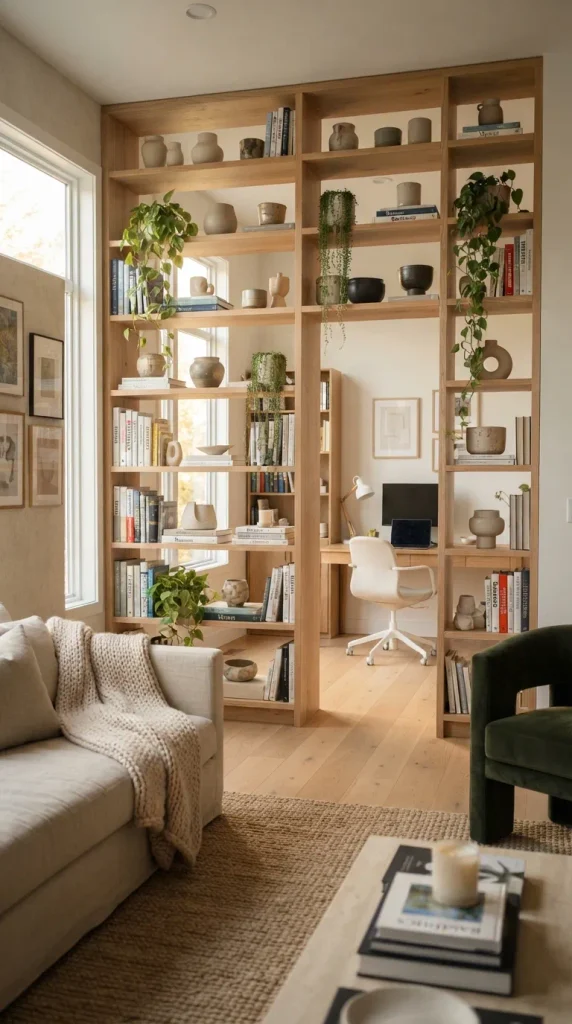
6. Double-Sided Open-Back Timber Bookcase Wall
Introduction
Maximizing storage while partitioning living zones, an open-back wooden bookcase allows light and curated decor to be enjoyed from both sides of the divided room.
What This Idea Means
A structural shelving unit spanning floor-to-ceiling or waist-to-ceiling heights without back panels. It provides functional display space for books, sculptures, and greenery while forming an architectural threshold.
How to Make It
- Dimension the overall space, designing an asymmetrical or symmetrical cubby layout using 5/4 (1.25-inch thick) solid oak, maple, or walnut boards for structural stability.
- Cut vertical uprights and horizontal shelf planks with clean 90-degree square cuts.
- Mill dados and rabbets into the vertical uprights where horizontal shelves will intersect, creating interlocking joinery capable of bearing heavy weight.
- Dry-fit the entire structure on a flat work surface to verify squareness with a framing square.
- Apply wood glue in all joints and clamp securely using long pipe clamps; reinforce with countersunk screws or hidden dowel pins.
- Anchor the unit directly into ceiling joists and wall studs using heavy-duty L-brackets concealed on upper shelf surfaces.
- Sand through 220-grit paper and apply two coats of hand-rubbed Danish oil.
Tips and Variations
- Asymmetrical Grids: Stagger vertical dividers to create cubbies of various heights for tall vases, art books, and horizontal plant arrangements.
- Integrated Planter Ledges: Make select lower shelves slightly deeper than upper tiers to house broad storage baskets or planter basins.
Materials & Tools Needed
- 5/4 solid hardwood boards (Oak, Ash, Maple, or Walnut)
- Table saw or circular saw with precision guide rail
- Dado blade set or plunge router
- Heavy-duty 48-inch and 72-inch pipe clamps
- Framing square, drill, and structural wood screws
- Hand-rubbed Danish oil or matte wipe-on poly
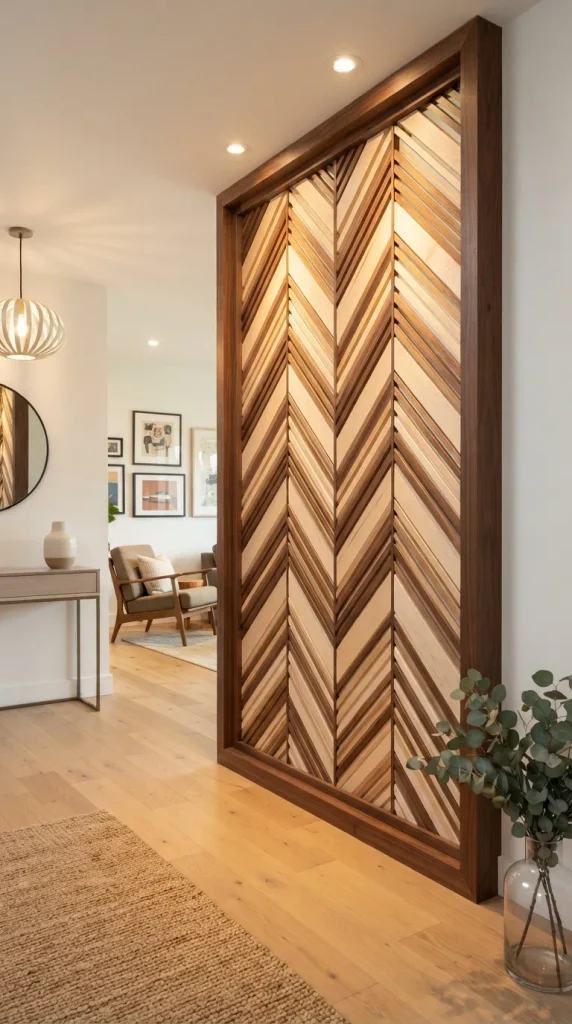
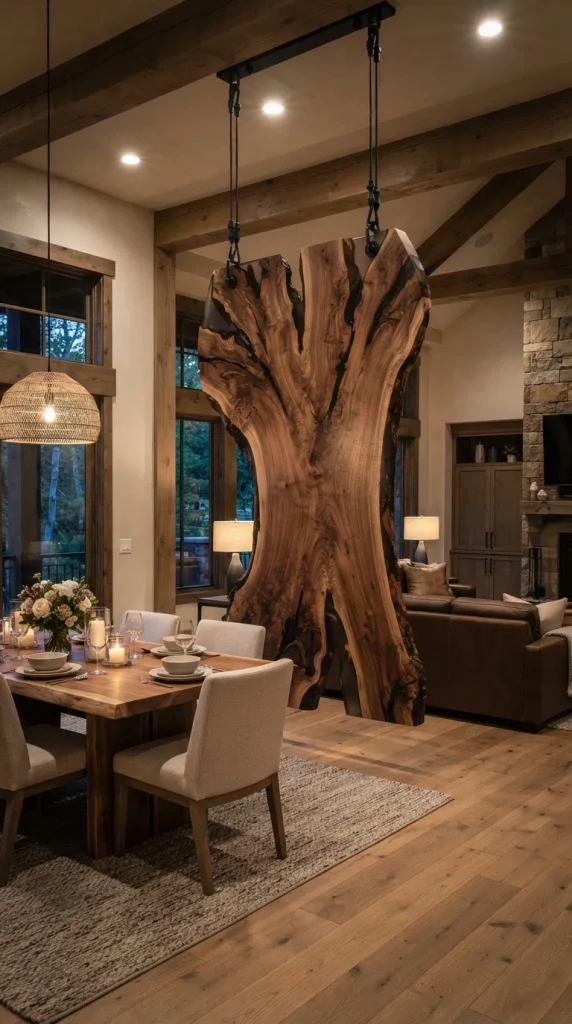
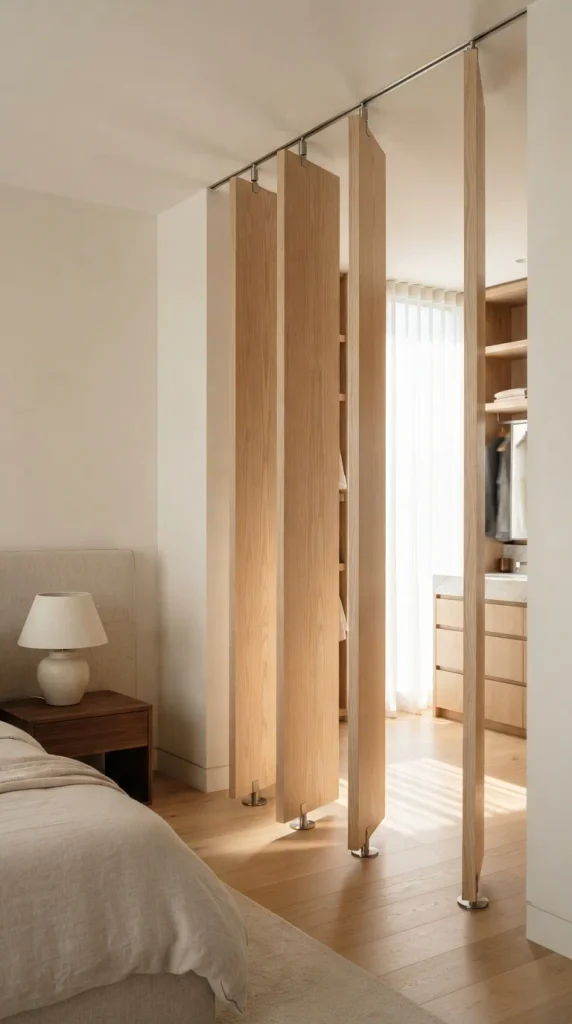
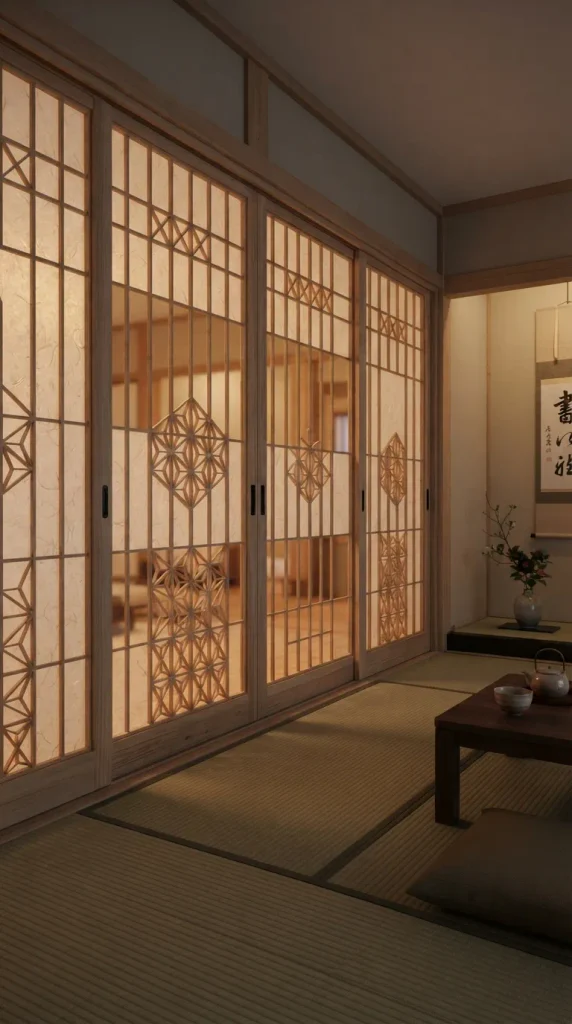
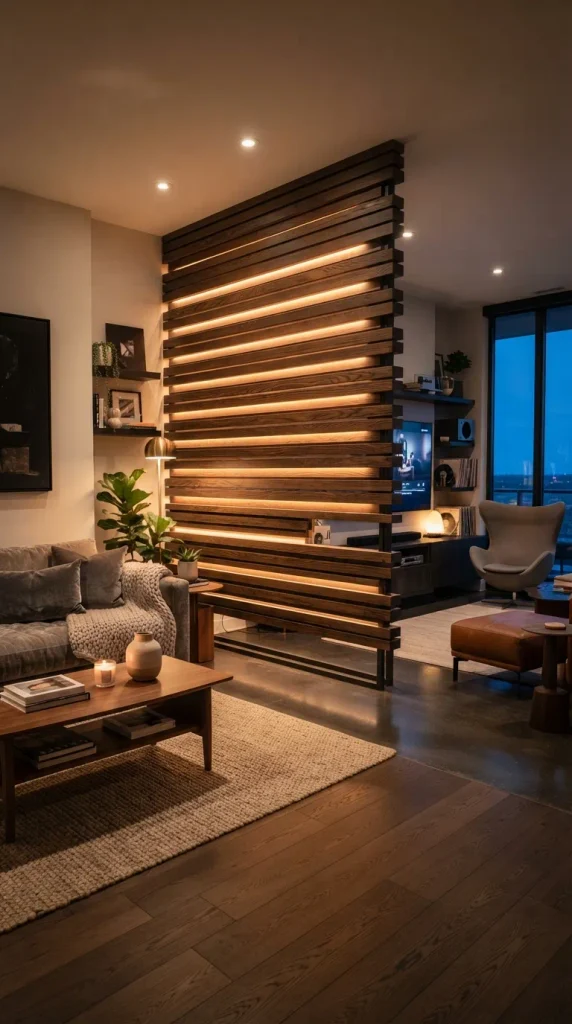
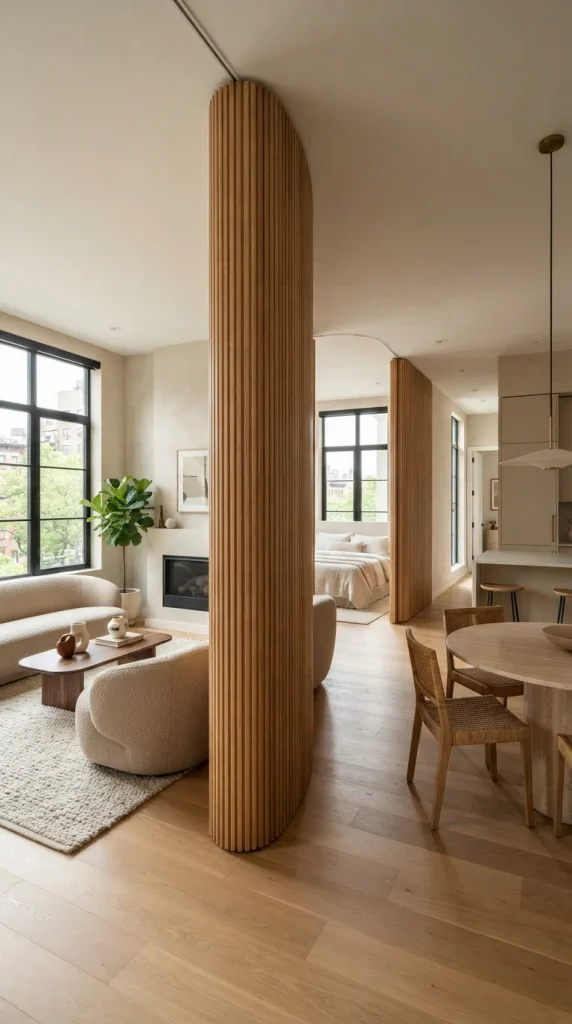
7. Rotating Vertical Timber Louvers
Introduction
Offering total control over light, airflow, and sightlines, rotating wooden louver partitions let homeowners toggle rooms between open-concept and closed configurations.
What This Idea Means
An array of vertical timber fins mounted on central pivot hardware. Slats can rotate 360 degrees, closing flush to form a solid wall or opening perpendicular to allow light through.
How to Make It
- Select straight, kiln-dried hardwood lumber (such as 1.5 x 6-inch vertical timber louvers) that will resist warping over time.
- Cut upper and lower mounting header tracks from matching hardwood stock.
- Install heavy-duty stainless steel center-pivot pins (or 360-degree rotating tension ball hardware) into precise pre-drilled holes at both ends of each vertical louver.
- Drill matching pivot receiver holes into the top header and bottom floor track at equal intervals.
- Fasten top and bottom tracks securely into structural ceiling joists and subflooring, ensuring precise plumb alignment with a laser level.
- Insert the pivot pins of each louver into the top and bottom track receivers, adjusting tension screws for smooth, quiet rotation.
- Finish the timber with hard-wearing furniture wax or matte polyurethane.
Tips and Variations
- Linked Mechanism: Connect the louvers with a concealed top linking rod so turning a single fin rotates the entire wall in synchronized harmony.
- Two-Tone Staining: Stain one edge of each louver darker than the other to create dynamic color transitions as the louvers rotate.
Materials & Tools Needed
- 1.5 x 6-inch straight-grain hardwood lumber
- 360-degree vertical pivot pin kits or thrust bearing hardware
- Laser level, plumb bob, and tape measure
- Drill press or precision doweling jig for straight end-hole drilling
- Structural installation screws
- Sanding supplies and protective clear wood sealant
8. Rustic Live-Edge Slab Hanging Divider Screen
Introduction
Celebrating the organic contours of natural timber, a suspended live-edge partition wall transforms raw tree slabs into suspended sculptural architecture.
What This Idea Means
A series of natural live-edge wood slabs hung vertically or horizontally using industrial steel aircraft cables, wrought iron rods, or ceiling suspension hardware.
How to Make It
- Source sustainably harvested live-edge slabs (such as walnut, cedar, or acacia) with distinctive bark edges and natural grain figures.
- Remove loose bark using a draw knife and wire brush, then sand the live edge smooth while preserving its organic silhouette.
- Fill large structural cracks or natural voids with clear or smoky black epoxy resin; install butterfly wood keys (Dutchman joints) across checks.
- Sand the slab faces flat from 80-grit up to 320-grit.
- Drill precision vertical holes through the corners or ends of the slabs to receive heavy-gauge stainless steel suspension cables.
- Install structural rated ceiling eyelets directly into overhead floor joists.
- Thread high-strength wire rope through the slabs, securing each tier in position using adjustable cable grippers and tension lock nuts.
- Coat the timber with penetrating oil to accentuate the natural wood figure.
Tips and Variations
- Horizontal Stacking: Hang multiple thin live-edge slabs horizontally, one above the other, leaving 6-inch air gaps between boards.
- Contrasting Hardware: Pair dark walnut slabs with brushed brass suspension rods instead of stainless steel cables for a warm, upscale aesthetic.
Materials & Tools Needed
- Natural live-edge hardwood slabs (1.5 to 2 inches thick)
- Draw knife, chisels, and wire detail brush
- Epoxy resin kit (for void stabilization)
- High-strength stainless steel suspension wire rope and ceiling anchors
- Heavy-duty cable stop clamps and tensioners
- Penetrating mineral/tung oil or satin hardwax finish
9. Modern Chevron & Herringbone Wood Panel Partition
Introduction
Patterned woodwork adds motion and visual interest to modern rooms. A herringbone or chevron partition wall combines the appeal of classic parquet flooring with the utility of a freestanding space divider.
What This Idea Means
Short timber planks arranged in a geometric V-pattern over an open or semi-opaque frame. The directional grain catches light from different angles, creating a dynamic multi-tonal effect across the wall.
How to Make It
- Construct a solid outer perimeter frame using 2×3 or 2×4 hardwood stock with reinforced half-lap corner joints.
- Install a central vertical spine support runner down the center of the frame.
- Cut hardwood slats (1×3 stock) at precise 45-degree angles using a miter saw equipped with a fine-finish blade and stop block for repeatable accuracy.
- Sand all individual slats before assembly to ensure crisp, uniform edges.
- Begin at the bottom, fixing chevron pairs to the central spine and outer frame rails with wood glue and micro-pin nails.
- Maintain consistent 1/2-inch gaps between each chevron tier using spacer blocks, or butt them tight for a completely solid chevron screen.
- Secure the frame to floor and ceiling plates, filling pin holes and sealing with satin protective varnish.
Tips and Variations
- Alternating Tones: Alternate slat materials (such as pairing white oak with walnut) for high-contrast geometric striping.
- Partial Chevron: Place chevron paneling along the lower half of the divider wall while keeping the top half as open vertical slats for balanced privacy and illumination.
Materials & Tools Needed
- Hardwood slats (1×3 stock) and frame timber (2×3 stock)
- Miter saw with fine-toothed 80-tooth crosscut blade
- 23-gauge micro pinner and adhesive
- Spacer blocks (1/2 inch or 1/4 inch thickness)
- Corner clamps, drill, and level
- Clear protective finish or stain
10. Japanese Shoji-Inspired Minimalist Cedar Lattice
Introduction
Rooted in traditional Japanese residential design, modern Shoji-style partitions offer lightweight, calming spatial transitions, infusing homes with diffused illumination and minimalist beauty.
What This Idea Means
A fine-grid wooden framework (kumiko lattice) paired with translucent washi paper, frosted acrylic, or high-tensile fiberglass backing. It creates complete visual privacy while allowing soft, diffused daylight to pass through.
How to Make It
- Mill straight, knot-free Western Red Cedar, Hinoki, or Basswood into delicate structural grid strips (typically 3/8 x 3/4-inch profiles).
- Cut half-lap micro-notches across the intersecting wood strips using a table saw dado jig to create a flush interlocking lattice grid.
- Assemble the lattice grid on a square assembly table, applying small dabs of wood glue at all interlocking joints.
- Construct a rigid outer frame from 1.5 x 2-inch cedar stock with internal grooving to hold the perimeter of the lattice.
- Fit the assembled lattice into the outer frame.
- Stretch tear-resistant synthetic Washi paper (or 1/8-inch frosted acrylic sheet) across the rear face, securing with double-sided Shoji tape or wood retaining strips.
- Mount as fixed partition panels or suspend from an overhead sliding barn-door track.
Tips and Variations
- Sliding Configuration: Mount panels on top-hung concealed sliding hardware to convert open spaces into private rooms on demand.
- Natural Oil: Treat cedar panels with pure tung oil to preserve the natural fragrance and warm golden hue of the wood.
Materials & Tools Needed
- Clear, knot-free Western Red Cedar or Basswood lumber
- Table saw with precision sliding crosscut sled
- Dado blade set or delicate Japanese pull saws (Nokogiri)
- Synthetic tear-resistant Washi paper sheets or frosted acrylic panels
- Specialized double-sided Shoji tape
- Top-hung sliding door hardware track (optional)
11. Tambour Wood Rolling Accordion Partition
Introduction
Flexible, tactile, and easily reconfigured, a tambour wood partition wall curves smoothly through rooms, allowing homeowners to shape dynamic, flowing floor layouts.
What This Idea Means
Narrow vertical half-round or rectangular wooden strips affixed to a flexible fabric or canvas backing. The wall functions like a roll-top desk cover, rolling open or closed along a recessed overhead ceiling track.
How to Make It
- Source flexible tambour wood sheets (or mill individual 1/2-inch vertical slats and glue them side-by-side onto heavy cotton canvas duck cloth).
- Install an aluminum ceiling track system featuring curved, sweeping radii directly into ceiling structural framing.
- Fasten precision roller bearing trolleys along the top edge of the tambour wall at 12-inch intervals.
- Guide the lower edge of the tambour wall inside a shallow floor channel or recessed guide track to prevent swinging.
- Attach a solid timber end-post equipped with magnetic catches or recessed flush latches to secure the wall when fully drawn.
- Sand the exterior wood face and apply flexible clear furniture wax or protective oil.
Tips and Variations
- S-Curve Free-Standing Walls: Use stiffened backing on the tambour panel so it stands freely on the floor in serpentine S-curves without fixed ceiling tracks.
- Contrasting Backer: Use black canvas behind natural oak slats to highlight shadow lines between every individual strip.
Materials & Tools Needed
- Flexible wood tambour sheets or custom-milled slats and canvas duck cloth
- Curved ceiling curtain/sliding track system and matching roller trolleys
- Contact cement or flexible water-based veneer adhesive
- Plunge router for floor-groove milling
- Screws, level, measuring tools, and wood wax
12. Floating Horizontal Slat Wall with Integrated LED Backlighting
Introduction
Horizontal lines visually widen narrow rooms. By integrating hidden LED channel diffusers into a horizontal slat wall, this design functions as both an architectural divider and an ambient lighting installation.
What This Idea Means
Wider wooden horizontal planks installed with deliberate air gaps across concealed structural vertical posts, incorporating low-voltage warm LED lighting channels behind or between slats.
How to Make It
- Install two or three vertical structural 2×4 support uprights anchored between ceiling joists and floor plates.
- Route a 1/2-inch deep continuous channel into the back edge of your horizontal slats to conceal LED aluminum profiles and diffuse covers.
- Cut horizontal boards (1×4 or 1×6 poplar, ash, or walnut) to the desired partition width.
- Fasten horizontal slats onto the front and rear faces of the vertical uprights, using uniform spacer blocks (1/2 inch) to maintain clean gaps.
- Install 2700K warm white LED strip lights into the aluminum channels, routing all low-voltage wiring down through the hollow internal framework.
- Connect the low-voltage power supply to a wireless wall switch or smart home dimmer module.
- Finish external wood faces with matte polyurethane.
Tips and Variations
- Staggered Depths: Alternate board thicknesses (e.g., mixing 1×4 and 5/4×4 stock) to create an undulating, textured topography across the wall.
- Indirect Uplighting: Place the LED channels along the bottom baseboard to create a subtle glow across the floor beneath the floating slats.
Materials & Tools Needed
- Horizontal hardwood lumber (1×4 or 1×6 stock)
- Structural 2×4 framing posts
- Aluminum LED mounting channels with frosted silicone diffusers
- 24V Warm White (2700K-3000K) LED strip light kit and transformer
- Router, bits, and cordless drill
- Level, countersunk screws, and satin wood finish
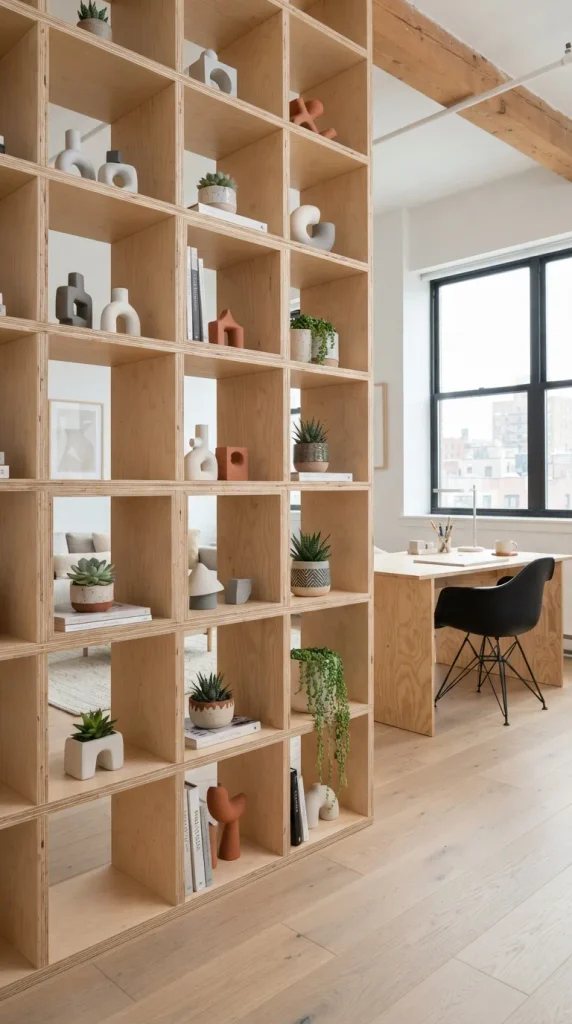
13. Architectural Plywood Box Grid Partition
Introduction
Celebrated in contemporary European architecture, exposed-edge Baltic Birch plywood provides clean geometric lines, structural rigidity, and practical utility in modern interiors.
What This Idea Means
A series of interlocking, open-face plywood cubic boxes stacked and fastened into a geometric modular wall. The visible multi-ply edges become an intentional decorative motif.
How to Make It
- Cut 3/4-inch high-grade Baltic Birch plywood into uniform depth strips (typically 12 to 15 inches deep).
- Cut the strips into individual modular box sides, bottoms, and tops.
- Assemble individual cube modules using 45-degree mitered corners or exposed box joints, reinforcing with wood glue and pocket screws on hidden sides.
- Sand the multi-ply edges up to 240-grit to highlight the alternating dark and light veneer layers.
- Stack the modular cubes into the desired partition arrangement, connecting adjacent units using threaded decorative furniture connector bolts (Chicago screws).
- Anchor bottom modules to the subfloor and secure upper modules to overhead ceiling framing for structural safety.
- Apply three coats of water-based clear acrylic clear coat.
Tips and Variations
- Negative Space: Leave strategic openings in the stacked grid to create view windows between living zones.
- Color Blocking: Paint the inside backboards of select cubbies in muted pastel or earth tones (terracotta, olive, mustard) while leaving surrounding plywood natural.
Materials & Tools Needed
- 3/4-inch Baltic Birch Plywood sheets
- Table saw with fine 80-tooth crosscut blade
- Pocket hole jig, screws, and corner clamping squares
- Threaded architectural furniture connector bolts
- Orbital sander with 120/180/240 grit sanding discs
- Clear water-based matte polyurethane
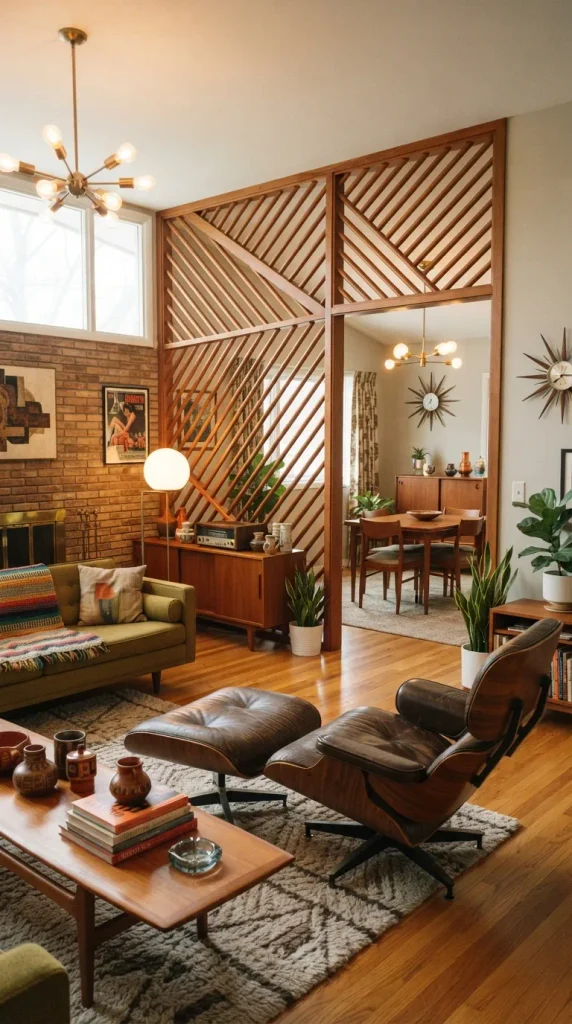
14. Mid-Century Modern Slanted Diagonal Dowel Screen
Introduction
Echoing the iconic forms of mid-century modern design, diagonal timber screens introduce dynamic diagonal geometry into rooms dominated by square layouts.
What This Idea Means
Thick round hardwood dowels or angled square timber struts set on a 45-to-60-degree diagonal angle within a rectangular perimeter frame, creating a striking retro aesthetic.
How to Make It
- Build a heavy rectangular outer frame using 2×4 or 2×6 walnut or teak-stained lumber.
- Calculate spacing for angled dowels or struts using a speed square to set uniform 45-degree angles.
- Drill matching angled holes into top and bottom horizontal frame rails using a drill press fitted with a Forstner bit and an angled drilling jig.
- Cut 1.25-inch or 1.5-inch diameter solid hardwood dowels to equal diagonal lengths.
- Insert dowels into the bottom rail holes with wood glue, then align and slide the top frame rail onto the upper dowel ends.
- Clamp the perimeter frame securely, reinforcing corners with internal corner keys or hidden lag screws.
- Secure the frame into structural floor and ceiling joists.
- Seal with a warm amber Danish oil or hand-rubbed satin varnish.
Tips and Variations
- Crossed Diamond Lattice: Combine two opposing diagonal layers inside a single frame to create an open mid-century diamond lattice pattern.
- Mixed Diameters: Alternate between 1-inch and 2-inch dowels across the frame for an irregular architectural cadence.
Materials & Tools Needed
- 1.25-inch to 1.5-inch solid hardwood dowels
- 2×4 framing lumber for outer perimeter
- Drill press with matching Forstner bits
- Adjustable angled drilling guide and speed square
- Wood glue, corner clamps, and structural frame lag screws
- Amber Danish oil finish
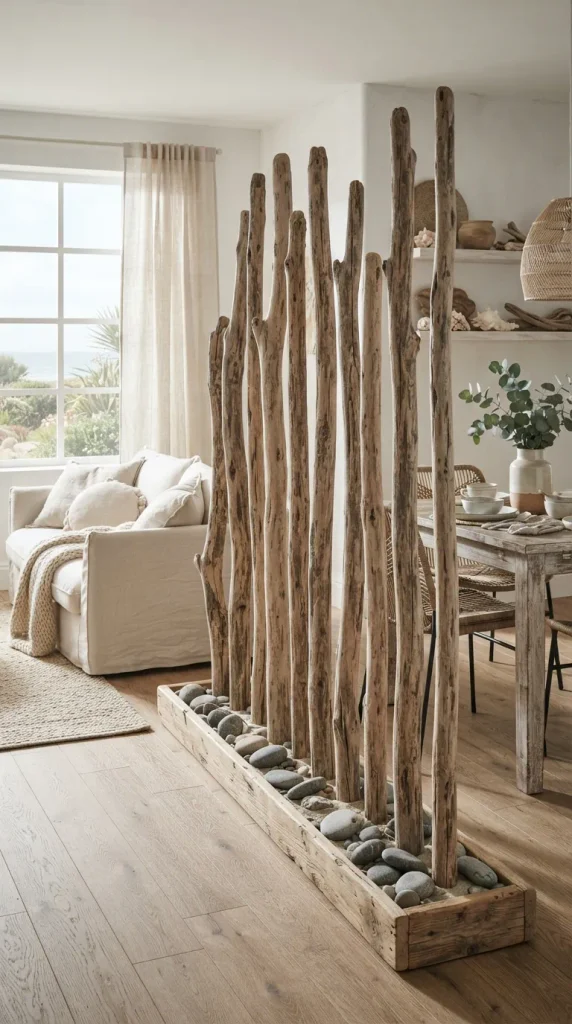
15. Whitewashed Weathered Driftwood Vertical Post Screen
Introduction
Perfect for coastal, Scandinavian, or organic modern homes, a driftwood post screen brings the relaxed textures of weathered beach timber into structured residential spaces.
What This Idea Means
An arrangement of natural, subtly irregular rustic vertical wood poles or weathered whitewashed cedar posts anchored in a linear floor trough.
How to Make It
- Select natural round timber poles (such as debarked cedar poles or reclaimed eucalyptus branch posts) with gentle natural variation.
- Sand away rough snags and splinters while preserving organic knots, contours, and texture.
- Build a floor-mounted base trough box from 2×8 lumber, lining the inside with internal structural mounting brackets.
- Fasten heavy-duty vertical steel mounting dowels into the bottom trough.
- Drill corresponding central base holes in the bottom of each wooden post and mount onto the base dowels with high-strength epoxy.
- Anchor the top of each post into a matching overhead ceiling channel box.
- Apply a thin whitewash stain (watered-down matte white latex or lime-wax finish), wiping back excess stain to highlight the wood grain beneath.
Tips and Variations
- River Rock Infill: Fill the open floor trough around the base of the posts with smooth black river pebbles or white marble chips to conceal the mounting hardware.
- Organic Cluster: Vary post spacing irregularly—grouping several posts tightly together followed by wider gaps—for a natural woodland grove appearance.
Materials & Tools Needed
- Natural cedar, spruce, or peeled eucalyptus round timber posts
- 2×8 lumber for base and ceiling channel troughs
- Steel mounting rods and structural construction epoxy
- Whitewash stain or lime wax
- Drill, large auger bits, and level
- Smooth river stones or decorative pebbles
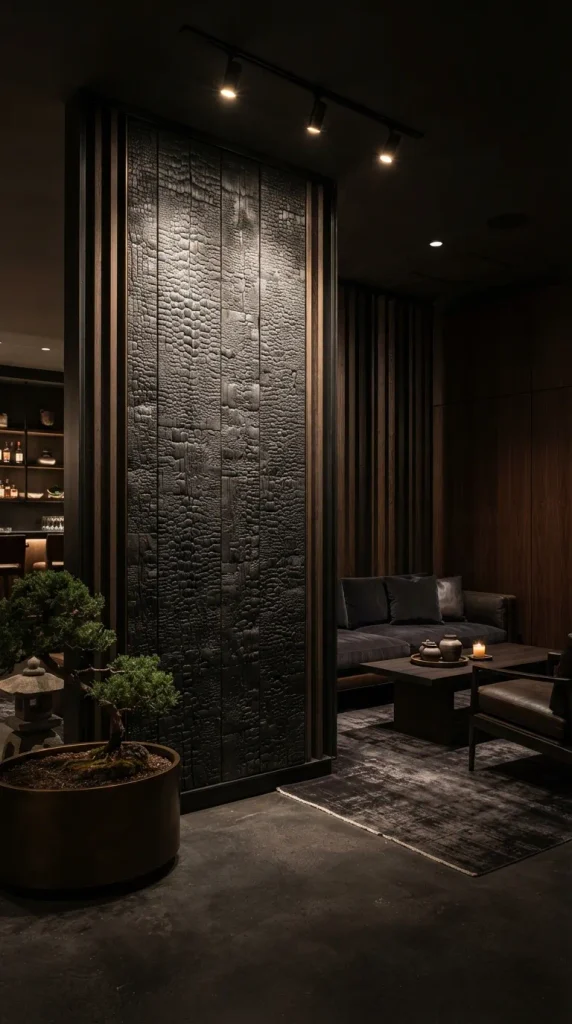
16. Smoked Shou Sugi Ban Charred Wood Partition
Introduction
Shou Sugi Ban (Yakisugi) is an ancient Japanese technique of charring timber with open flame to preserve, waterproof, and darken the wood, resulting in a rich charcoal finish.
What This Idea Means
A dramatic, deep-black structural partition made from surface-charred cedar or cypress planks, offering unmatched depth, fire resistance, and a modern sculptural presence.
How to Make It
- Source rough-sawn Western Red Cedar or Cypress boards (1×4 or 1×6 dimensions).
- Use a handheld propane weed burner torch outdoors to systematically scorch the board faces until an even, alligator-scale charcoal layer develops.
- Allow boards to cool, then brush the charred surface with a medium-soft wire or stiff nylon brush to remove loose soot.
- Wipe the boards down thoroughly with clean, damp cloths.
- Seal the charred layer with two coats of natural tung oil, Danish oil, or specialty Yakisugi sealant to lock in the black finish and prevent soot transfer.
- Assemble charred boards into vertical slat arrangements or a solid shiplap partition wall using black screws.
- Fasten wall into floor and ceiling framing securely.
Tips and Variations
- Char Depth Variation: Lightly scorch the wood for a “toast” finish where natural amber grain peaks through black ridges, or go for full deep-char alligator crust for a dark, matte monolith look.
- Contrast Joinery: Frame jet-black charred panels within light natural maple framing for striking black-and-white architectural contrast.
Materials & Tools Needed
- Western Red Cedar, Cypress, or Pine boards
- Handheld propane torch and propane tank
- Nylon/wire bristle hand brush
- Pure Tung oil or penetrating matte wood finish
- Nitrile gloves, safety goggles, and respirator
- Black finish screws and miter saw
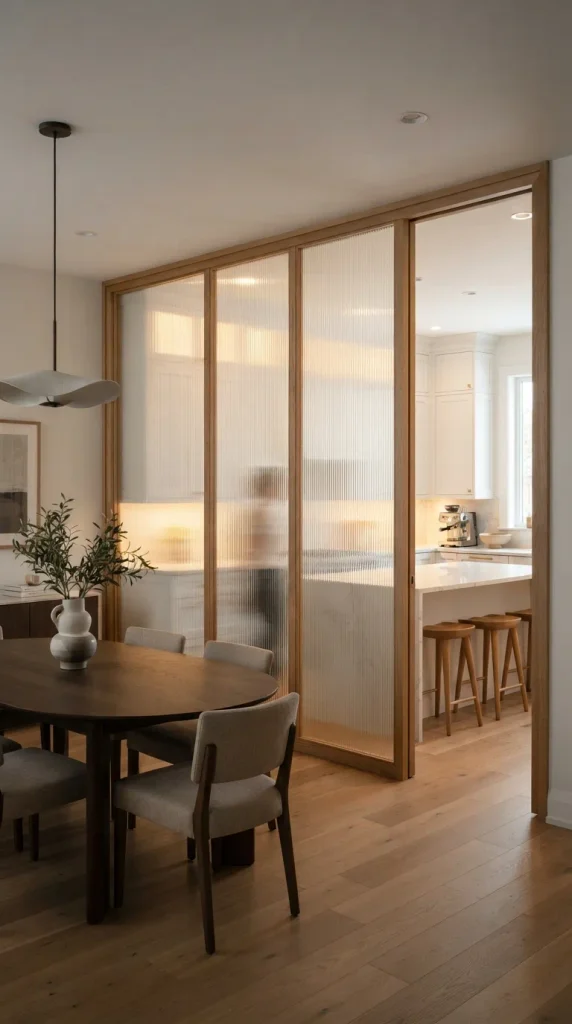
17. Wood Frame & Ribbed Fluted Glass Divider
Introduction
Merging the warmth of timber with the light-passing translucence of textured glass, this hybrid partition provides acoustic buffering and spatial definition without blocking natural light.
What This Idea Means
A custom hardwood perimeter grid containing inset panels of tempered fluted, reeded, or ribbed architectural glass. It keeps spaces bright while obscuring visual clutter.
How to Make It
- Construct a sturdy hardwood frame (typically 2×3 or 2×4 white oak or walnut) with internal vertical and horizontal muntin bars.
- Route 3/8-inch deep glass retaining rabbets along the inner faces of every window opening.
- Order custom-tempered fluted (reeded) architectural safety glass cut 1/8-inch smaller than your framed openings.
- Sand and finish the entire wooden frame prior to glass installation to avoid getting stains or sealers on the glass.
- Place clear rubber glass-setting blocks into the bottom of each routed wood opening.
- Set the fluted glass panels into the wood openings, securing them with matching removable wood stops fastened with 18-gauge pin nails.
- Install the partition securely into ceiling joists and wall studs.
Tips and Variations
- Rib Direction: Align glass ribs vertically to visually accentuate ceiling height; orient ribs horizontally for a mid-century modern look.
- Amber or Smoked Glass: Use bronze-tinted or smoked fluted glass for a cozy, retro atmosphere.
Materials & Tools Needed
- Solid hardwood framing lumber (White Oak, Ash, or Walnut)
- Tempered architectural fluted/reeded glass panels (custom ordered)
- Router with rabbeting bit
- Rubber glass-setting blocks and silicone glazing gaskets
- Matching wood glass-stop trim strips
- Brad nailer, finish screws, and level
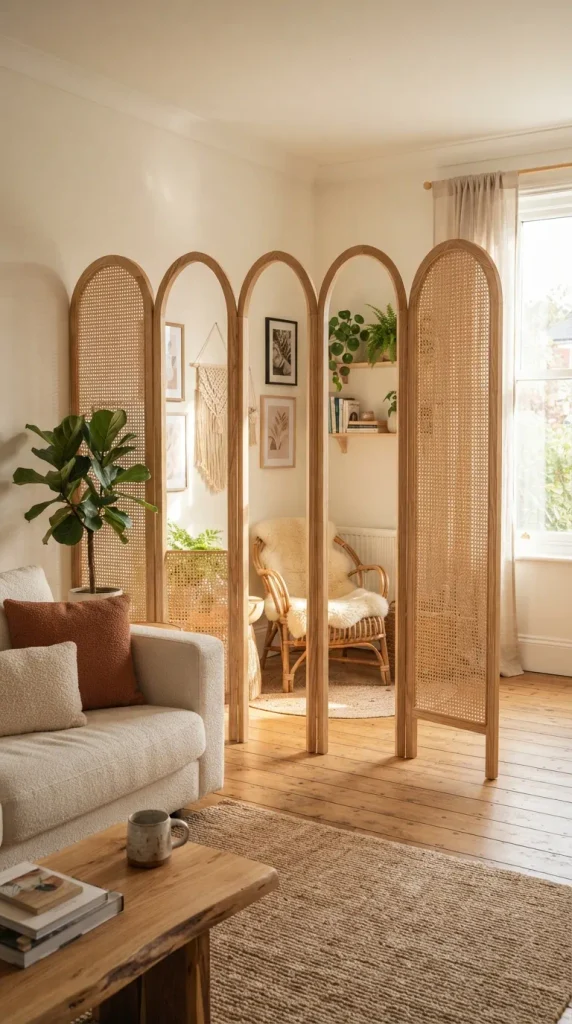
18. Woven Cane Webbing & Natural Ash Wood Arch Screen
Introduction
Bohemian warmth meets Scandinavian design in this arched timber partition. The open-weave rattan cane webbing softens hard geometric room lines with breezy organic textures.
What This Idea Means
A lightweight wooden partition frame featuring sweeping curved top arches filled with natural octagonal or radio-weave rattan cane mesh.
How to Make It
- Cut curved arched top rails from wide 2×10 Ash or Beech boards using a bandsaw or jigsaw, sanding smooth to match a templated curve.
- Assemble the main frame with curved arches over straight vertical side stiles using mortise-and-tenon or dowel joints.
- Route a 1/4-inch deep spline groove around the perimeter of each inner arched opening.
- Soak natural woven cane webbing in warm water for 30 to 45 minutes to make the fibers pliable.
- Lay the damp cane over the opening, pulling it taut, and press the cane edges into the routed groove using a wedge tool and rubber mallet.
- Drive a matching reed spline with wood glue into the groove to lock the cane in place; trim excess cane with a utility knife.
- As the cane dries, it shrinks and tightens like a drum. Finish the wood frame with clear matte wax.
Tips and Variations
- Multi-Panel Folding Screen: Connect three arched panels with two-way folding brass hinges to create a movable, freestanding room divider screen.
- Solid Bottom Panel: Install solid wood tongue-and-groove boards in the lower third of the screen and cane webbing in the upper arches for balanced weight.
Materials & Tools Needed
- Solid Ash, Beech, or Oak lumber (including wide stock for arches)
- Rolls of pre-woven natural rattan cane webbing
- Rattan reed spline and spline wedge drive tools
- Bandsaw, jigsaw, and plunge router with spline bit
- Water soaking tub and utility knife
- Two-way folding hinges (if making a folding screen)
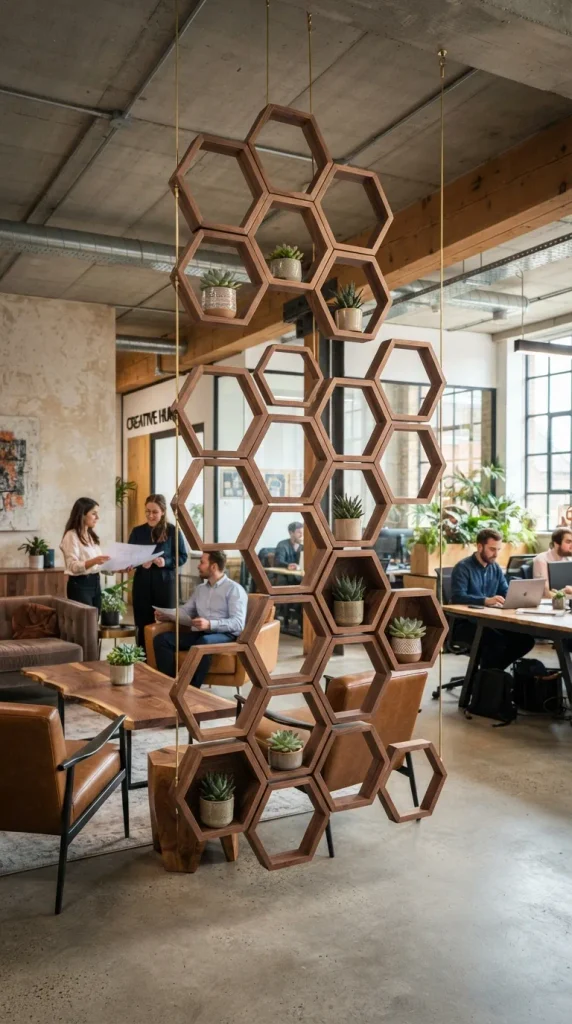
19. Suspended Geometric Timber Hexagon Screen
Introduction
Modern and artistic, a suspended hexagonal timber partition functions like hanging sculpture, creating an airy boundary between functional living spaces.
What This Idea Means
An open honeycomb array of interlocking wooden hexagons suspended from the ceiling. It defines zones while keeping light flowing freely through its open geometry.
How to Make It
- Cut dozens of equal-length timber segments (typically 1×3 hardwood stock) with precise 30-degree miter cuts at each end.
- Group six segments together using strap clamps and wood glue to assemble uniform regular hexagons, reinforcing miter joints with splines or 23-gauge micro-pins.
- Sand each hexagonal module smooth across all faces and internal facets.
- Arrange hexagons on a large workbench, gluing touching facets together in a staggered honeycomb pattern.
- Reinforce module connections from the rear using small, concealed hardwood biscuit joints or brass connector plates.
- Install heavy-duty ceiling eyelets into joists and attach the top row of hexagons using adjustable braided steel cables or brass rods.
- Seal all wood surfaces with clear satin wipe-on poly.
Tips and Variations
- Functional Shelves: Insert flat horizontal wooden shelf inserts inside select central hexagons to hold small potted succulents or ceramic display pieces.
- Mixed Wood Species: Alternate walnut, maple, and cherry hexagons across the cluster for subtle, natural color variation.
Materials & Tools Needed
- Hardwood slats (1×3 stock in Walnut, Maple, or Oak)
- Precision miter saw with calibrated 30-degree angle stop
- Hexagonal strap/band clamps
- Wood glue, spline jig, or doweling joiner
- Ceiling suspension aircraft wire and grippers
- Satin protective topcoat
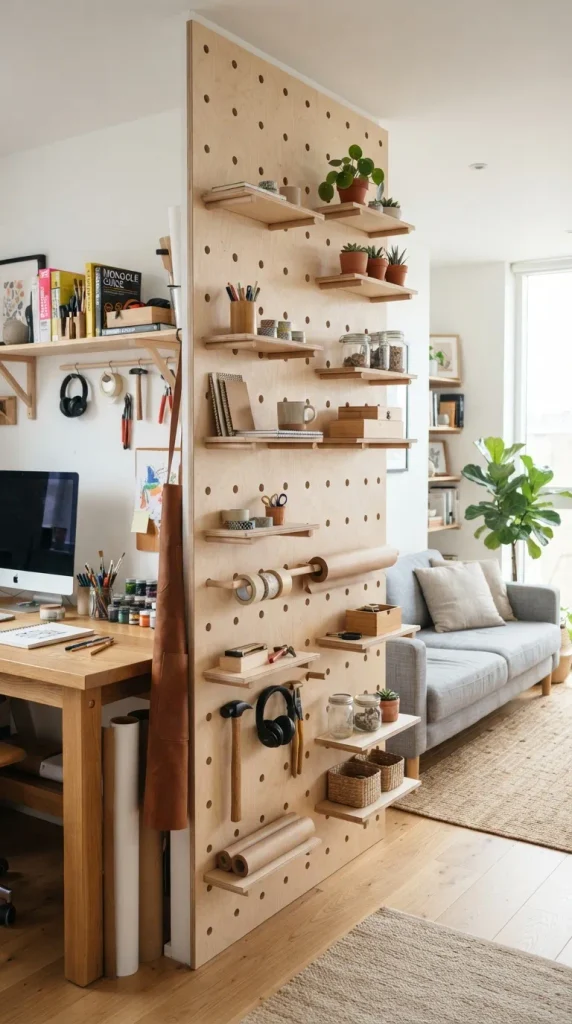
20. Modular Pegboard Hardwood Utility Partition
Introduction
Blending functional organization with warm woodwork, an architectural oversized hardwood pegboard separation wall serves as an adaptable partition for home offices, creative studios, and kitchens.
What This Idea Means
A thick, structural hardwood wall featuring a uniform grid of precision-bored oversized holes that accept moveable wooden dowel pegs, floating display shelves, hanging mirrors, and storage boxes.
How to Make It
- Use 1-inch thick premium Baltic Birch or furniture-grade hardwood plywood as the main panel.
- Mark a precise grid across the panel face (typically 4-to-6-inch on-center hole spacing) using a framing square and layout ruler.
- Drill clean holes at every intersection using a 1-inch or 1.25-inch Forstner bit mounted in a drill press (or with a plunge router fitted with a precision centering guide template).
- Sand both panel faces and use round-over sandpaper to soften the inner edge of every hole.
- Build a rigid perimeter 2×4 framing base to anchor the pegboard securely between floor and ceiling.
- Cut matching hardwood dowels (1-inch or 1.25-inch diameter) into 6-to-8-inch peg lengths.
- Mill matching wooden shelves with routed underside locating grooves that rest securely atop pairs of inserted dowel pegs.
- Seal with a hard-wearing clear hardwax oil.
Tips and Variations
- Double-Sided Function: Drill clean through-holes so pegs and shelves can be inserted from both sides, serving two rooms simultaneously (e.g., hallway storage on one side, home office shelving on the other).
- Integrated Planters: Create custom hanging wooden planter boxes fitted with rear mounting dowels to display cascading indoor plants.
Materials & Tools Needed
- 1-inch thick Baltic Birch plywood or solid glued edge panels
- 1-inch or 1.25-inch solid hardwood dowel rods
- Drill press with precision Forstner bits
- Router with round-over bit
- Framing lumber for outer structural posts
- Measuring grid ruler, orbital sander, and clear hardwax oil