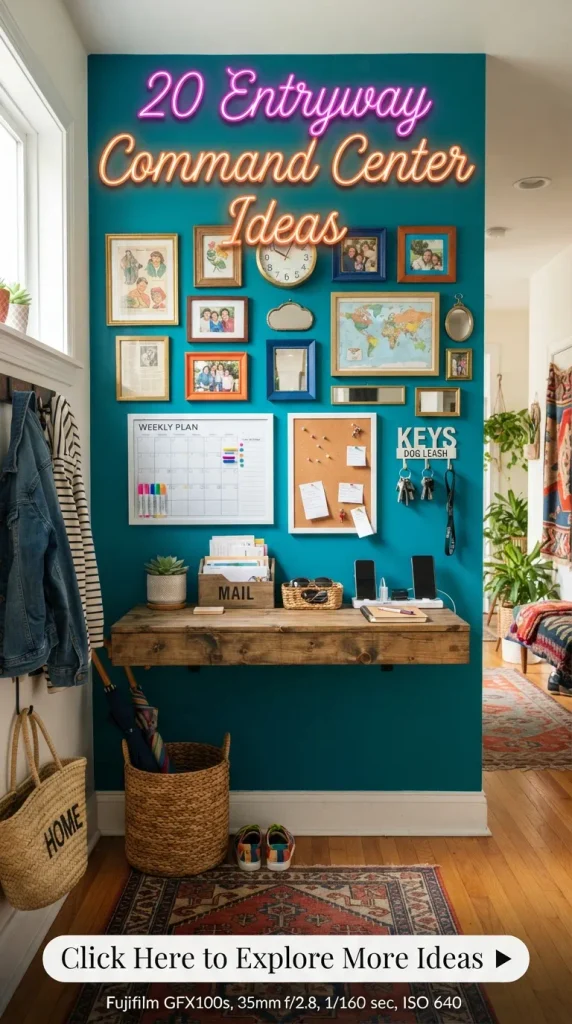
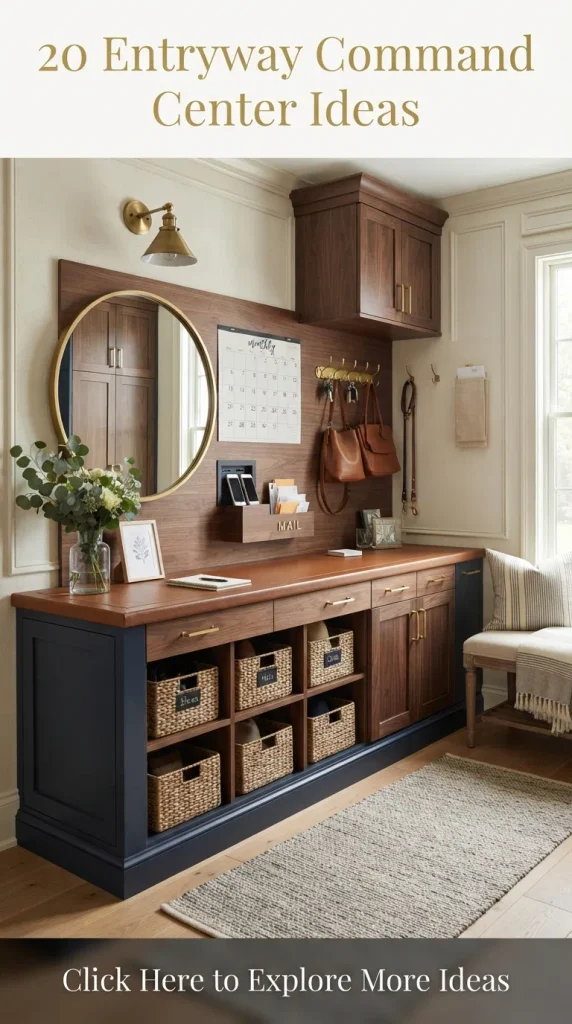
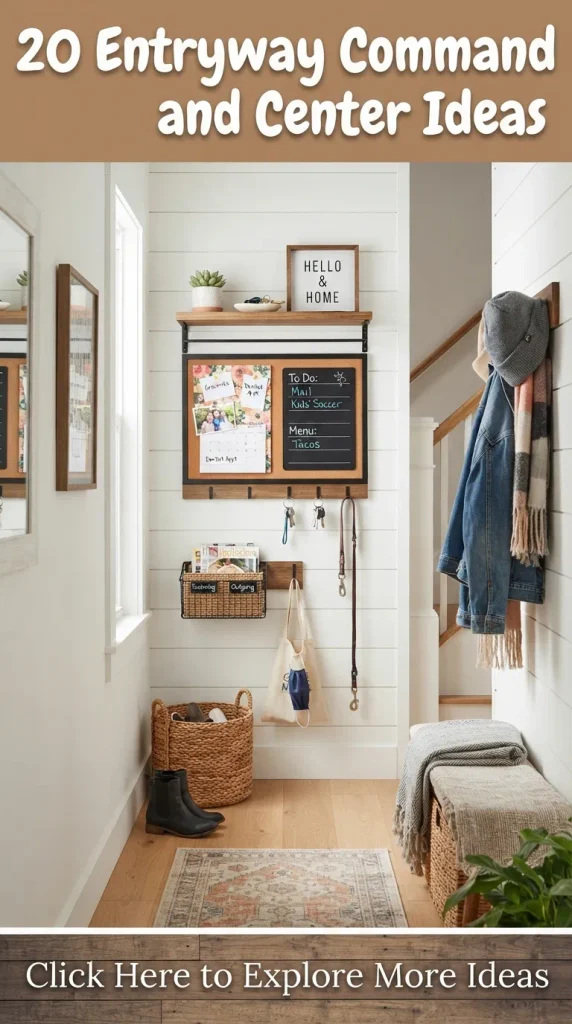
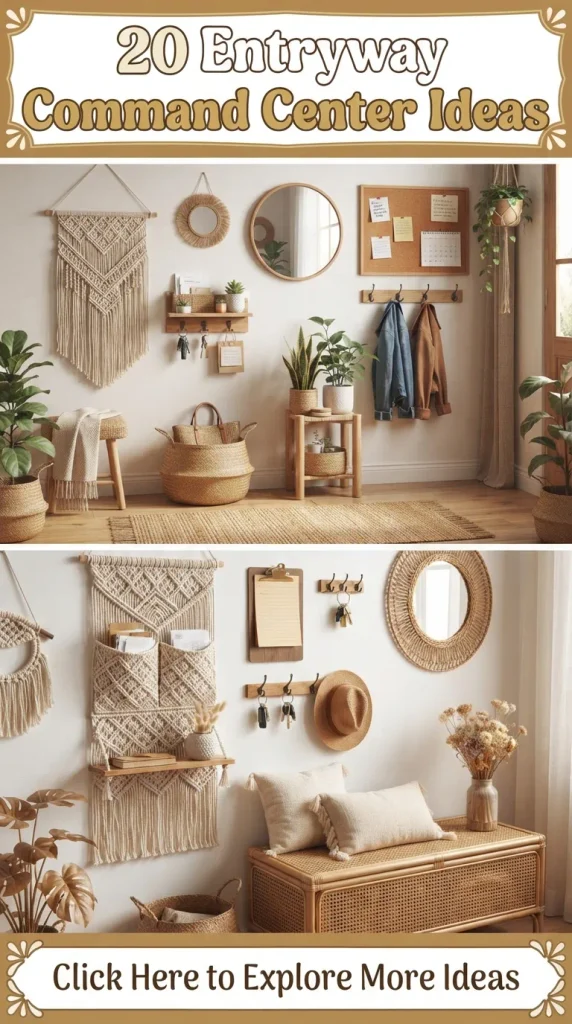
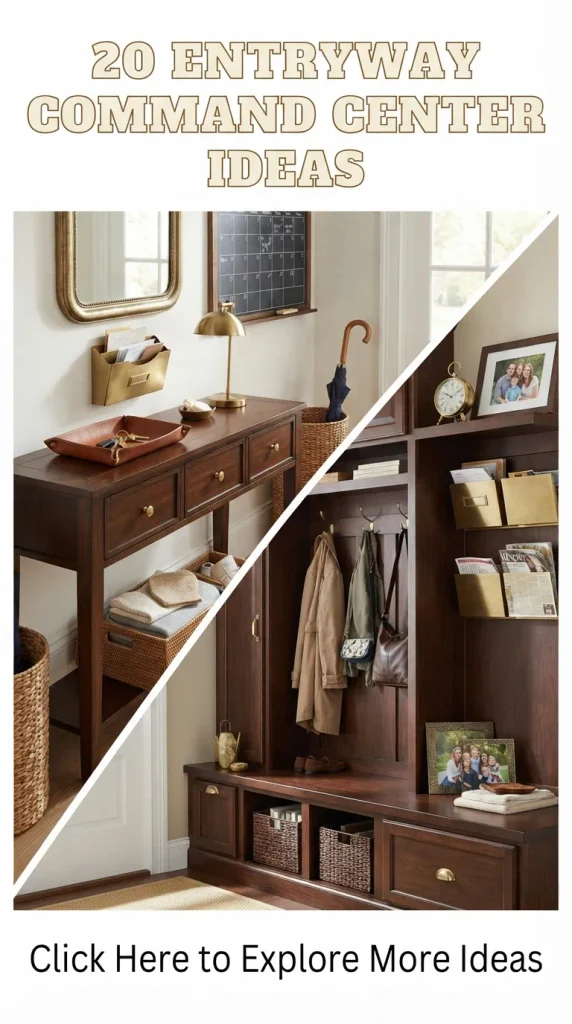
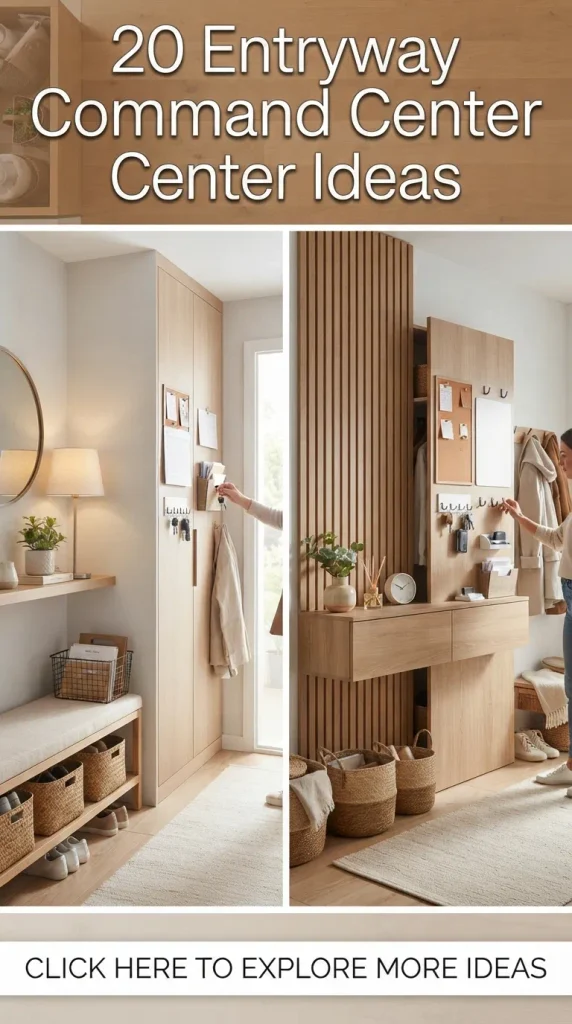
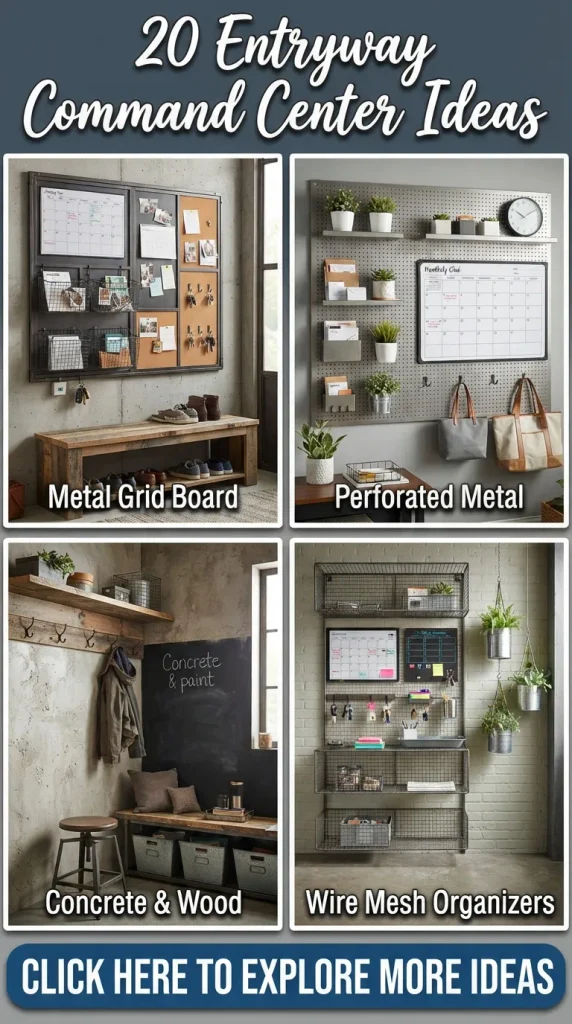
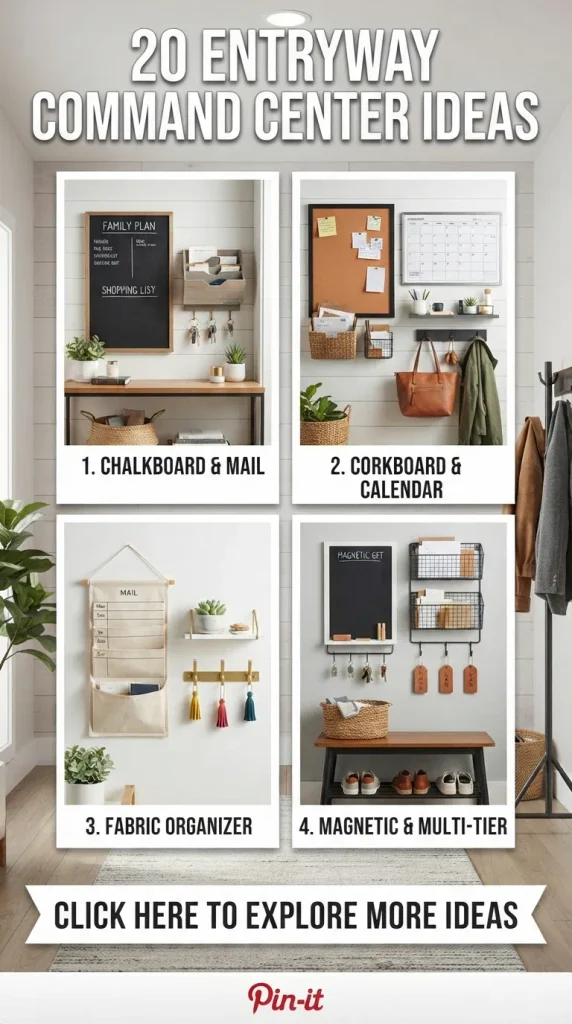
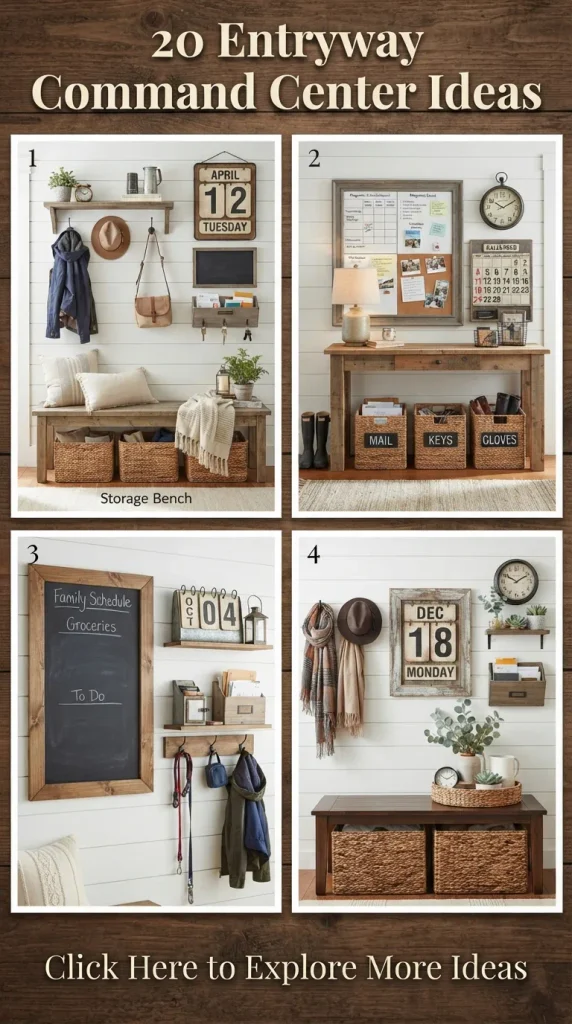
The entryway is the undisputed threshold of your home. It is the transition zone where the outside world falls away and your sanctuary begins. Yet, how often does this critical transition space become a chaotic dumping ground for keys, mail, dog leashes, shoes, and unread parcels? The solution is not merely cleaning up; it is establishing an Entryway Command Center.
A command center marries high-end interior aesthetics with ruthless functional efficiency. It is a dedicated organizational anchor that keeps your household running like clockwork while elevating your foyer, mudroom, or hallway into an architectural feature.
This comprehensive guide explores 20 aesthetic, amazing, gorgeous entryway command center ideas, complete with step-by-step DIY instructions, styling variations, and essential tips to create a custom focal point tailored to your home.
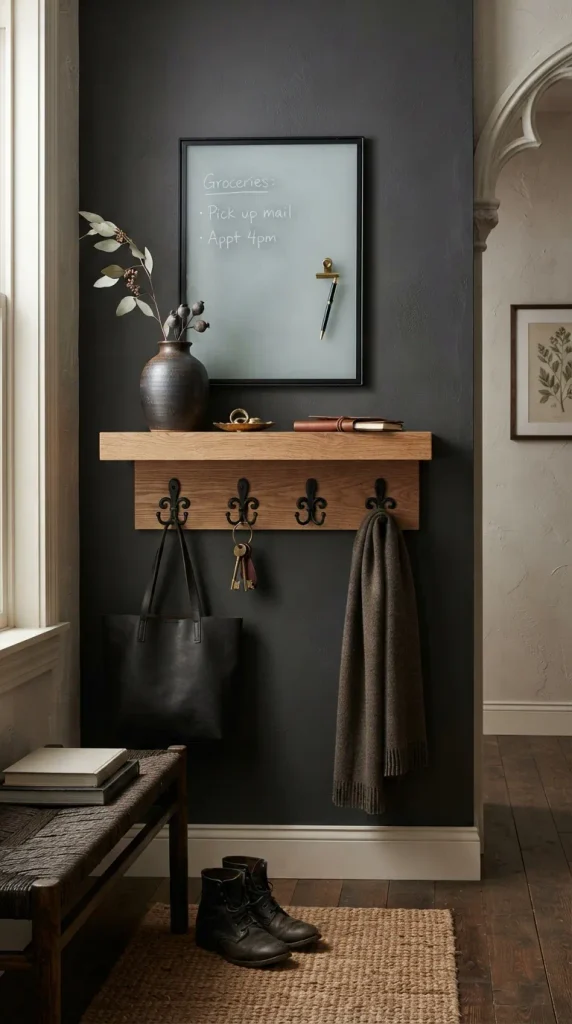
1. The Japandi Minimalist Floating Oak Ledge
Concept & Aesthetic Appeal
Rooted in Japanese wabi-sabi and Scandinavian functionalism, this design celebrates clean lines, natural white oak, and uncluttered serenity. A single, thick floating oak shelf acts as the main drop-zone, paired with hidden magnetic key holders beneath and a frosted glass memo board.
How to Make It (Step-by-Step DIY)
- Source the Timber: Select a 2-inch thick white oak slab, cut to 36 inches in length. Sand the surface progressively using 120-grit, 180-grit, and 220-grit sandpaper until silky smooth.
- Apply Finish: Coat the wood with a matte natural hardwax oil to preserve the raw, organic tone of the oak without adding artificial shine.
- Mount Concealed Brackets: Install heavy-duty heavy-load blind shelf brackets directly into wall studs to ensure maximum weight capacity. Slide the oak slab onto the brackets and secure it from underneath.
- Install Hardware: Affix three minimalist brass double-robe hooks beneath the shelf. Recess rare-earth neodymium magnets into the underside of the wood to catch metal key rings seamlessly.
- Add the Memo Board: Hang a frameless frosted glass dry-erase board directly above the shelf, anchored with sleek brushed-brass standoffs.
Styling Variations & Tips
- Japandi Zen: Style the top shelf with a single minimalist ceramic vase holding a dried eucalyptus stem and a small, fluted ceramic dish for loose change.
- Warm Minimalist: Swap brass hardware for matte black accents and pair with a textured linen wall hanging beside the ledge.
- Tip: Keep the surface strictly curated. The golden rule of minimalist command centers is that if an item does not serve a daily functional or aesthetic purpose, it does not live on the ledge.
2. The Modern Arch Wall-Niche Integrated Station
Concept & Aesthetic Appeal
Arches continue to dominate contemporary interior design, introducing soft, organic curves that counteract rigid architectural lines. Carving or painting a faux arch onto your entryway wall and nesting a slim wooden console inside creates a high-end, custom-built look.
How to Make It (Step-by-Step DIY)
- Map the Arch: Locate the center point of your entryway wall. Use a pencil tied to a piece of string anchored at the base of your desired arch height to draw a perfect semi-circle radius at the top. Use a long level to drop straight vertical lines down to the floor or console height.
- Paint the Niche: Fill the interior of the arch shape with a contrasting, tactile paint color. Limewash or Roman clay in a warm beige or soft terracotta creates stunning texture.
- Position the Console: Place a shallow, floating console table or a wall-mounted drop-front secretary desk directly inside the painted arch perimeter.
- Layer Organization: Hang a matching arched brass-framed mirror directly above the desk surface, reflecting light and amplifying spatial depth. Install a slim charging dock inside the desk cavity.
Styling Variations & Tips
- Monochromatic Drama: Paint the arch the exact same color as your surrounding walls, but finish it in high-gloss lacquer while the walls remain matte for a subtle, sophisticated textural play.
- Terracotta Haven: Pair a deep terracotta arch with a natural rattan console and black iron hook hardware.
- Tip: Ensure your console depth does not exceed 10 to 12 inches so it does not crowd narrow entry hallways.
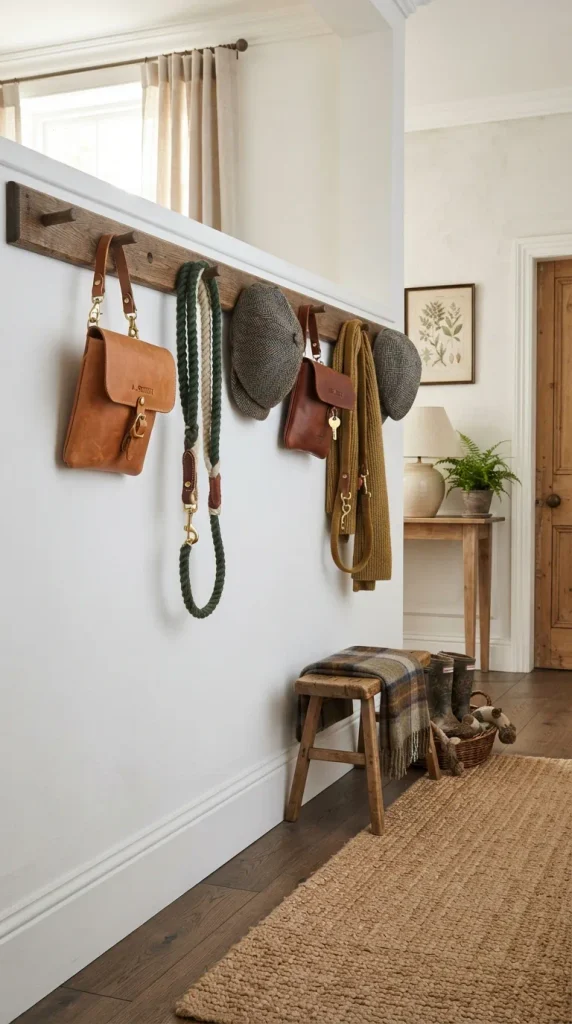
3. The Vintage Shaker Peg Rail with Leather Catch-Alls
Concept & Aesthetic Appeal
Timeless and endlessly versatile, the traditional Shaker peg rail gets a modern farmhouse update. Running a continuous length of pegged timber around the entryway perimeter provides infinite modular hanging options for bags, hats, and customized leather pouches.
How to Make It (Step-by-Step DIY)
- Prepare the Backer Board: Cut a 1×4 inch pine or maple board to fit the desired wall span. Round the top and bottom edges using a router with a quarter-round bit.
- Drill Peg Holes: Space pre-made Shaker wooden pegs evenly along the board, typically every 6 to 8 inches. Drill snug pilot holes at a slight upward angle so the pegs tilt upward, preventing items from sliding off.
- Assemble and Paint: Apply wood glue to the peg tenons, press them firmly into the holes, and secure them from the back with wood screws. Paint or stain the entire rail to match your trim color (classic creamy white or deep forest green work wonderfully).
- Mount to Wall: Secure the rail directly into wall studs using countersunk screws, then conceal the screw heads with matching wood plugs and sand flush.
- Hang Leather Pouches: Craft custom hanging catch-alls by punching holes in vegetable-tanned leather sheets and suspending them from selected pegs using matching leather cords.
Styling Variations & Tips
- English Countryside: Paint the rail in a moody heritage color like Farrow & Ball’s Studio Green and style with wool dog leashes and tweed caps.
- Scandi Neutral: Paint the rail crisp white and pair with natural tan leather accessories and woven straw market bags.
- Tip: Vary the hanging heights of your accessories—hang structured leather bags lower and delicate silk scarves higher to create visual rhythm.
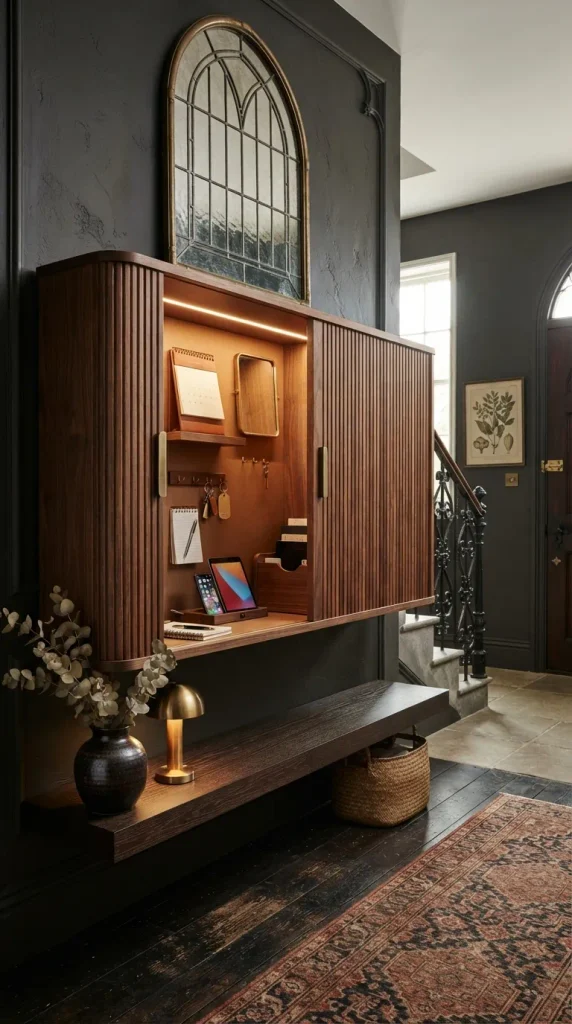
4. The Fluted Wood Tambour Panel Hidden Hub
Concept & Aesthetic Appeal
For those who despise visual clutter, the fluted tambour panel command center is a masterpiece of concealment. Sliding tambour doors glide smoothly across tracks to reveal a fully loaded command center complete with charging stations, mail slots, and family calendars, and vanish when closed into a stunning textured wooden wall feature.
How to Make It (Step-by-Step DIY)
- Build the Cabinet Shell: Construct a shallow cabinet box out of high-grade plywood, sizing it roughly 36 inches wide by 30 inches high and 6 inches deep. Paint or veneer the interior.
- Install Interior Components: Screw in vertical acrylic mail dividers, mount a multi-port USB charging hub inside the bottom shelf, and hang a magnetic whiteboard on the inside of the back panel.
- Construct Tambour Slats: Rip thin strips of walnut or oak into half-round profiles. Glue these wooden slats onto a durable, flexible canvas backing fabric to create a continuous rolling tambour sheet.
- Install Tracks: Route curved or straight aluminum sliding tracks into the top and bottom interior frames of the cabinet box.
- Mount Doors and Box: Slide the tambour sheets into the tracks, attach felt-backed finger pulls, and securely wall-mount the entire cabinet assembly at eye level.
Styling Variations & Tips
- Warm Walnut: Use rich, dark walnut tambour paired with brushed bronze hardware for a luxurious mid-century modern aesthetic.
- Bleached Ash: Opt for blonde ash wood paired with white walls for an airy, contemporary Japanese feel.
- Tip: Run a discreet cord-concealment channel through the bottom of the cabinet box down behind the baseboard to your nearest wall outlet.
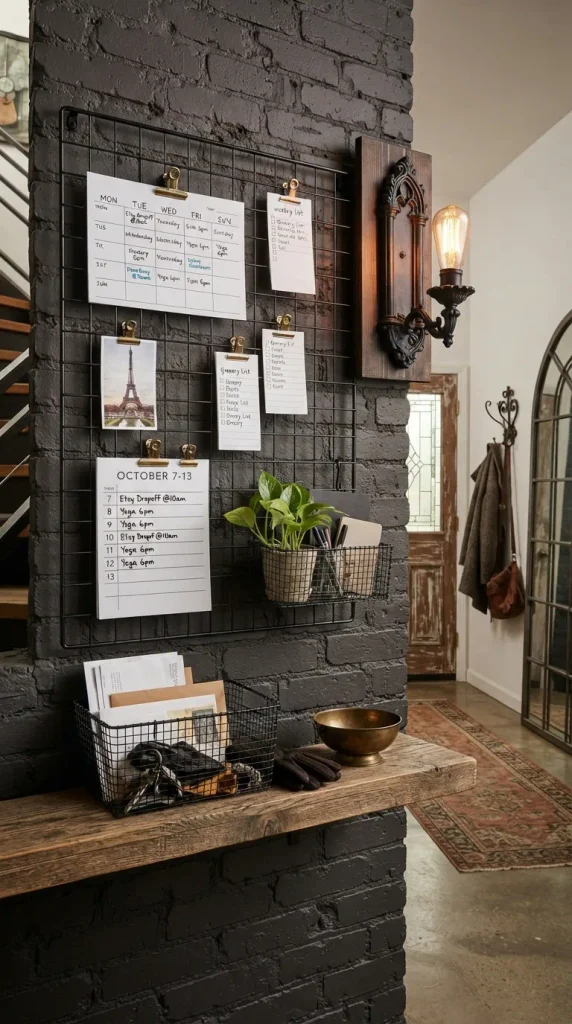
5. The Industrial Steel Grid & Magnetic Pinboard Center
Concept & Aesthetic Appeal
Industrial loft styling meets ultimate urban utility. Utilizing a heavy-gauge black powder-coated steel wire grid paired with matching magnetic clips, wire baskets, and wooden clipboards, this command center is rugged, industrial, and completely customizable on the fly.
How to Make It (Step-by-Step DIY)
- Select the Grid Panel: Purchase a heavy-duty architectural steel grid panel (typically 24×36 inches) finished in matte black or industrial gunmetal.
- Secure Wall Spacers: Install rubber or metal wall spacers behind the grid corners so the panel sits roughly 1 inch off the wall surface, allowing clips and hooks to wrap fully around the wire rungs.
- Anchor to Studs: Use heavy-duty toggle bolts or direct stud-mounted anchor clips to secure the grid firmly, ensuring it can handle the weight of heavy books and planners.
- Accessorize with Modules: Hang modular wire catch-all baskets for incoming mail, snap-on mini shelves for car keys, and brass bulldog clips to hold daily to-do lists and school permission slips.
- Add Task Lighting: Mount a sleek, battery-operated rechargeable picture light directly above the top edge of the grid.
Styling Variations & Tips
- Raw Industrial: Pair the black steel grid with reclaimed scaffold board shelving below and exposed Edison bulb sconces.
- Urban Chic: Spray-paint the wire grid in a champagne gold or soft rose-bronze finish and pair with blush pink leather folders.
- Tip: Use colorful washi tape or cardstock labels inside the wire clips to color-code family members’ schedules at a glance.
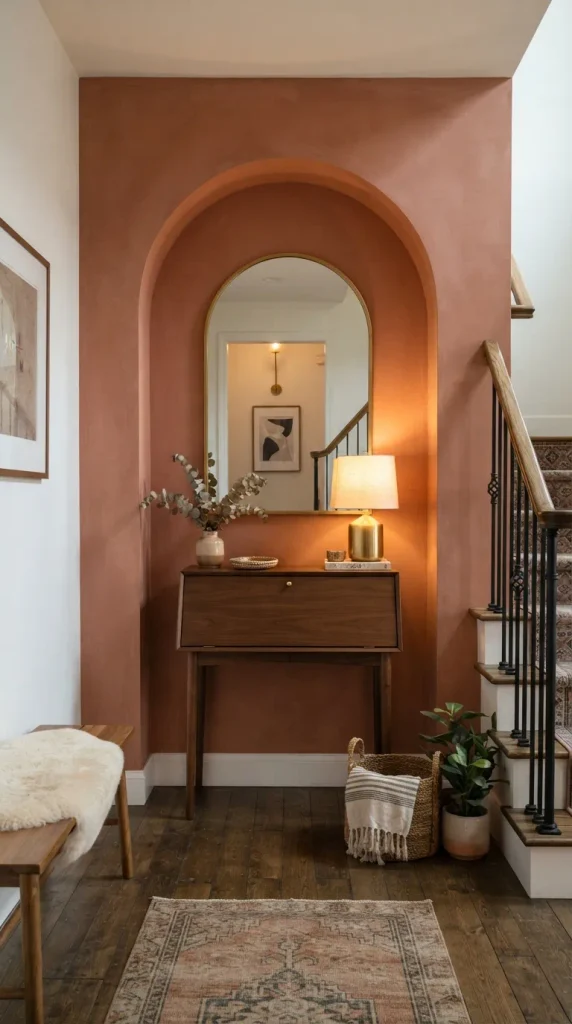
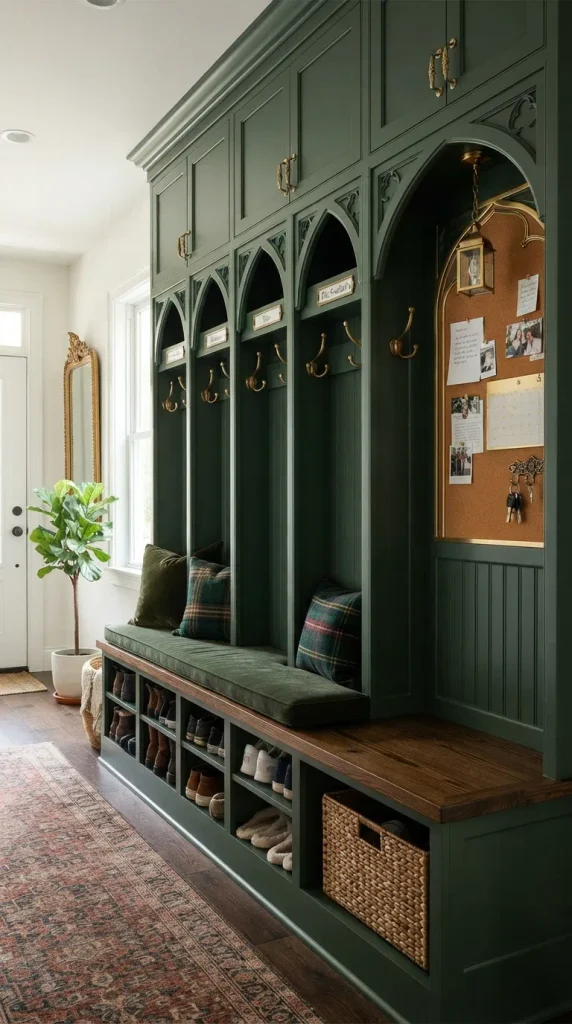
6. The Built-In Mudroom Locker & Mini-Command Center Combo
Concept & Aesthetic Appeal
If your entryway allows for full cabinetry, combining a floor-to-ceiling mudroom locker unit with a dedicated sit-down or standing command nook creates the ultimate multi-tasking family drop zone.
How to Make It (Step-by-Step DIY)
- Design the Layout: Frame out a modular floor-to-ceiling unit featuring individual lower shoe cubbies, a comfortable bench seat with beadboard backing above, and upper storage lockers.
- Carve Out the Niche: Designate one side column or the central upper wall section specifically as the command center, lined with corkboard or magnetic steel sheet metal.
- Install Electrical Rough-In: Run electrical wiring behind the wall cavity into the command nook space to install a dedicated double-gang USB charging outlet flush with the back panel.
- Add Custom Millwork Trim: Crown the top of the entire built-in unit with classic colonial crown molding and baseboards to make the piece look like high-end architectural millwork.
- Paint and Seal: Paint the entire built-in structure in a durable, scrubbable satin enamel paint. Deep navy, hunter green, or classic Dover white work brilliantly.
Styling Variations & Tips
- Moody Heritage: Paint the lockers in a rich, saturated dark olive green, accented with unlacquered brass double hooks and a vintage runner rug.
- Coastal Cottage: Opt for crisp white beadboard backing, light oak bench seating, and polished chrome hardware.
- Tip: Assign each family member their own vertical locker column and matching color-coded mail slot to prevent hallway clutter battles.
7. The Framed Leather & Cork Bulletin Board Center
Concept & Aesthetic Appeal
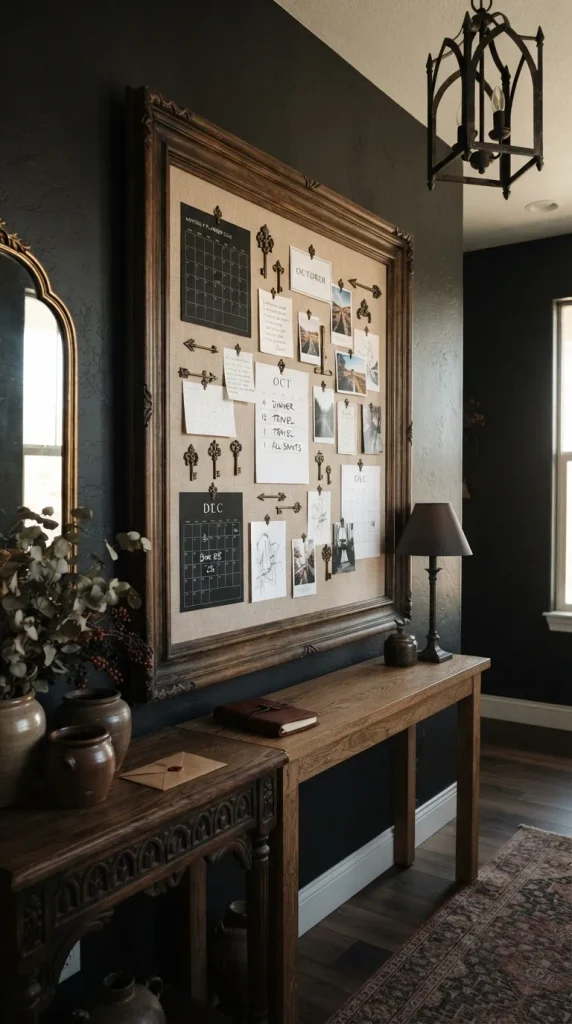
Say goodbye to ugly, crumbling corkboards. This elevated design combines high-density fine-grain cork wrapped in premium cognac leather or neutral linen, framed inside an oversized, architectural wood picture frame for a bespoke art-piece look.
How to Make It (Step-by-Step DIY)
- Build the Frame: Construct a custom wooden picture frame using hardwood molding. Miter the corners at 45 degrees, wood-glue, and secure with v-nails in a joining vise.
- Prepare the Cork Base: Cut a piece of 1/2-inch thick homasote board or high-density cork roll to fit precisely inside the rabbit of your custom frame.
- Apply Upholstery Fabric: Wrap the cork board surface tightly with fine Belgian linen or butter-soft top-grain leather. Secure the fabric edges cleanly to the back of the board using a heavy-duty pneumatic staple gun.
- Mount Hardware: Insert heavy-duty D-ring hangers on the wooden frame backer.
- Final Assembly: Drop the upholstered cork insert into the frame, secure with glazing points, and hang securely on the entryway wall. Pair with custom brass push pins.
Styling Variations & Tips
- Executive Suite: Use dark espresso-stained walnut framing paired with rich black leather upholstery and sleek nickel push pins.
- Boho Natural: Choose light ash wood framing wrapped in natural oatmeal-colored linen and raw wooden pins.
- Tip: Pin a framed calendar print alongside your notes so the board serves as both functional schedule tracker and rotating gallery wall.
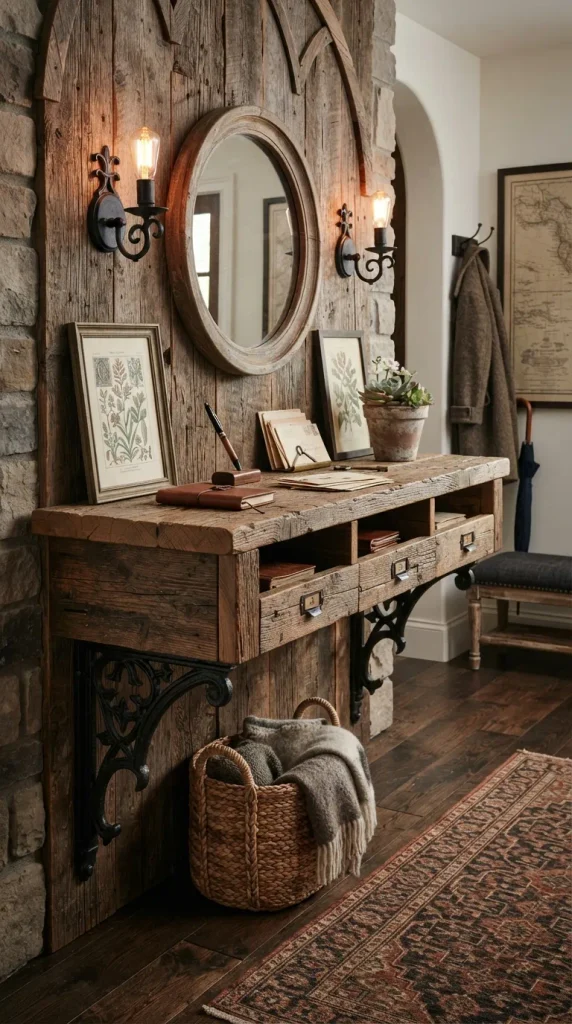
8. The Reclaimed Wood Floating Desk & Cubby Station
Concept & Aesthetic Appeal
Infuse rustic warmth into your entryway with a floating desk system fashioned from weathered barnwood. Featuring integrated mail cubbies, a lower shelf for incoming tote bags, and rugged iron brackets, this station feels rich with history and character.
How to Make It (Step-by-Step DIY)
- Source Reclaimed Timber: Obtain weathered barn siding or salvaged joist lumber featuring authentic saw marks, nail holes, and rich patina.
- Mill and Sand: Plane the wood down to a uniform thickness while preserving the weathered outer face. Sand smooth with 120-grit sandpaper to remove splinters while keeping the rustic texture intact.
- Construct Mail Cubbies: Build a small, multi-compartment cubby box out of matching thin reclaimed wood boards using mitered joints and wood glue.
- Mount Shelf and Cubbies: Secure heavy-duty black iron L-brackets to wall studs, mount the main thick floating desk slab, and stack or mount the mail cubby unit directly above.
- Seal the Wood: Apply a matte, non-yellowing polyurethane or water-based matte sealer to protect the porous antique wood from moisture and coffee cup rings.
Styling Variations & Tips
- Rustic Farmhouse: Pair the reclaimed wood with matte black cast-iron hooks and galvanized metal file bins.
- Industrial Vintage: Combine the weathered wood slab with exposed black gas-pipe plumbing brackets for legs and framing.
- Tip: Leave a small clearance gap at the back edge of the floating desk to route phone charging cables neatly down to a floor outlet.
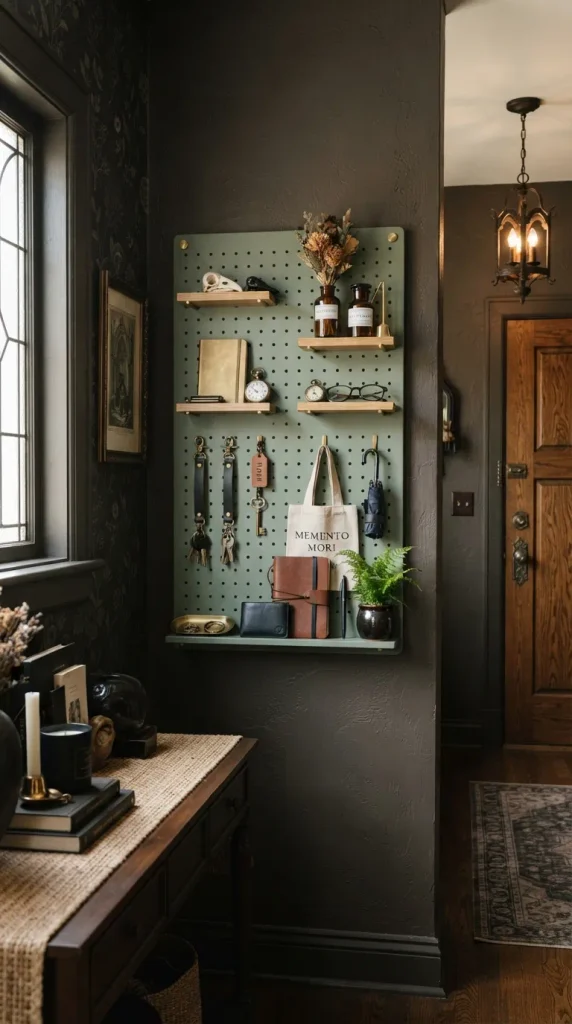
9. The Minimalist Metal Pegboard & Magnetic Shelf Unit
Concept & Aesthetic Appeal
Industrial utility meets sleek modernism with a powder-coated steel pegboard system. Unlike traditional wooden pegboards, steel pegboards allow for heavy-duty magnetic accessories, repositionable metal shelves, and industrial hooks that can be reconfigured in seconds.
How to Make It (Step-by-Step DIY)
- Purchase Modular Steel Pegboards: Procure two 16×24 inch heavy-duty steel pegboard panels finished in matte white, charcoal gray, or sage green.
- Mount with Spacer Frames: Install the included standoff mounting brackets directly into wall studs. This ensures the back of the metal board remains clear so locking pegs and hooks can snap securely into the perforation holes.
- Snap in Accessories: Attach magnetic wooden letter trays, snap-in metal shelves, and heavy-duty tool hooks designed specifically for the grid pattern.
- Add Magnetic Accents: Use powerful neodymium rare-earth magnets to pin urgent reminders and photos directly to the steel face of the pegboard.
Styling Variations & Tips
- Monochrome Studio: Use a matte white steel pegboard with white accessories, accented only by a sleek black leather key lanyard.
- Earthy Sage: Choose a sage green metal pegboard paired with natural oak mini-shelves and brass stationery clips.
- Tip: Keep frequently used items—like sunglasses cases and car keys—on the lower eye-level tier for grab-and-go convenience.
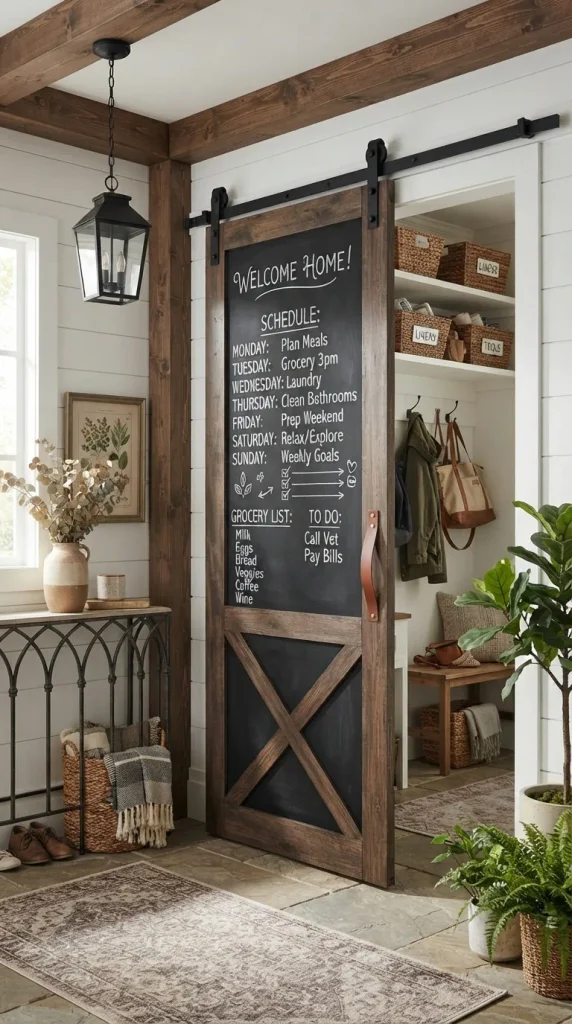
10. The Sliding Chalkboard Barn Door Over Utility Cubbies
Concept & Aesthetic Appeal
When you need to hide a multitude of entry sins—breaker boxes, messy coat hooks, or telecom wiring panels—a sliding mini barn door featuring a chalkboard face provides brilliant concealment while offering a massive vertical writing surface for family notes.
How to Make It (Step-by-Step DIY)
- Build the Door Panel: Construct a lightweight vertical plank door out of MDF or pine boards, sizing it to completely cover your utility zone plus a 2-inch overlap on all sides.
- Apply Chalkboard Finish: Prime the front surface with high-adhesion primer, then apply three smooth coats of premium chalkboard paint, allowing proper curing time between coats.
- Install Sliding Hardware Kit: Mount a mini top-hung sliding barn door track horizontally to the wall headers above the opening.
- Hang the Door: Attach roller hangers to the top of the chalkboard door panel and hang the assembly onto the track. Install a floor guide at the base to prevent swinging.
- Frame the Interior: Line the recessed utility zone behind the door with mail slots, key hooks, and charging pads.
Styling Variations & Tips
- Modern Farmhouse: Use a classic Z-brace wood frame painted matte black around a smooth black chalkboard center.
- Scandinavian Clean: Opt for a frameless slab door painted in dark charcoal gray paired with a minimalist leather pull tab.
- Tip: Condition your chalkboard surface by rubbing the side of a piece of white chalk across the entire board and wiping it off before writing your first message to prevent permanent ghosting.
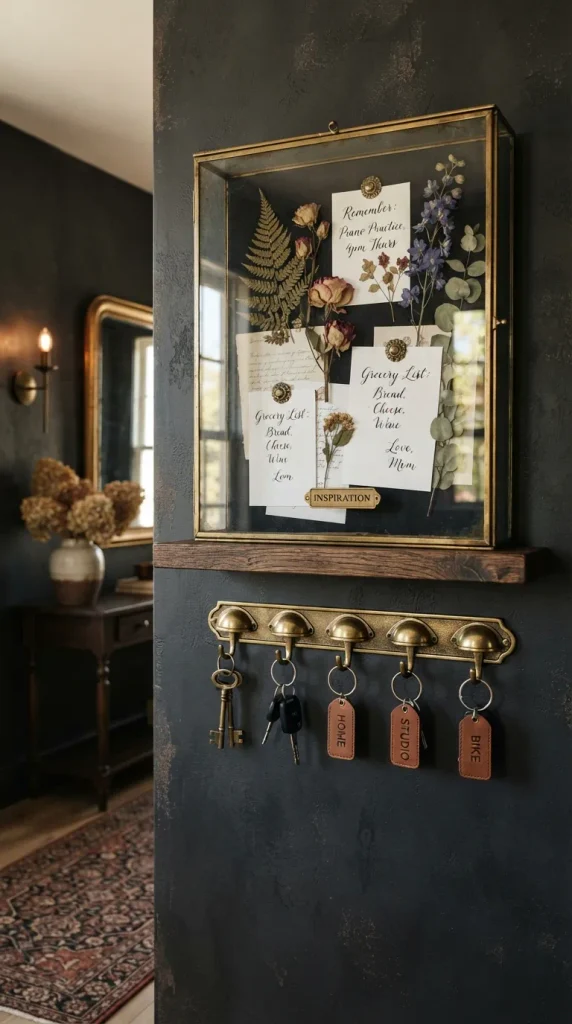
11. The Glass & Brass Shadow Box Display Command Center
Concept & Aesthetic Appeal
Elevate organization into an art gallery experience. A brass-framed glass shadow box mounted on the entryway wall allows you to display cherished family photos, dried botanicals, or heirloom keepsakes inside, while functioning as a magnetic memo board and key drop zone.
How to Make It (Step-by-Step DIY)
- Source the Shadow Box: Acquire a deep, hinged glass shadow box with a brass or bronze metal frame and a linen-lined or magnetic interior back panel.
- Customize the Interior: If the back panel is plain fabric, overlay it with a piece of thin galvanized steel sheet metal wrapped in neutral Belgian linen so it accepts magnets invisibly.
- Mount Securely: Use heavy-duty wall anchors and mirror mounting brackets to secure the shadow box to the wall at a comfortable standing height.
- Organize Inside and Out: Hang small brass cup hooks along the bottom exterior frame for keys. Use decorative brass magnets inside the glass box to hold memos and notes against the linen backing.
Styling Variations & Tips
- Vintage Parisian: Pair an antique-brass finished shadow box with vintage French postcards and an ornate brass key ring.
- Modern Luxe: Choose sleek polished chrome framing paired with stark white linen and minimalist geometric brass magnets.
- Tip: Place your most striking visual composition (like a vintage botanical sketch) directly in the center so the board looks like fine art when empty.
12. The Warm Beige Soft-Girl Aesthetic Curved Station
Concept & Aesthetic Appeal
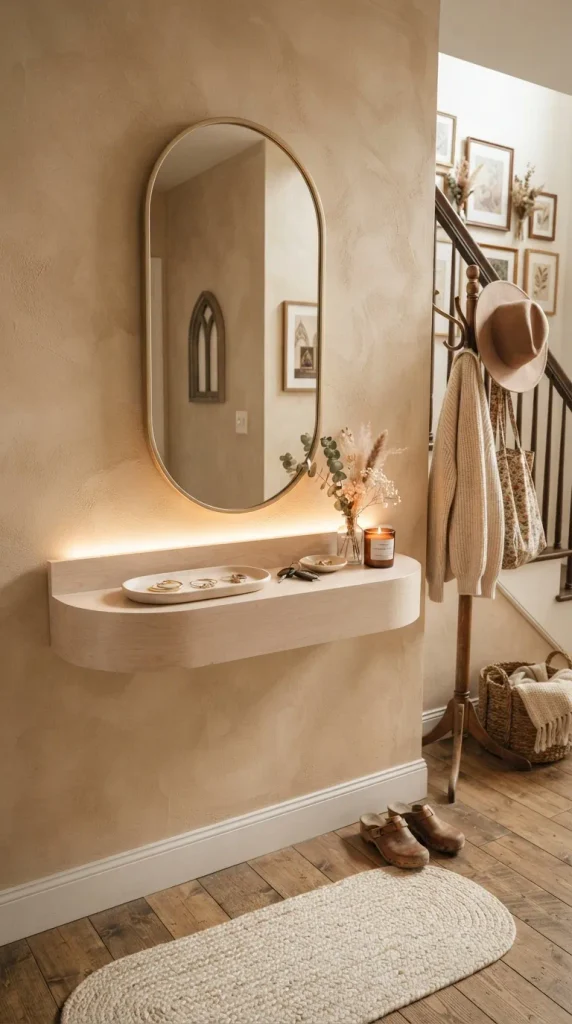
Curated for warmth, softness, and tactile comfort, this soft-girl aesthetic entryway command center relies on rounded silhouettes, plush textures, creamy beige limewash walls, and brushed gold accents to create a welcoming embrace.
How to Make It (Step-by-Step DIY)
- Prep the Wall Texture: Apply a creamy beige limewash paint finish across the entryway feature wall using a block brush in gentle criss-cross strokes to create organic cloud-like movement.
- Hang a Pill-Shaped Mirror: Mount a vertically oriented pill-shaped or capsule mirror featuring a brushed champagne-gold metal frame.
- Install Floating Curved Ledge: Mount a custom-milled wooden shelf with rounded, softened edges directly beneath the mirror, finished in a warm whitewashed maple tone.
- Add Soft Accessories: Hang a braided velvet key loop from a matching gold wall hook and place a soft ceramic catch-all tray on the shelf.
Styling Variations & Tips
- Cloud Neutral: Pair warm beige tones with cream boucle accents, dried pampas grass, and brushed brass hardware.
- Rose Quartz Touch: Introduce subtle warmth by pairing beige walls with muted blush-pink leather storage folders.
- Tip: Incorporate a small, rechargeable amber LED table lamp on the ledge to cast a soft, warm evening glow across the entryway.
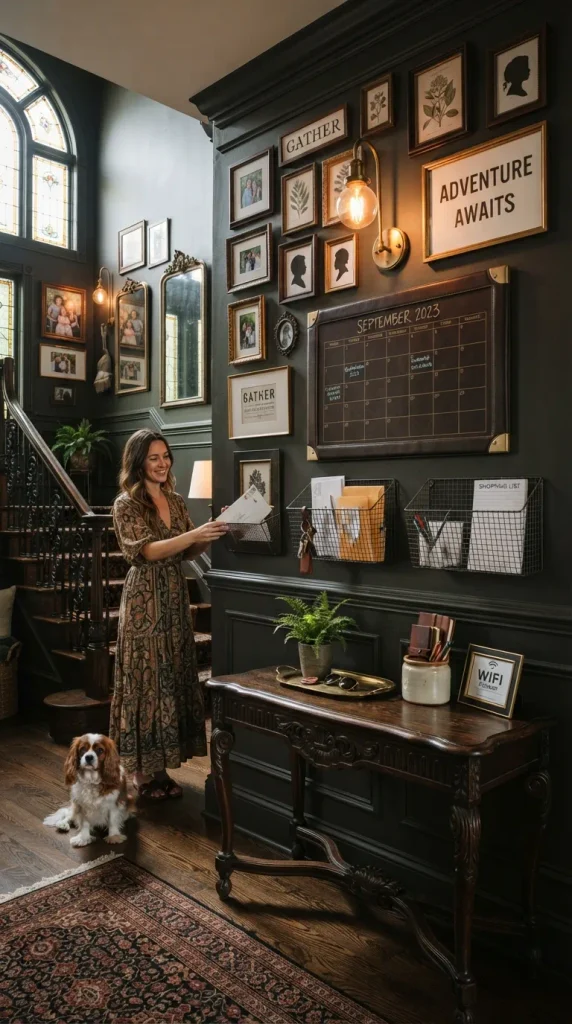
13. The Dark Black Moody Gothic Architectural Center
Concept & Aesthetic Appeal
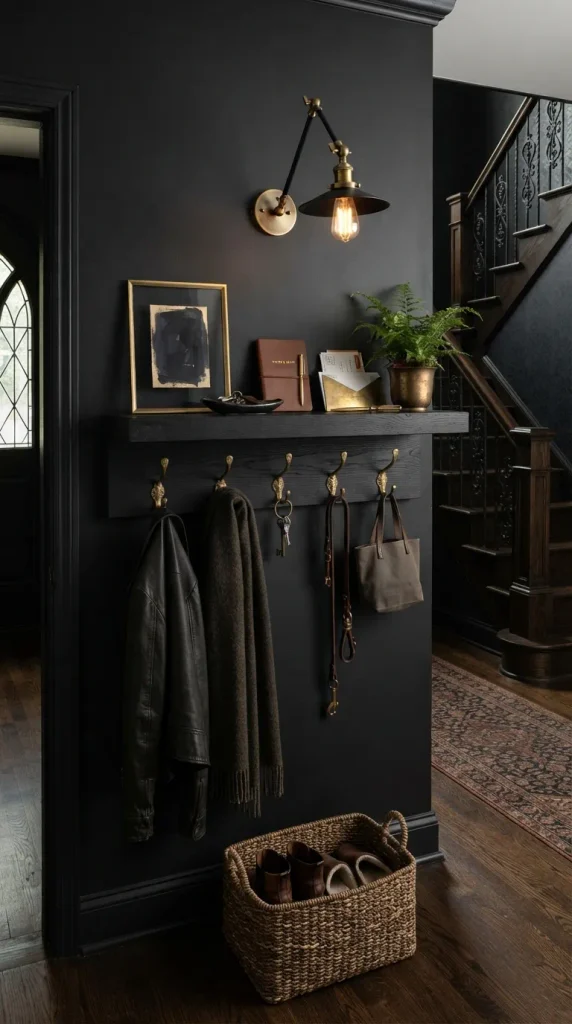
Dramatic, bold, and unapologetically sophisticated, a dark black entryway command center turns functional organization into a striking statement. Encompassing matte black walls, obsidian-stained wood, and aged brass hardware, this design exudes moody luxury.
How to Make It (Step-by-Step DIY)
- Paint the Backdrop: Paint your entryway walls and trim in a saturated, light-absorbing matte black paint (such as Black Blue or Tricorn Black).
- Build the Blackened Shelf: Construct a floating shelf out of pine, stain it deep ebony, and seal it with an ultra-matte varnish.
- Mount Aged Brass Hardware: Install heavy, unlacquered solid brass hooks and wire mesh file sorters against the dark wall to create high-contrast metallic sparkle.
- Add Task Lighting: Hang a sleek, adjustable matte black swing-arm wall sconce with an exposed warm LED Edison bulb above the station.
Styling Variations & Tips
- Gothic Revival: Pair black walls with ornate carved corbels supporting your shelf and antique brass skeleton key hooks.
- Modern Noir: Keep lines ultra-clean and geometric, pairing absolute black surfaces with brushed brass linear memo bars.
- Tip: Ensure your entryway lighting is adequately layered so the dark paint absorbs light without making the hallway feel claustrophobic.
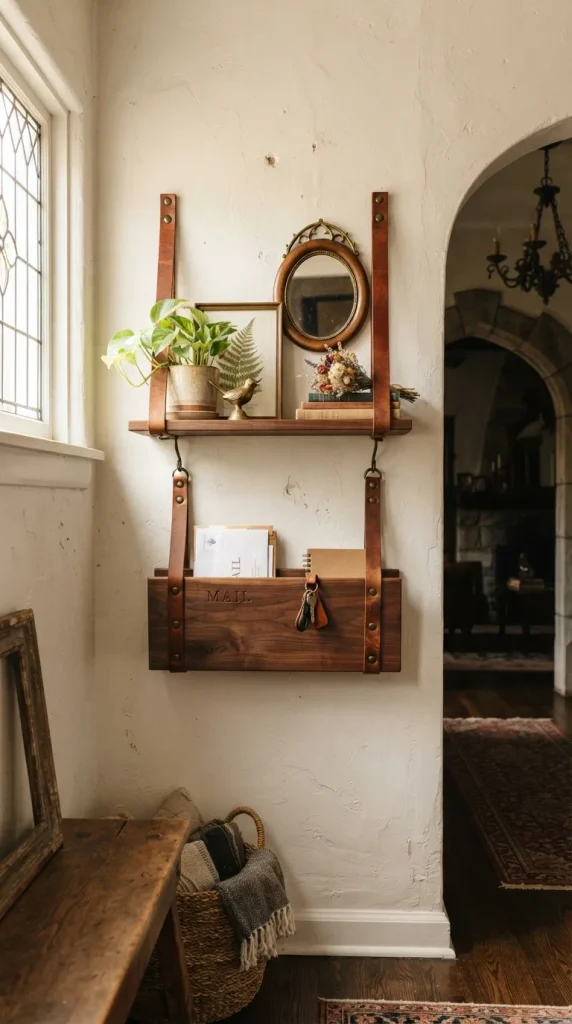
14. The Vertical Leather Strap Hanging Shelf Station
Concept & Aesthetic Appeal
Sleek, bohemian, and incredibly simple to install, this station suspends a solid wood shelf and a matching mail pocket using thick, vegetable-tanned leather straps riveted directly to wall anchors.
How to Make It (Step-by-Step DIY)
- Cut Leather Straps: Cut two identical strips of 2-inch wide, heavy-duty bridle leather to length. Fold each strip in half to form a loop that will cradle your shelf and hanging pocket.
- Prep the Wood Shelf: Cut a solid walnut or oak board to length, round the front corners, and sand smooth.
- Mount Straps to Wall: Screw the top ends of the leather loops directly into wall studs using decorative brass cup washers and heavy wood screws.
- Slide Shelf into Loops: Slip the wooden shelf through the lower cradle of the leather loops, leveling carefully.
- Add Matching Pocket: Hang a secondary smaller leather sleeve from a brass rivet on the strap to act as your mail and receipt drop.
Styling Variations & Tips
- Boho Desert: Use rich cognac leather straps paired with white oak wood and matte black wall hardware.
- Modern Minimalist: Choose sleek black leather straps paired with dark stained wood and polished chrome screws.
- Tip: Secure the underside of the shelf to the leather straps with a hidden dab of heavy-duty adhesive or a small screw so the shelf cannot slide out if bumped.
15. The Magnetic Chalkboard Panel in a Slim Oak Frame
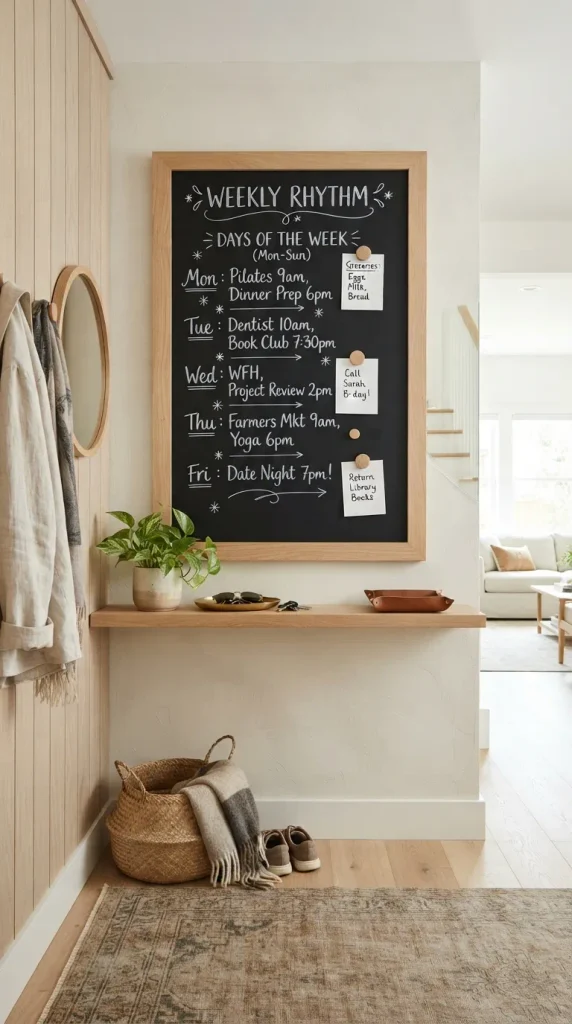
Concept & Aesthetic Appeal
The ultimate hybrid tool: a heavy-duty magnetic steel sheet coated in premium slate chalkboard paint, framed inside a custom white oak picture frame. It lets you write messages in chalk and attach magnetic baskets and clips instantly.
How to Make It (Step-by-Step DIY)
- Source Magnetic Sheet: Acquire a thin, 24×36 inch sheet of galvanized steel from a metal supply shop or hardware store.
- Apply Chalkboard Coating: Prime the steel sheet with self-etching metal primer, then roll on three coats of premium black chalkboard paint.
- Build Oak Frame: Construct a slim mitered picture frame out of white oak to fit snugly around the painted magnetic steel panel.
- Assemble and Mount: Secure the steel panel into the frame backing, attach heavy-duty hanging wire, and mount securely to the entryway wall studs.
Styling Variations & Tips
- Café Chic: Use white liquid chalk markers to write daily family schedules and menus in gorgeous calligraphy fonts.
- Minimalist Clean: Pair the dark magnetic board with natural wooden magnetic clips and a slim brass rail across the base.
- Tip: Keep a small, magnetic wooden cup attached to the bottom corner of the board to hold chalk, erasers, and dry-erase markers securely.
16. The Industrial Pipe & Reclaimed Wood Multi-Tier Hub
Concept & Aesthetic Appeal
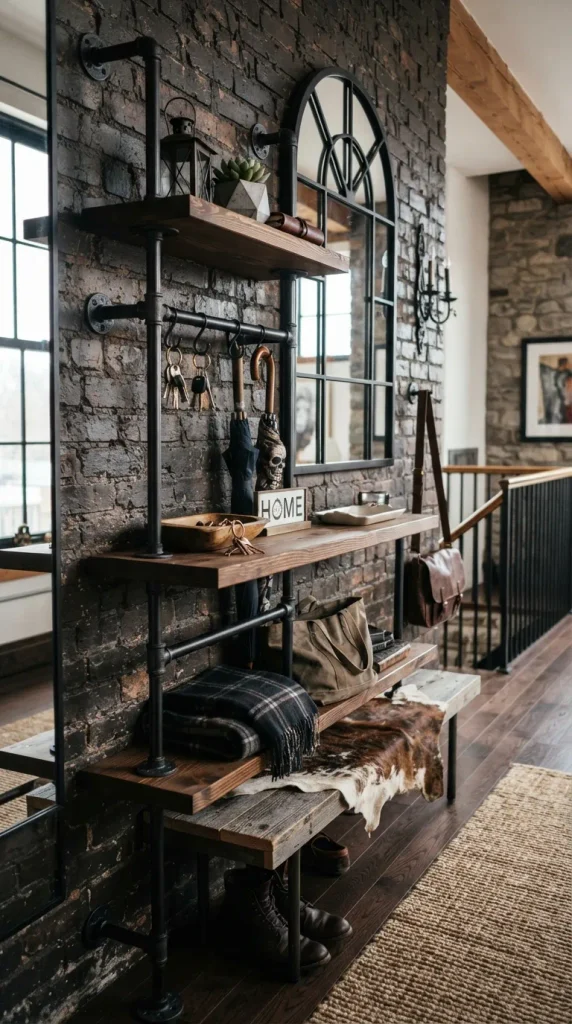
Rugged, durable, and packed with mechanical character, this command center uses industrial black iron plumbing pipes and fittings combined with thick reclaimed pine planks to create a multi-tier organizational powerhouse.
How to Make It (Step-by-Step DIY)
- Assemble Pipe Framing: Screw together black iron floor flanges, nipples, elbows, and tees to create a structural wall-mounted frame with multiple horizontal tiers.
- Prepare Reclaimed Planks: Cut thick pine scaffold boards to fit your tier lengths, sand them thoroughly, and stain with a rich provincial oak finish.
- Mount Pipe Assembly: Anchor the iron pipe frame securely into wall studs using heavy-duty masonry or wood screws through the floor flanges.
- Secure Shelves: Rest and screw the wooden shelves directly onto the upper pipe rings or pipe collars from underneath.
- Add Utility Hooks: Screw S-hooks onto the lower horizontal pipe rails to hang keys, umbrellas, and dog leashes.
Styling Variations & Tips
- Steampunk Loft: Leave the iron pipes in their raw, oily state (sealed with clear coat) and pair with vintage brass tag holders on the shelves.
- Clean Industrial: Spray-paint the iron pipes in a clean matte white finish to soften the industrial look for modern apartments.
- Tip: Use the top tier for decorative items and framed art, the middle tier for mail sorting trays, and the lower tier for drop baskets.
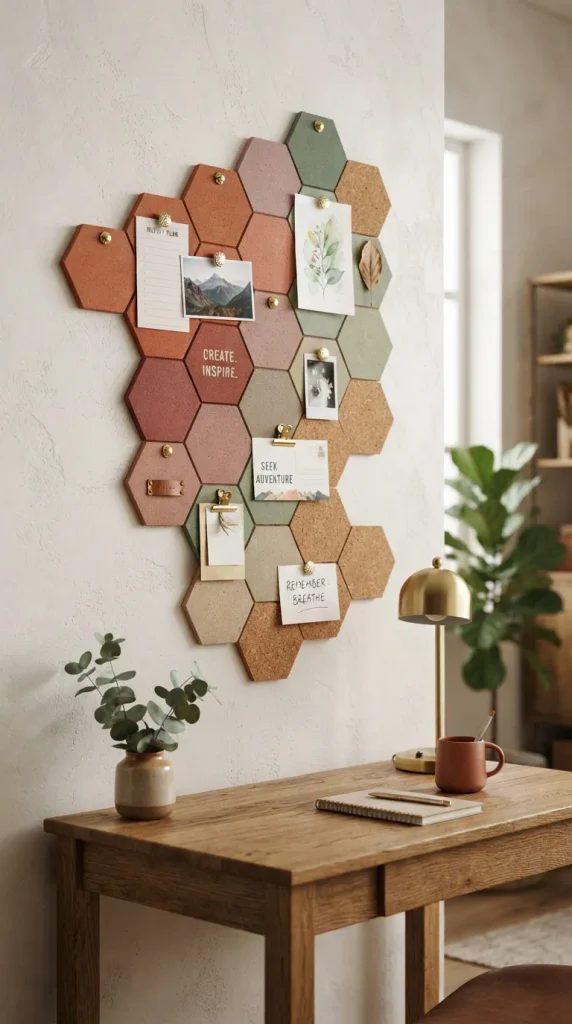
17. The Cork Hexagon Honeycomb Mosaic Wall Cluster
Concept & Aesthetic Appeal
Break away from boring rectangular corkboards by creating an artistic honeycomb mosaic pattern using individual cork hexagons. Painted in a curated ombré color palette, this functional wall installation serves as both memo board and geometric art piece.
How to Make It (Step-by-Step DIY)
- Procure Cork Tiles: Obtain a pack of 1/2-inch thick adhesive-backed cork tiles and cut them into precise uniform hexagons (or buy pre-cut hexagonal cork trivets).
- Plan the Mosaic Pattern: Arrange the hexagons on the floor in an organic honeycomb cluster layout. Mask off specific geometric sections with painter’s tape.
- Paint Selected Tiles: Spray-paint selected cork tiles in coordinated accent colors (such as soft sage, warm terracotta, and creamy beige) while leaving natural cork tiles exposed for texture.
- Mount to Wall: Peel off the adhesive backing (or apply heavy-duty construction adhesive) and press each hexagonal tile firmly onto the entryway wall in your planned mosaic pattern.
- Pin and Style: Use brass push pins to secure notes, keys, and reminders across the geometric honeycomb cluster.
Styling Variations & Tips
- Ombré Desert: Transition colors gracefully from deep terracotta at the bottom to pale cream at the top of the cluster.
- Monochrome Geometric: Keep tiles in natural cork, black, and crisp white for a striking modern graphic statement.
- Tip: Stagger the depths of a few hexagons by placing small foam mounting spacers behind them to create 3D shadow effects.
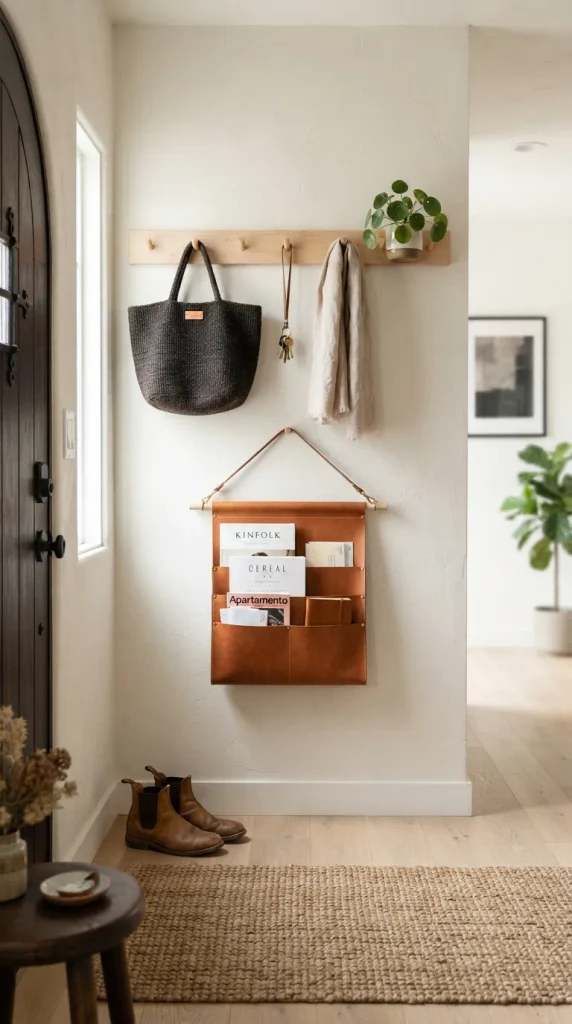
18. The Modern Peg-Rail and Leather Magazine Sling Combo
Concept & Aesthetic Appeal
Combining a continuous wooden peg rail with a suspended leather magazine and mail sling, this station keeps daily reading material, incoming mail, and essential keys organized in a slim, elegant profile.
How to Make It (Step-by-Step DIY)
- Build the Peg Rail: Prepare a 48-inch maple wood board, drill evenly spaced holes, and glue in matching Shaker-style wooden pegs.
- Craft the Leather Sling: Cut a wide, sturdy strip of bridle leather. Fold the bottom to create a deep pocket and rivet the sides securely. Punch two hanging loops at the top edge.
- Mount Rail and Sling: Secure the maple peg rail to the entryway wall studs. Slip the leather sling over one of the central wooden pegs.
- Add Accents: Hang smaller leather key loops and a brass wire mail basket from the remaining pegs.
Styling Variations & Tips
- Scandi Oak: Use natural blonde oak with tan leather accessories and white ceramic wall planters.
- Mid-Century Walnut: Pair rich walnut wood with dark chocolate leather and unlacquered brass hooks.
- Tip: Use the leather sling specifically for outgoing mail, magazines, and important family event flyers that require quick access.
19. The Entryway Command Center with Integrated Charging Drawer
Concept & Aesthetic Appeal
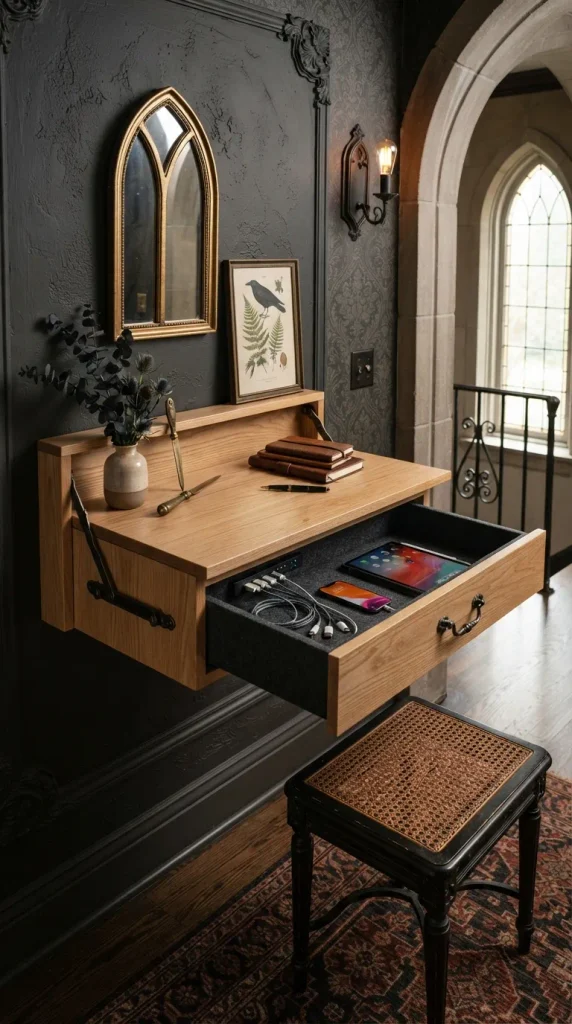
Eliminate cord clutter forever. This design features a wall-mounted drop-leaf desk containing a hidden power strip and USB hub inside a felt-lined drawer, ensuring phones, tablets, and smart devices charge completely out of sight.
How to Make It (Step-by-Step DIY)
- Build or Modify Drawer Box: Construct a shallow wooden drawer box equipped with full-extension soft-close undermount drawer slides.
- Install Internal Power: Drill a discreet access hole through the back of the drawer box and cabinet shell. Feed a slim power strip inside, plugging it into a wall outlet behind the unit.
- Mount Cabinet Shell: Secure the wall cabinet housing the drawer firmly to wall studs at standard console height.
- Line the Interior: Line the bottom of the charging drawer with custom-cut premium wool felt to protect devices from scratches.
- Style the Top: Leave the top surface clean and clutter-free, styling it only with a minimalist key tray and a single decorative vessel.
Styling Variations & Tips
- Clean White Oak: Build the entire unit in white oak with a flush push-to-open drawer mechanism for handle-free minimalism.
- Matte Charcoal: Paint the exterior charcoal gray while keeping the interior wood grain natural and warm.
- Tip: Label the internal charging cords with small leather tags so family members always know which cord belongs to which device.
20. The Oversized Gallery Wall Command Center
Concept & Aesthetic Appeal
For larger entryways and foyers, turn an entire focal wall into an expansive gallery command center. Combining framed family art prints, a central leather-framed calendar, hanging wire baskets, and brass sconces, this design is grand, functional, and deeply personal.
How to Make It (Step-by-Step DIY)
- Map the Gallery Grid: Lay out a balanced grid of frames on the floor first. Include a mix of art prints, family photos, a large monthly acrylic calendar board, and a corkboard frame.
- Install Wall Anchors: Transfer measurements to the entryway wall, installing heavy-duty wall anchors and picture hooks for every frame in the composition.
- Hang Integrated Modules: Hang your calendar and corkboards at central eye level for ease of use, surrounded by decorative art prints to soften the utilitarian elements.
- Mount Task Accessories: Install discreet brass hooks along the lower perimeter of the gallery layout for keys, hats, and light bags.
- Add Sconce Lighting: Frame the upper edges of the gallery wall with matching battery-operated brass picture lights.
Styling Variations & Tips
- Classic Traditional: Use ornate antique gold frames paired with black-and-white family portrait photography and traditional brass accessories.
- Modern Minimalist: Use thin black metal frames with stark white mats, abstract line art, and a sleek acrylic calendar board.
- Tip: Use matching frame finishes and matting widths throughout the gallery grid to ensure the command elements blend seamlessly into the cohesive art display.
Essential Tips for Building & Styling Your Entryway Command Center
- Audit Your Household Needs: Before building, take a 7-day inventory of what actually accumulates in your entryway. If you never receive paper mail, skip the mail slots and invest in more key hooks and charging ports.
- Prioritize Ergonomics: Place high-frequency items (keys, phones, sunglasses) at elbow height (roughly 42 to 48 inches from the floor). Place children’s coat hooks and cubbies lower so they can independently manage their belongings.
- Maintain the Zen Factor: A command center only works if it does not overflow. Establish a weekly 2-minute reset habit to clear out old receipts, recycle junk mail, and return misplaced items to their proper rooms.