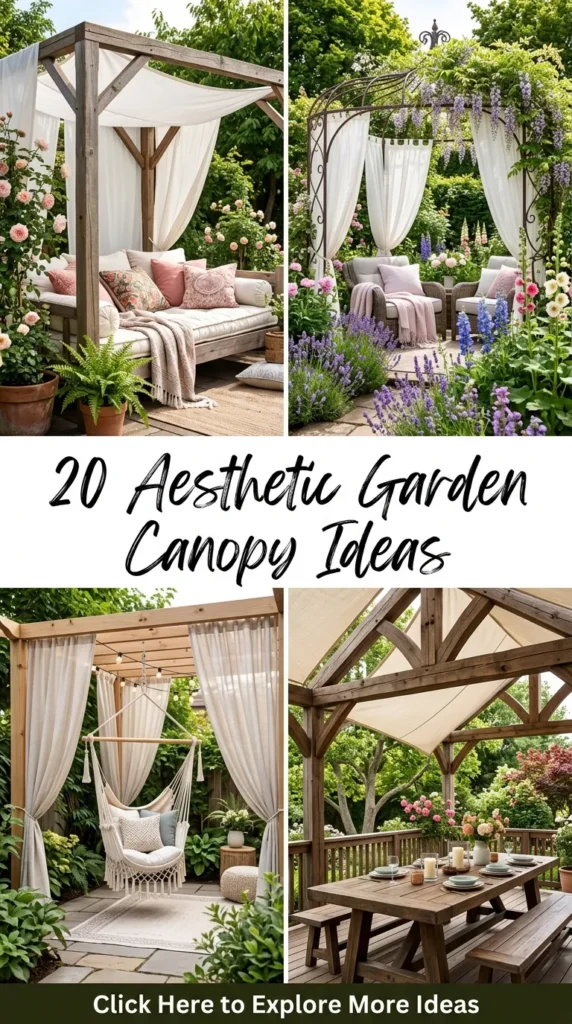
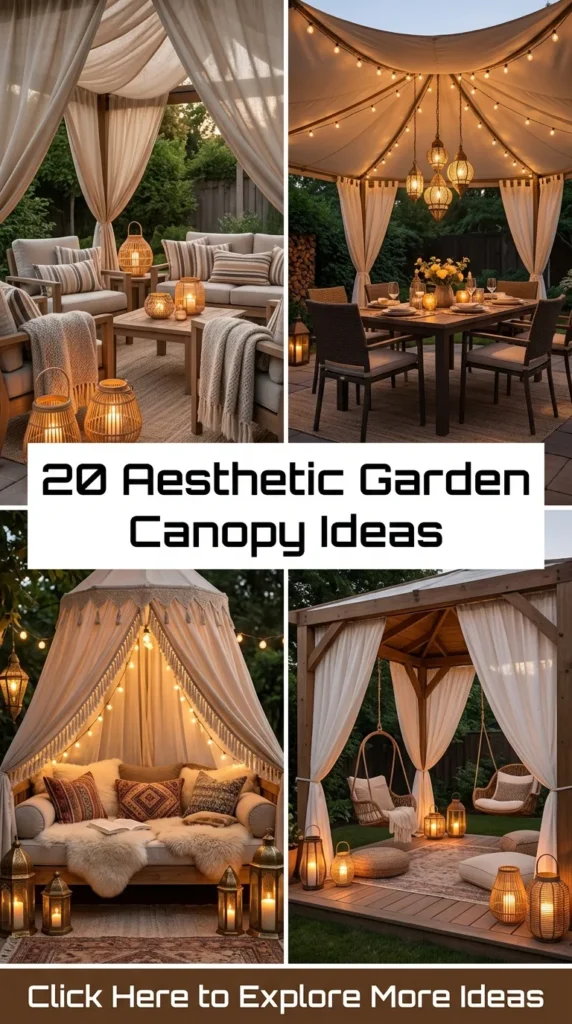
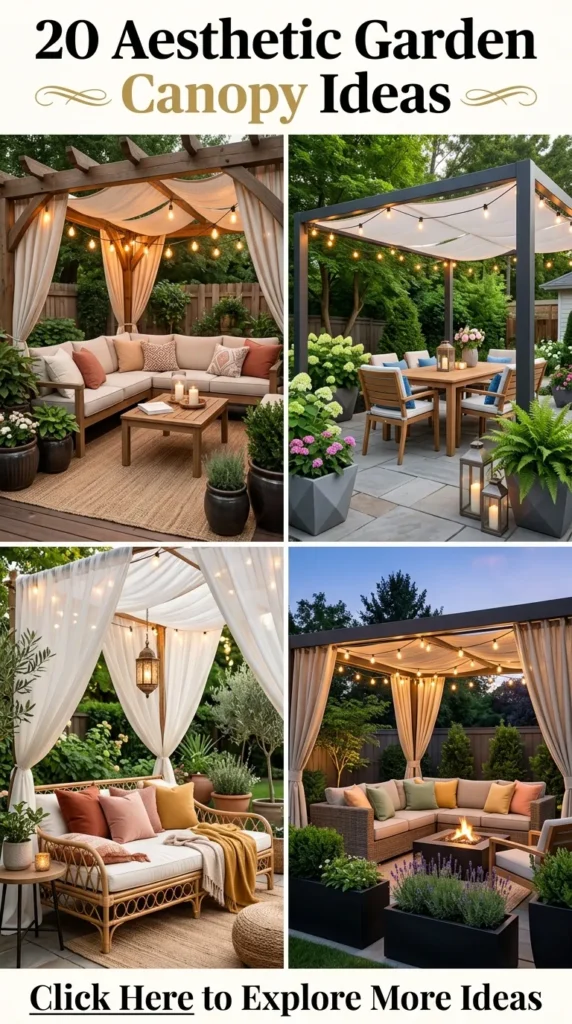
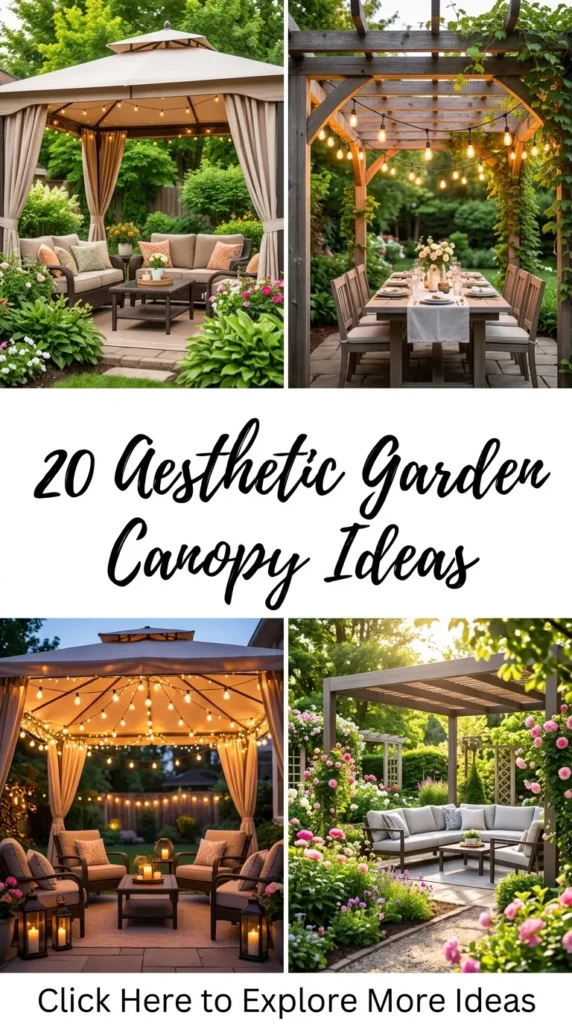
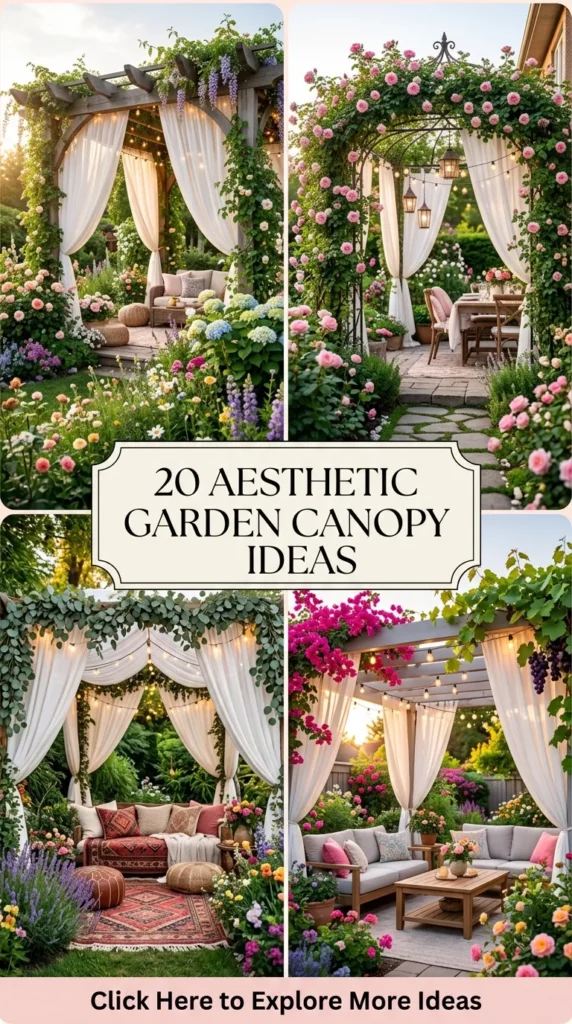
A garden canopy is far more than a simple sunshade—it is an architectural anchor that reshapes how we experience outdoor living. Whether serving as an intimate dining alcove, a serene reading nook, a poolside cabana, or a sprawling entertainment venue, a thoughtfully chosen canopy elevates the aesthetic appeal of any backyard. By integrating structure, textiles, natural light, and surrounding foliage, a garden canopy creates an inviting sanctuary that blends seamlessly with the natural landscape.
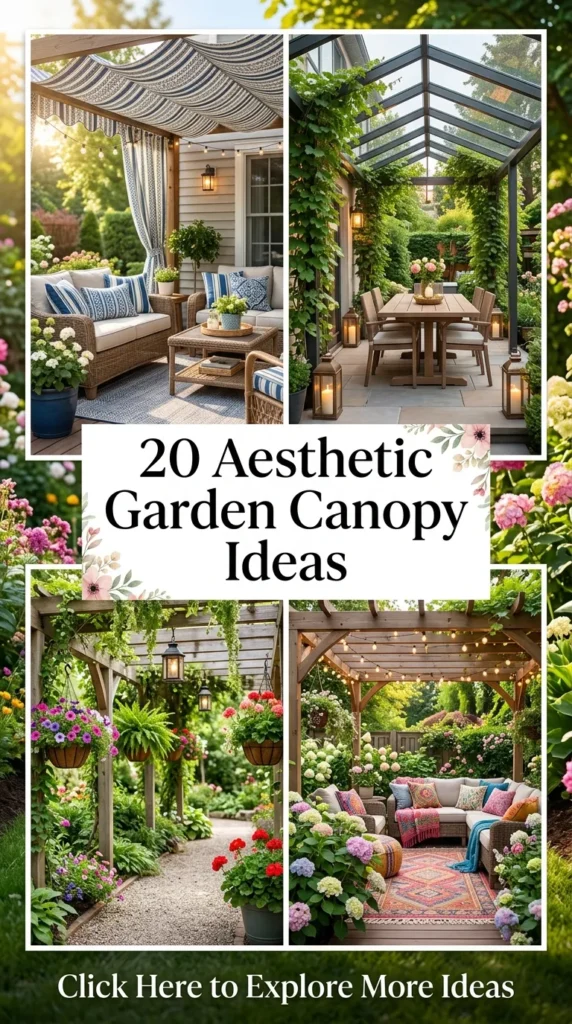
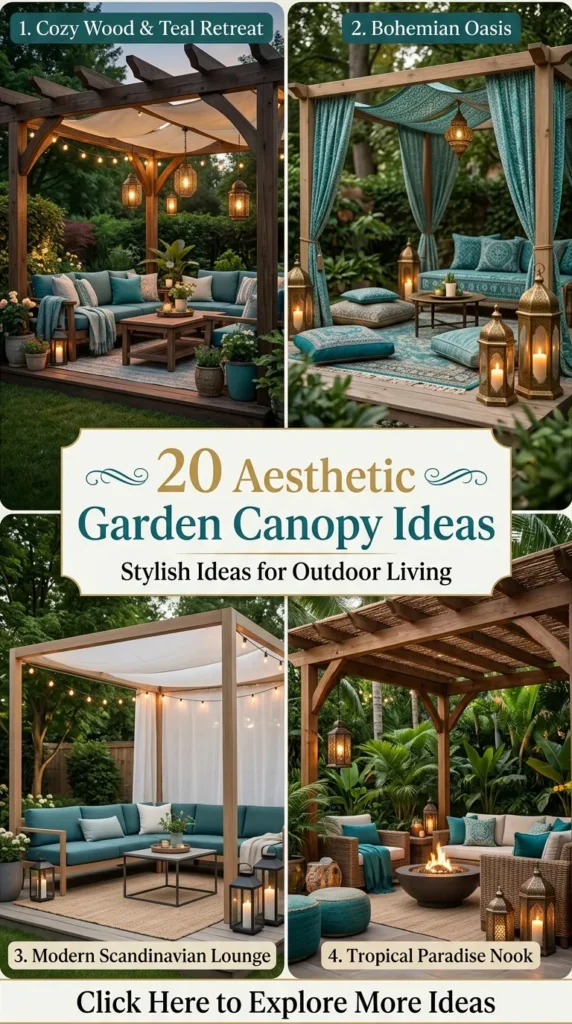
Below are 20 elegant, aesthetic, and inspiring garden canopy ideas tailored for modern outdoor spaces. Each concept breaks down the core aesthetic, provides step-by-step construction guidance, offers expert design tips and variations, and outlines the precise materials required.
1. The Romantic Sheer Draped Pergola Canopy
What This Idea Means
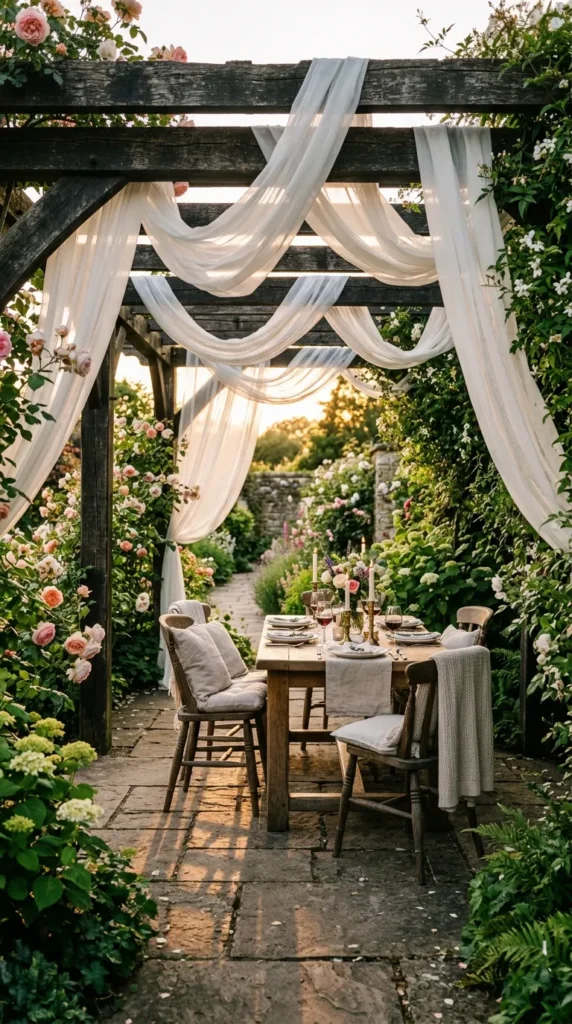
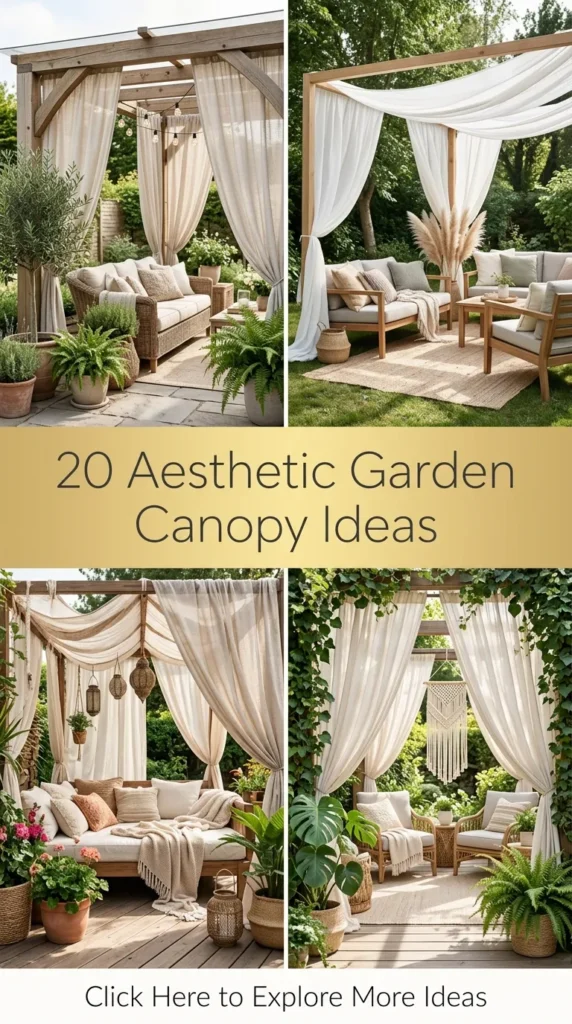
The Romantic Sheer Draped Pergola Canopy fuses structural woodwork with soft, flowing textiles. Designed to evoke European villa gardens and luxury resort retreats, this canopy relies on lightweight, semi-translucent fabrics suspended over modern or rustic pergola rafters. As breezes pass through, the billowing fabric catches the light, filtering harsh sunbeams into a soft, romantic ambient glow.
How to Make It
- Pergola Base: Install or utilize an existing wood or aluminum garden pergola anchored securely to concrete footings.
- Textile Selection: Cut high-grade, outdoor-rated sheer voile or weather-resistant polyester fabric into long continuous panels (typically 5 to 6 feet wide).
- Suspension Rods: Mount stainless steel tension cables or wooden curtain rods across the upper inner framing of the pergola rafters.
- Draping: Thread the sheer fabric panels over the top rafters, allowing them to swoop gently between beams in uniform, graceful swags.
- Tie-Backs: Secure the loose fabric ends to the corner vertical posts using braided jute ropes, brass tie-back hooks, or matching fabric sashes.
Tips and Variations
- Weighting Hemlines: Sew small lead drapery weights or heavy glass beads into the bottom hems to prevent windy days from whipping the sashes excessively.
- Warm Evening Glow: Weave delicate warm-white LED string lights across the tops of the rafters above the fabric panels for a celestial night effect.
- Variation: Swap sheer white sashes for dusty rose or sage green tones to match seasonal garden blooms.
Needs to Make That Thing
- Wooden or metal pergola structure
- Outdoor sheer voile fabric panels
- Stainless steel tension wire kit or curtain rods
- Braided jute ropes or brass tie-back hardware
- Lead drapery hem weights
- Warm-white outdoor string lights
- Waterproof fabric protector spray
2. The Modern Retractable Wave Sail Canopy
What This Idea Means
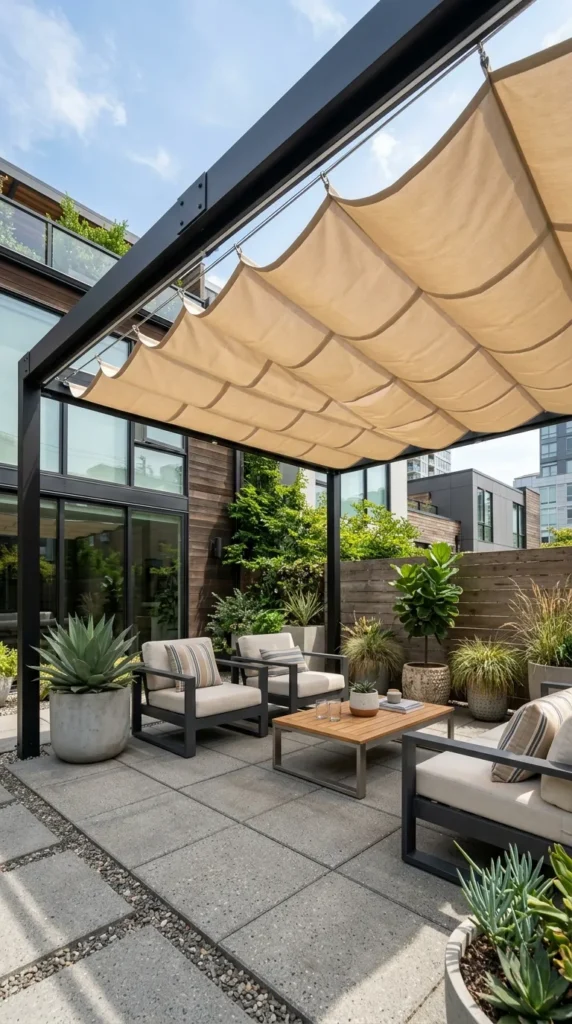
Defined by sleek lines and functional versatility, the Modern Retractable Wave Sail Canopy caters to contemporary architectural tastes. Featuring horizontal fabric panels running along metal tracks, this canopy can be extended to provide full sun protection or retracted to reveal open skies. When partially deployed, the fabric forms elegant wave-like ripples that bring dynamic movement to patio spaces.
How to Make It
- Frame Installation: Erect a sturdy rectangular frame using black powder-coated aluminum or heavy timber posts.
- Track Fitting: Attach dual stainless steel guide cables or aluminum track channels along the top interior edges of the long frame sides.
- Purlin Rod Assembly: Slide light aluminum support rods through pre-sewn fabric pockets along the length of a water-repellent canvas slide shade.
- Pulley Attachment: Connect the rod ends to the track gliders, and attach a manual draw-string pulley mechanism or motorized drive system.
- Tension Calibration: Adjust track tension so the fabric glides smoothly, dropping into shallow 8-inch deep waves when extended.
Tips and Variations
- Drainage Angle: Pitch one side of the track 2 to 3 inches lower than the other so rainwater runs off smoothly during sudden downpours.
- Color Schemes: Charcoal gray, sand beige, or pure white fabrics provide the cleanest modern aesthetic.
- Variation: Motorize the pulley system with a smart sensor that automatically retracts the canopy during high winds.
Needs to Make That Thing
- Powder-coated aluminum or timber post frame
- High-density polyethylene (HDPE) or acrylic canvas wave sail fabric
- Stainless steel slide-track cable system
- Aluminum purlin support rods
- Pulley rope mechanism or motorized shade controller
- Concrete footing anchor bolts
3. The Botanical Wisteria Lattice Pavilion
What This Idea Means
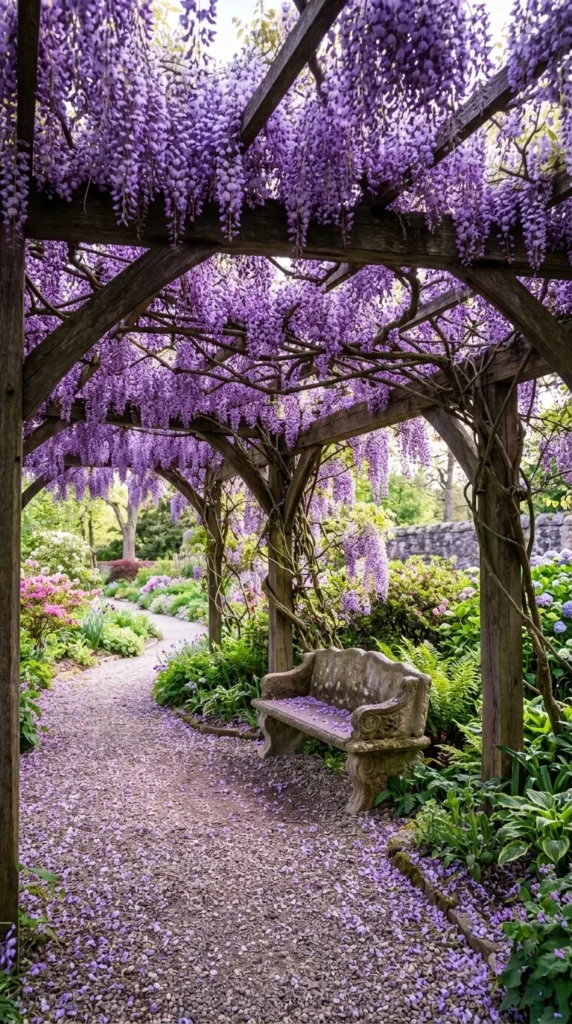
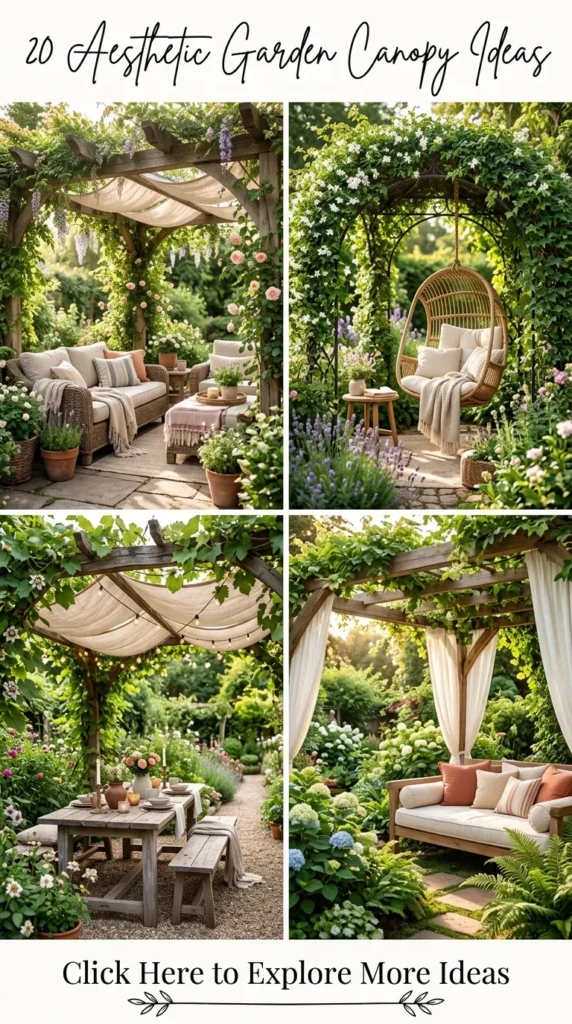
Rooted in traditional landscape design, the Botanical Wisteria Lattice Pavilion merges organic flora with architectural timber. Instead of synthetic fabrics, this canopy utilizes living climbing vines—such as wisteria, grapevines, or honeysuckle—trained across a dense overhead wooden lattice. In spring and summer, it forms a fragrant, living ceiling that dappled sunlight filters through naturally.
How to Make It
- Heavy-Duty Frame: Build a robust wooden pavilion frame using 6×6 posts and heavy crossbeams capable of supporting significant mature plant weight.
- Lattice Overhead: Lay a 2×2 timber lattice grid or heavy-gauge wire trellis over the top roof rafters.
- Planting: Plant vigorous climbing vines—such as Chinese Wisteria or American Pillar Roses—at the base of each supporting vertical post.
- Training Vines: Secure main vines to posts using flexible garden ties, guiding leaders upward toward the overhead lattice grid.
- Pruning: Prune aggressively twice a year (summer and winter) to direct growth horizontally across the ceiling structure.
Tips and Variations
- Structural Safety: Vines become exceptionally heavy over time; ensure all timber joints use heavy-duty galvanized structural connectors.
- Fragrance Pairing: Combine wisteria with night-blooming jasmine for round-the-clock floral fragrance.
- Variation: Use evergreen ivy or star jasmine for year-round green canopy coverage in milder climates.
Needs to Make That Thing
- 6×6 treated timber posts and heavy roof beams
- 2×2 wooden lattice panels or heavy wire mesh
- Mature climbing vine plants (Wisteria, Jasmine, Grapevine)
- Flexible rubber garden ties
- Galvanized steel post brackets and lag screws
- Organic compost and rich planting soil
4. The Bohemian Macramé & Bamboo Canopy
What This Idea Means
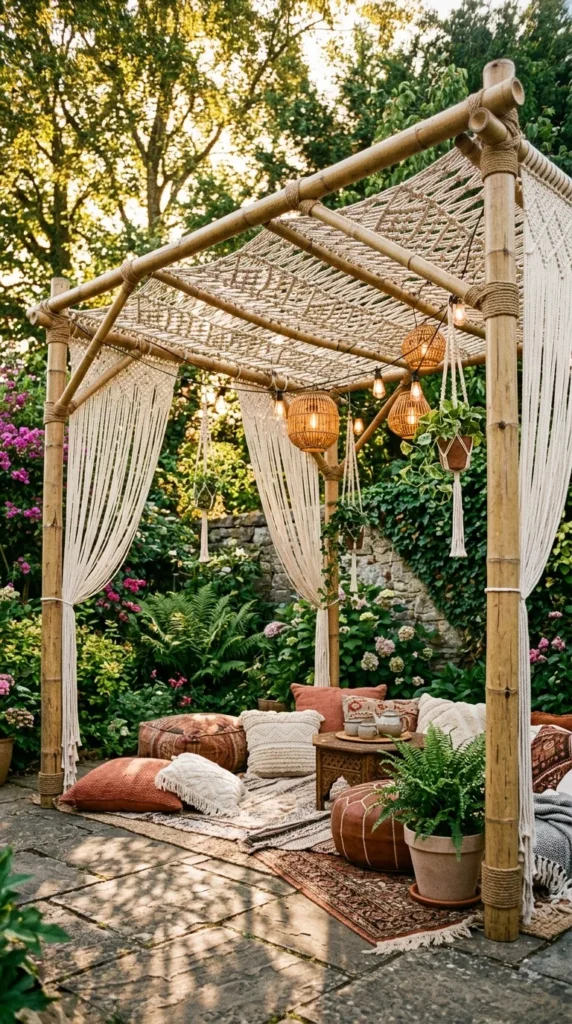
The Bohemian Macramé & Bamboo Canopy brings textural warmth, relaxed artistry, and earthy charm into garden nooks. Utilizing natural bamboo structural poles paired with hand-knotted cotton macramé web roofs, this design creates striking geometric shadow patterns on the ground below while channeling laid-back, festival-inspired aesthetic appeal.
How to Make It
- Bamboo Framing: Secure four thick, cured bamboo posts into concrete ground anchors or heavy planter pots.
- Rafter Joinery: Join upper bamboo cross-beams using traditional Japanese square lashing techniques with thick jute or hemp cord.
- Macramé Weaving: Hand-knot or stretch a large pre-made macramé cotton cord canopy net over the upper bamboo frame.
- Fringe Accents: Allow long, unraveled cotton fringe tassels to hang freely along the four exterior borders of the roof line.
- Interior Styling: Add woven rattan light fixtures, hanging floor cushions, and low wooden tables underneath.
Tips and Variations
- Weathering Protection: Coat natural bamboo with clear outdoor marine varnish to prevent sun splitting and water decay.
- Shadow Effects: Position the canopy where direct noon sunlight casts intricate geometric macramé shadow grids across paved stone patios.
- Variation: Integrate small wooden beads or cowrie shells directly into the macramé fringe loops for extra texture.
Needs to Make That Thing
- Cured natural bamboo posts (4-inch diameter)
- Heavy cotton macramé cord (6mm to 8mm thickness)
- Jute or hemp lash cordage
- Outdoor marine polyurethane varnish
- Concrete anchors or heavy decorative planter pots
- Rattan pendant lanterns
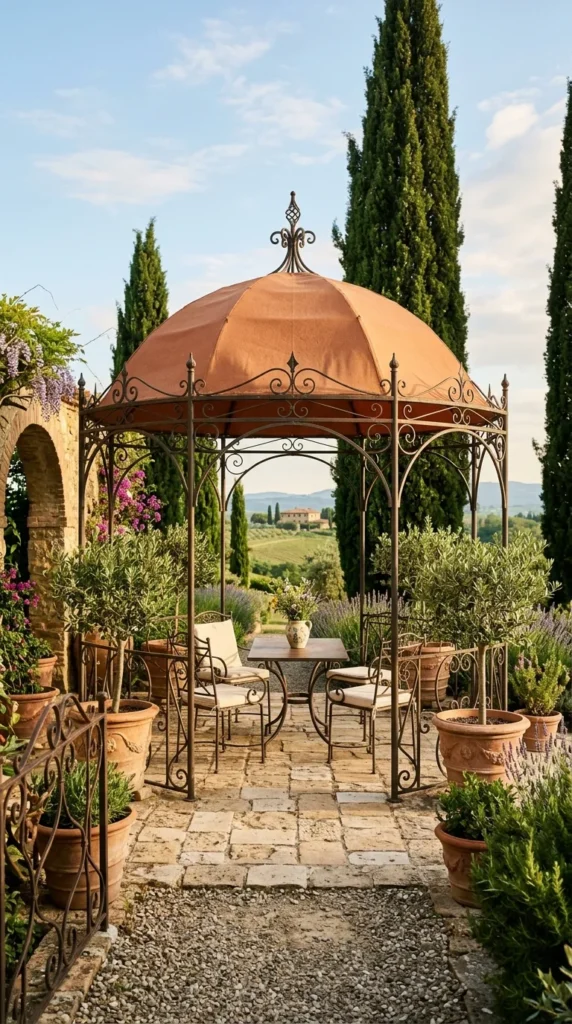
5. The Tuscan Terracotta & Canvas Gazebo
What This Idea Means
Capturing the warm, sun-drenched romance of the Italian countryside, the Tuscan Terracotta & Canvas Gazebo pairs wrought-iron scrollwork with warm-toned canvas shades. Set against stone patios, cypress trees, and terracotta planter urns, this canopy style emphasizes warmth, timeless elegance, and Old World craftsmanship.
How to Make It
- Wrought-Iron Frame: Assemble or custom-forge an octagonal or square wrought-iron gazebo frame featuring decorative scrollwork upper corners.
- Canvas Dome: Tailor a heavy-duty, solution-dyed acrylic canvas top in terracotta, ochre, or warm cream tones fitted tightly over the domed roof frame.
- Scalloped Valance: Finish the canvas perimeter with a classic scalloped edge trimmed with matching or dark contrast bias tape.
- Side Drapery: Hang outdoor linen or canvas side curtain panels on iron rings, allowing them to be tied back against the iron posts.
- Hardscaping: Position the structure on a tumbled limestone or terracotta tile patio base.
Tips and Variations
- Iron Treatment: Coat wrought iron with black anti-rust enamel or bronze patina paint to withstand weather elements.
- Warm Lighting: Install a central wrought-iron candle chandelier or warm Edison bulb lantern under the dome peak.
- Variation: Replace side canvas with iron trellises draped in climbing bougainvillea or red climbing roses.
Needs to Make That Thing
- Custom or prefabricated wrought-iron gazebo frame
- Solution-dyed acrylic canvas top (Terracotta/Ochre)
- Heavy-duty iron curtain rings and tie-back hooks
- Anti-rust metal enamel paint
- Tumbled limestone pavers or terracotta floor tiles
- Wrought-iron central chandelier fixture
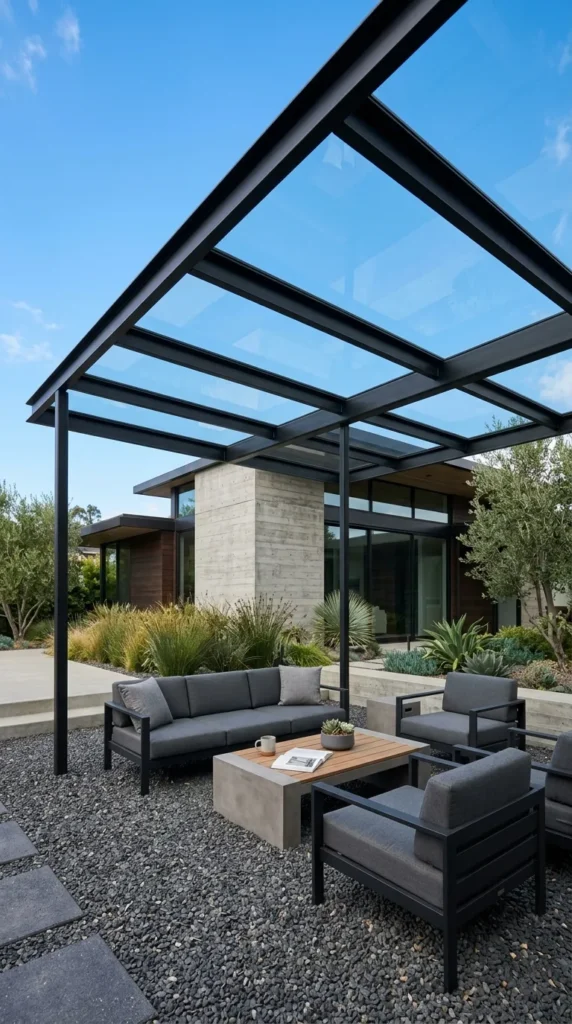
6. The Minimalist Black Steel Glasshouse Canopy
What This Idea Means
Sleek, architectural, and sophisticated, the Minimalist Black Steel Glasshouse Canopy blends indoor comfort with outdoor open air. Featuring ultra-slim black steel or aluminum framing paired with tempered clear glass or UV-filtering polycarbonate roof panels, this design offers complete rain protection while keeping views of the sky completely unobstructed.
How to Make It
- Steel Framing: Construct an industrial-grade steel post-and-beam frame painted in matte black rust-resistant enamel.
- Glazing Bars: Install specialized aluminum glazing bars equipped with rubber gaskets along the roof rafters.
- Glass Placement: Lay tempered safety glass sheets or clear multi-wall polycarbonate panels onto the glazing bars.
- Sealing: Secure glass panels with top pressure caps and apply weatherproof marine silicone sealant around all perimeter seams.
- Under-Shade System: Install a thin, retractable interior fabric blind underneath the glass to mitigate summer heat buildup.
Tips and Variations
- Self-Cleaning Glass: Opt for self-cleaning coated glass panels that break down organic dirt when exposed to sunlight and rain.
- Integrated Drainage: Hide rainwater downspouts inside the hollow interior of the vertical black steel support posts.
- Variation: Use tinted smoked glass or fluted reeded glass panels for added privacy and thermal comfort.
Needs to Make That Thing
- Structural black steel tubing or aluminum beams
- Tempered safety glass or clear multi-wall polycarbonate panels
- Aluminum glazing bars with rubber seals
- Matte black anti-rust exterior paint
- Marine-grade clear silicone sealant
- Retractable interior solar shade system
7. The Nautical Timber & Sail Shade Canopy
What This Idea Means
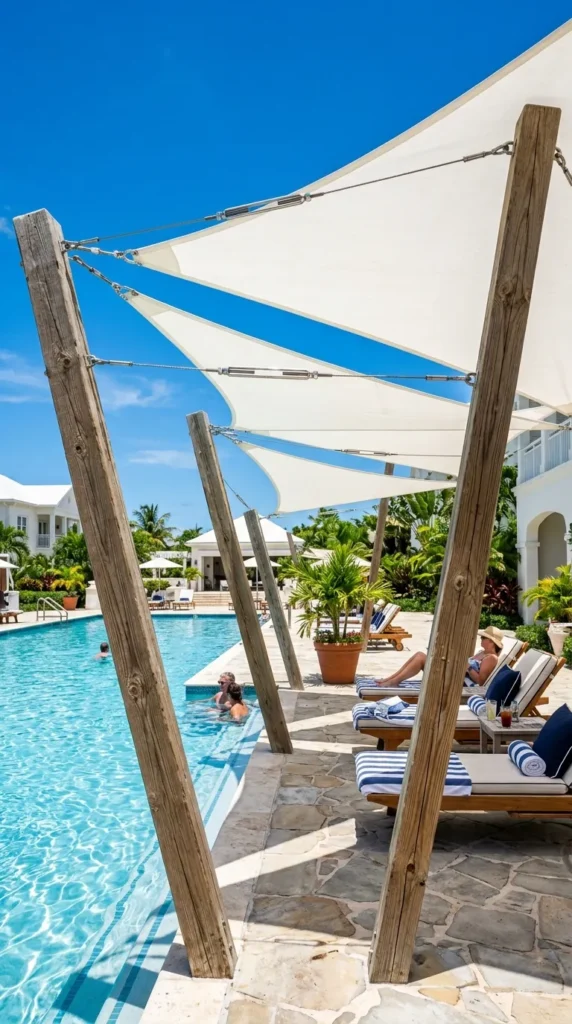
Inspired by coastal yacht design, the Nautical Timber & Sail Shade Canopy uses triangular or hyperbolic parabolic fabric sails stretched tightly between heavy wooden posts. The crisp tension, stainless steel marine hardware, and angled geometry create a breezy, modern look ideal for poolside loungers, coastal decks, or sunny lawns.
How to Make It
- Post Installation: Set 6×6 timber posts deep into the ground using reinforced concrete, angling them 10 degrees outward away from the tension load.
- Anchor Mounting: Attach heavy stainless steel pad eyes or eye bolts securely near the tops of the timber posts.
- Sail Connection: Connect high-density sail shade corners to the post anchors using stainless steel turnbuckles, snap hooks, and D-rings.
- Tensioning: Tighten the turnbuckles until the fabric sail is pulled completely taut without center sag, forming a hyperbolic curve.
- Multi-Sail Layering: Overlap two or three triangular sails at varying heights to maximize shade coverage and visual interest.
Tips and Variations
- Height Variation: Anchor opposing corners at different heights (e.g., 9 feet and 7 feet) to allow rainwater to shed quickly off the angled surface.
- Marine Hardware: Use 316-grade stainless steel hardware exclusively to prevent rusting in salty sea air.
- Variation: Combine stark white sails with navy blue painted posts for a bold maritime color scheme.
Needs to Make That Thing
- Heavy 6×6 timber or steel support posts
- Commercial-grade HDPE triangle shade sails
- 316-grade stainless steel turnbuckles, pad eyes, and snap hooks
- Fast-setting concrete mix
- Marine-grade wood sealant or paint
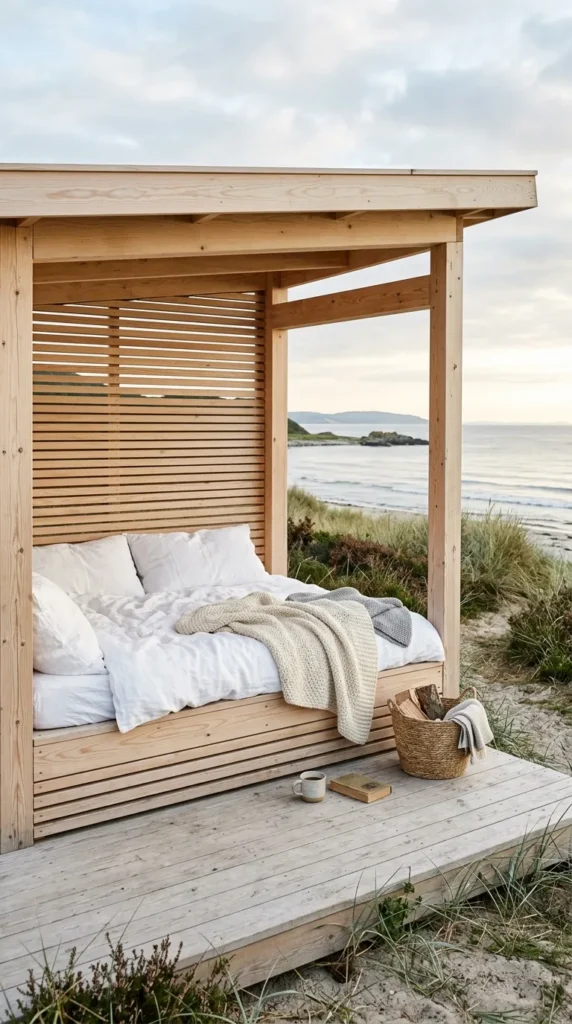
8. The Scandinavian Light Timber Cabana
What This Idea Means
Embodying Nordic functional simplicity, the Scandinavian Light Timber Cabana focuses on clean geometry, light natural woods, and uncluttered serenity. Featuring blonde timber slat walls, an integrated daybed platform, and a flat overhead roof shade, this canopy acts as an airy outdoor sanctuary for meditation, reading, or quiet relaxation.
How to Make It
- Platform Base: Construct a low, raised timber deck platform using blonde pine, spruce, or cedar.
- Frame Structure: Build a simple cubic frame using clean-planed square timber posts.
- Slat Backing: Install horizontal timber slats across the back wall with 1-inch air gaps between boards for light filtration and airflow.
- Overhead Canopy: Lay matching horizontal slats across the roof frame, lined underneath with a rain-proof clear acrylic sheet.
- Daybed Cushioning: Place a custom outdoor-upholstered mattress, neutral linen pillows, and light knit throw blankets directly on the platform.
Tips and Variations
- Wood Finish: Treat light wood with a matte, non-yellowing clear UV oil finish to maintain its raw, natural appearance over time.
- Sliding Screen: Add a sliding slatted timber side panel to adjust privacy according to wind direction and neighbor views.
- Variation: Paint the timber structure in iconic Swedish Falun Red or matte black while keeping interior cushions light cream.
Needs to Make That Thing
- Light pine, spruce, or cedar decking lumber
- Square timber framing posts
- Clear UV matte wood sealer
- Clear corrugated acrylic roof sheeting
- Custom outdoor daybed mattress and linen cushions
- Stainless steel decking screws
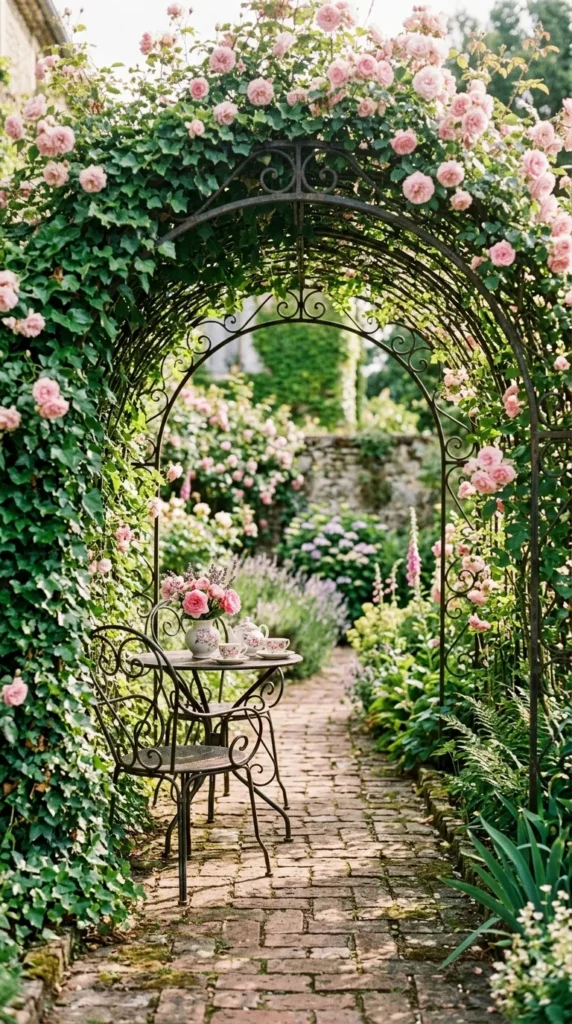
9. The French Country Iron & Ivy Arched Canopy
What This Idea Means
Evoking the classic elegance of Provencal estates, the French Country Iron & Ivy Arched Canopy features a graceful, curved iron frame covered in evergreen ivy and climbing roses. Positioned over a bistro table or garden bench, this canopy creates a sweet, sun-dappled dining spot surrounded by romantic blooms and lush greenery.
How to Make It
- Arched Frame Assembly: Anchor a curved wrought-iron or steel arbor tunnel frame into the garden bed or paved patio.
- Lattice Mesh: Wrap a thin wire mesh grid over the top arch to provide multiple gripping points for climbing foliage.
- Plant Selection: Plant English Ivy, Climbing Pierre de Ronsard Roses, or Star Jasmine around all four base corner feet.
- Weaving Growth: Thread growing stems manually through the metal lattice grid as they mature across the arch.
- Base Setting: Set a wrought-iron bistro table and two matching chairs directly beneath the center of the living green vault.
Tips and Variations
- Bloom Succession: Pair evergreen ivy (for year-round structure) with seasonal climbing roses (for summer color and scent).
- Pruning Maintenance: Keep interior growth neatly clipped so the ceiling arch stays spacious overhead without low-hanging twigs.
- Variation: Hang a vintage glass hurricane lantern from the center apex of the arch for candlelit dinners.
Needs to Make That Thing
- Curved wrought-iron or steel tunnel arch frame
- Heavy wire lattice mesh
- Climbing roses, English ivy, or star jasmine plants
- Antique bronze or black metal finish spray
- Wrought-iron bistro dining set
- Vintage hanging hurricane glass lantern
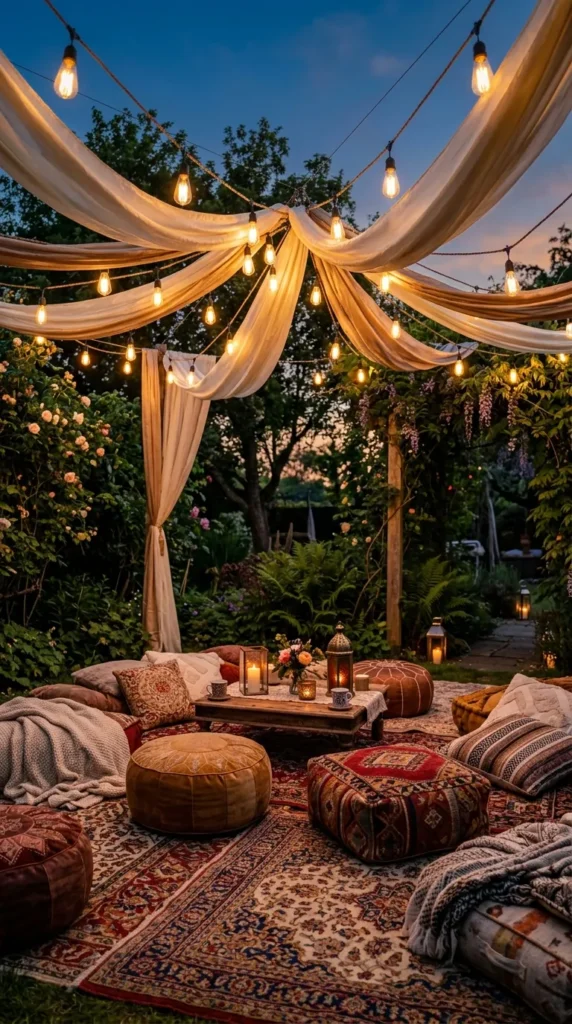
10. The Bohemian Strung Festoon & Silk Canopy
What This Idea Means
Designed for magical evening gatherings and festive garden parties, this canopy relies on structural light wires and draped vintage silk scarves or linen sashes. The Bohemian Strung Festoon & Silk Canopy transforms plain backyards into fairy-tale courtyards lit by warm glowing bulbs and flowing, multi-colored textiles.
How to Make It
- Support Poles: Set four tall wooden poles or vintage iron rods around the perimeter of your outdoor seating lounge.
- Cable Network: Run a criss-cross network of stainless steel guide wire cables between the tops of all four corner poles.
- Festoon Lighting: String commercial-grade outdoor Edison bulb festoon lights along the steel cable grid.
- Fabric Draping: Drape lightweight silk, chiffon, or colorful linen sashes over the lit wires, letting them drop in soft center swoops.
- Seating Layering: Arrange floor poufs, vintage oriental rugs, and low wooden coffee tables underneath the illuminated canopy canopy.
Tips and Variations
- Bulb Safety: Use shatterproof LED filament bulbs to prevent breakage if wind causes bulbs to bump against fabric sashes.
- Weathering: This setup is ideal for temporary events or dry summer climates; bring delicate silk sashes indoors during heavy rains.
- Variation: Stick to an all-white silk and warm-gold bulb palette for a celestial bridal shower ambiance.
Needs to Make That Thing
- Perimeter support posts or tree attachment points
- Stainless steel guide wire cable kit
- Commercial outdoor LED festoon string lights (Edison bulbs)
- Silk, chiffon, or lightweight linen sashes
- Outdoor oriental rugs and floor poufs
- Cable tension turnbuckles
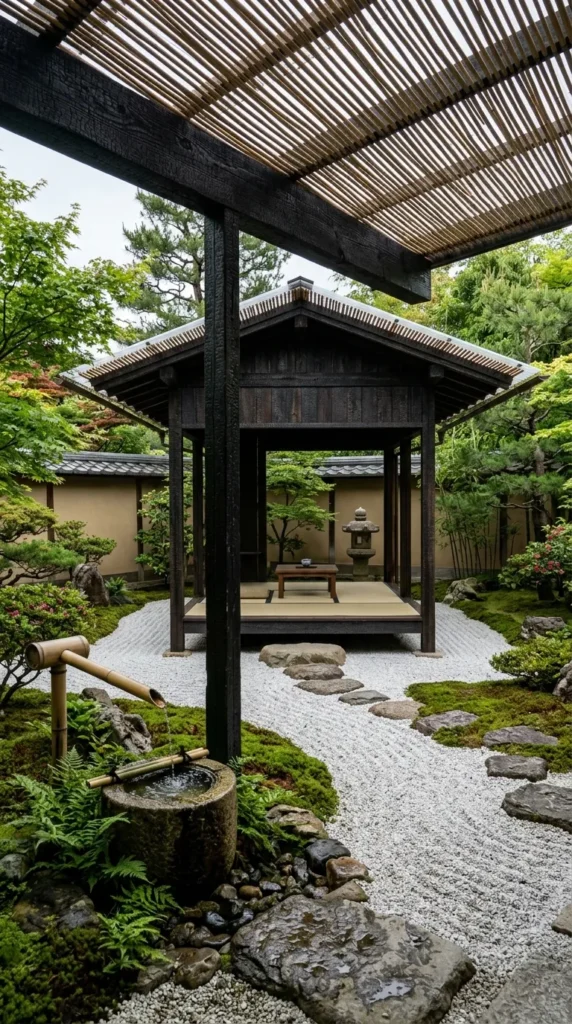
11. The Japanese Zen Slat & Bamboo Pavilion
What This Idea Means
Focusing on balance, natural harmony, and tranquil proportions, the Japanese Zen Slat & Bamboo Pavilion combines dark timber framing with finely spaced horizontal bamboo slats. The canopy creates quiet, meditative shade over water features, stone gardens, or tea seating areas.
How to Make It
- Charred Frame: Build a clean post-and-beam pavilion frame using timber treated with the Japanese Shou Sugi Ban charring technique.
- Slat Roof: Lay thin, closely spaced bamboo or dark cedar slats across the top roof frame, allowing narrow strips of sunlight to pass through.
- Water Protection: Mount a flat sheet of smoked UV-blocking polycarbonate across the top to keep rain out while preserving shadow effects.
- Side Screens: Install semi-private sliding Shoji-inspired slatted wood screens on one or two sides.
- Surrounding Design: Surround the base with raked white gravel, river boulders, moss beds, and a stone water basin.
Tips and Variations
- Charring Finish: Coat charred timber with natural linseed oil to preserve its rich, velvety dark surface and increase water resistance.
- Auditory Elements: Place a bamboo water spout (shishi-odoshi) right outside the canopy to add gentle water sounds.
- Variation: Use un-charred natural red cedar for a lighter, warm timber aesthetic.
Needs to Make That Thing
- Cedar or Douglas fir timber beams
- Propane torch and linseed oil (for Shou Sugi Ban process)
- Narrow bamboo or cedar roof slats
- Smoked UV-blocking polycarbonate roofing sheet
- Raked white granite gravel and smooth river stones
- Bamboo water feature kit
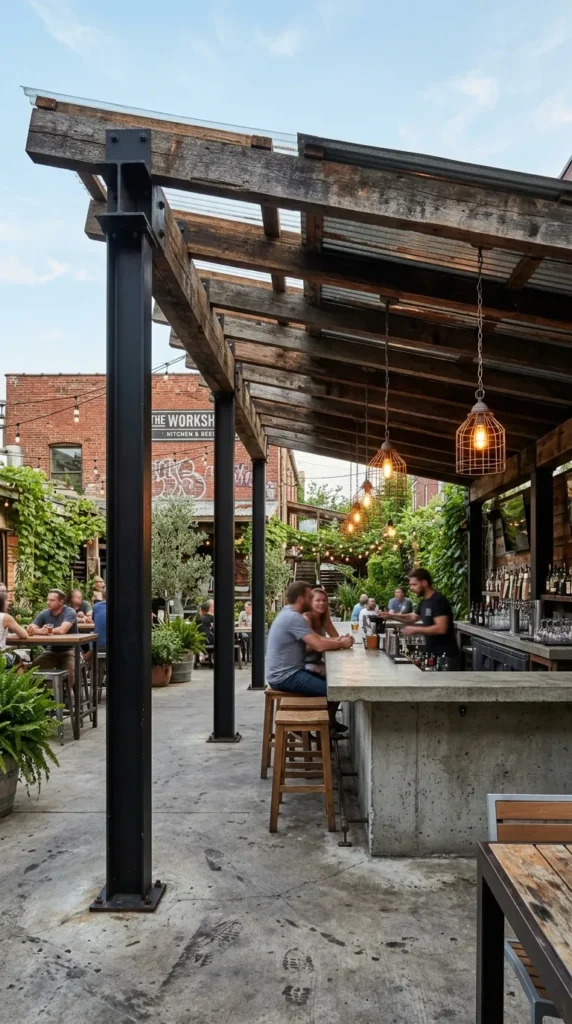
12. The Industrial Reclaimed Wood & Iron Canopy
What This Idea Means
Combining rugged urban character with natural outdoor spaces, the Industrial Reclaimed Wood & Iron Canopy utilizes heavy iron I-beams, reclaimed barn wood rafters, and corrugated metal roof accents. It provides a bold, masculine centerpiece for outdoor kitchens, bar setups, or modern fire pit lounges.
How to Make It
- Steel Columns: Anchor thick black steel I-beams or heavy iron pipe columns into deep concrete footings.
- Reclaimed Beams: Mount thick, weathered reclaimed wood joists across the steel columns using exposed black steel brackets.
- Hybrid Roof: Install rusted corten steel or dark corrugated metal panels across two-thirds of the roof, leaving the remaining third open with wood rafters.
- Lighting: Mount industrial cage pendant lamps or black barn lights directly to the exposed reclaimed joists.
- Kitchen Integration: Build a concrete-topped outdoor bar counter or pizza oven station directly underneath the shelter.
Tips and Variations
- Metal Protection: Seal rusted Corten steel with clear matte polyurethane sealer to prevent rust drips from staining patio pavers below.
- Reclaimed Sourcing: Source genuine barn timber with weathered nail holes and saw marks to maximize industrial texture.
- Variation: Replace metal roofing entirely with open heavy-gauge steel mesh panels draped in subtle string lights.
Needs to Make That Thing
- Structural steel I-beams or iron pipe posts
- Reclaimed barn wood timber joists
- Corten steel or corrugated iron roof sheets
- Black steel mounting plates and structural bolts
- Industrial cage pendant light fixtures
- Clear matte polyurethane sealer
13. The Moroccan Tile & Patterned Fabric Canopy
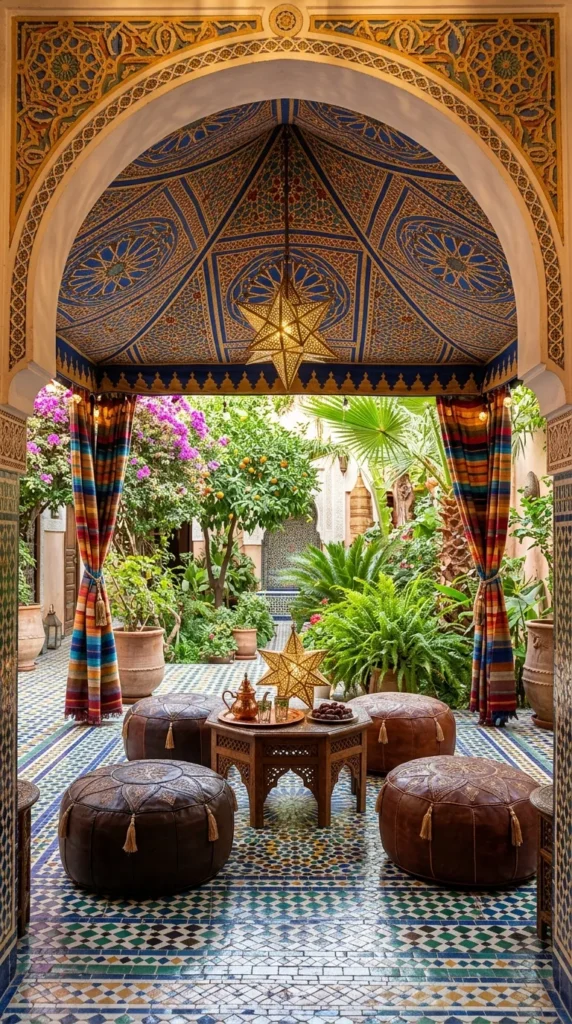
What This Idea Means
Exploding with vibrant colors, rich patterns, and exotic warmth, the Moroccan Tile & Patterned Fabric Canopy channels the opulence of Marrakesh riads. Characterized by pointed horseshoe arches, intricate mosaic tile floors, and richly patterned geometric fabric roofs, this canopy creates a dramatic, jewel-toned oasis.
How to Make It
- Arched Structure: Construct a wooden or masonry canopy frame featuring decorative carved horseshoe arch openings on all sides.
- Tile Flooring: Lay a stunning Zellige mosaic tile floor or geometric ceramic tile pattern across the interior floor pad.
- Patterned Roof Canvas: Stretch a custom-printed outdoor canvas featuring Moroccan geometric latticework patterns over the roof.
- Draped Corners: Hang deep cobalt blue, saffron yellow, or rich crimson outdoor velvet curtains from the interior arch corners.
- Central Accent: Hang a pierced brass star lantern from the ceiling apex, casting intricate starry shadows at night.
Tips and Variations
- Fabric Durability: Ensure vibrant patterned fabrics are treated with high UV-resistance sprays to prevent sun fading.
- Low Seating: Furnish with low plush floor benches, embroidered leather poufs, and brass tea trays.
- Variation: Keep the structure simple white plaster while concentrating rich Moroccan patterns entirely on textiles and tiles.
Needs to Make That Thing
- Timber or plaster-finished canopy frame with horseshoe arches
- Moroccan Zellige ceramic floor tiles
- UV-resistant patterned outdoor canvas
- Deep-toned outdoor curtain sashes (Cobalt/Saffron)
- Pierced brass star pendant lantern
- Leather poufs and low lounge benches
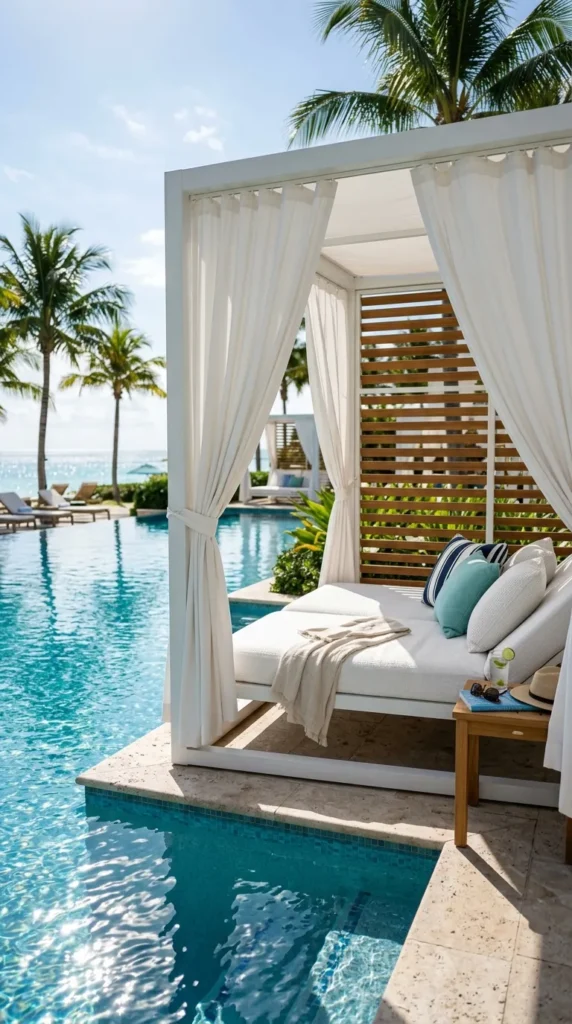
14. The Poolside Resort Cabana Canopy
What This Idea Means
Designed for poolside relaxation, the Poolside Resort Cabana Canopy offers private, air-circulating shade right next to the water. Featuring crisp white structural frames, privacy louvers, water-resistant daybeds, and full-length white curtains, this canopy mirrors five-star tropical resort luxury.
How to Make It
- Waterproof Frame: Assemble a clean cubic frame using composite timber or powder-coated aluminum rated for high moisture exposure.
- Louvered Rear Wall: Install adjustable horizontal privacy louvers along the rear wall to block wind while controlling privacy.
- Waterproof Roof: Attach a flat, insulated seam metal roof or heavy waterproof canvas cover pitched slightly toward the back pool deck.
- Full Curtains: Mount track-guided white Sunbrella fabric curtains along all four sides so the cabana can be fully enclosed.
- Interior Furniture: Add a double-wide outdoor plush lounge daybed with quick-dry foam cushion inserts.
Tips and Variations
- Quick-Dry Foam: Always use reticulated reticulating marine foam for daybed cushions so water drips dry within minutes.
- Curtain Tracks: Use ceiling-recessed stainless steel curtain tracks for a seamless, ultra-modern luxury appearance.
- Variation: Add built-in outdoor speakers and a hidden mini-fridge inside the cabana back wall for poolside entertaining.
Needs to Make That Thing
- Powder-coated aluminum or composite timber frame
- Adjustable horizontal louver panels
- Sunbrella marine-grade white curtain fabric
- Ceiling-mounted curtain track system
- Quick-dry foam outdoor daybed cushion
- Water-resistant structural deck flooring
15. The Victorian Greenhouse Style Glass Canopy
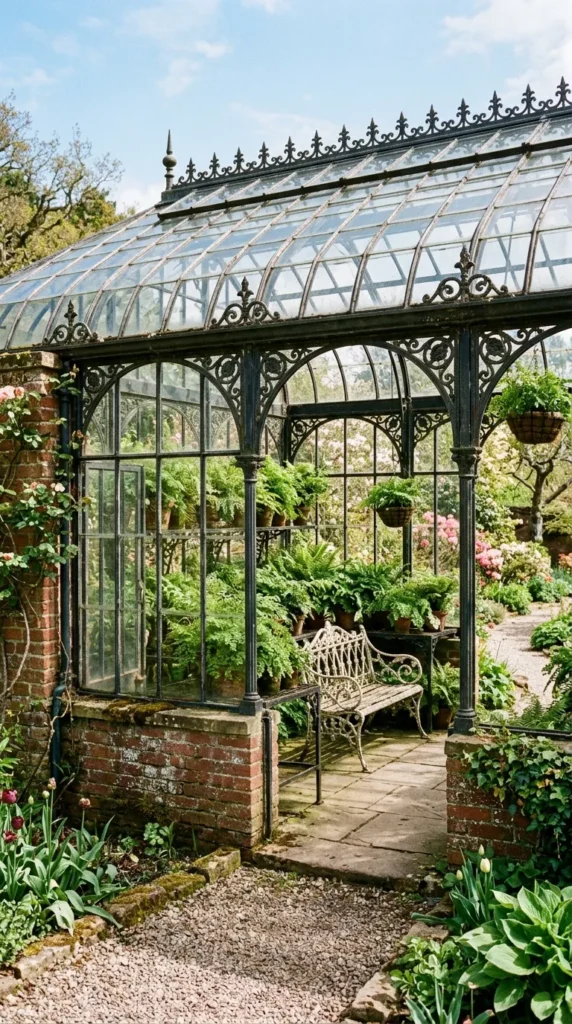
What This Idea Means
Infused with 19th-century conservatory charm, the Victorian Greenhouse Style Glass Canopy uses dark wrought-iron framing, decorative cresting along roof ridges, and paned glass vaults. Functioning as a sunroom-canopy hybrid, it extends outdoor garden enjoyment through sunny spring days and rainy autumn afternoons.
How to Make It
- Brick Base Wall: Lay a low 2-foot brick stem wall using weathered red bricks to anchor the historic design aesthetic.
- Iron Glass Frame: Build or install a Victorian-style wrought-iron greenhouse frame with a steep gabled glass roof atop the brick wall.
- Roof Cresting: Attach ornamental cast-iron roof cresting and finials along the top ridge line.
- Paned Windows: Fit multi-pane glass panels into the iron framework, incorporating top-hinged transom vent windows for air circulation.
- Interior Garden: Fill interior shelves with potted ferns, orchids, vintage potting benches, and iron wire seating.
Tips and Variations
- Ventilation: Install automatic heat-sensitive roof vent openers that push open automatically when interior temperatures rise.
- Shade Cloth: Hang internal vintage cloth roll-up blinds to shade sensitive plants during extreme mid-summer heat spikes.
- Variation: Paint the iron frame deep heritage sage green instead of classic black.
Needs to Make That Thing
- Weathered red bricks and mortar mix
- Wrought-iron or aluminum conservatory glass frame
- Tempered glass pane sheets
- Cast-iron decorative roof cresting and finials
- Automatic hydraulic roof vent openers
- Vintage iron wire outdoor furniture
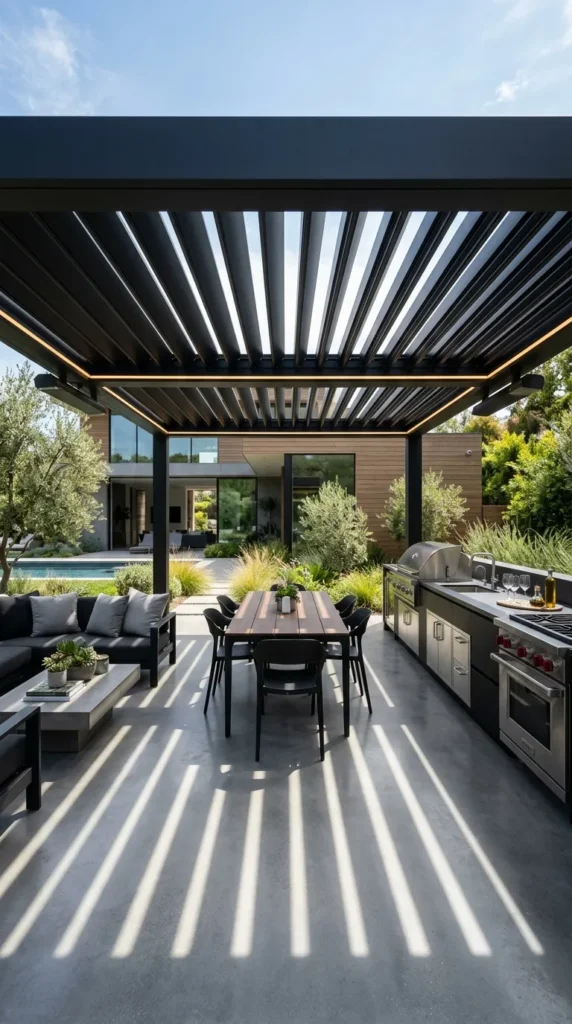
16. The Modern Louvered Aluminum Smart Canopy
What This Idea Means
Representing the peak of modern outdoor engineering, the Modern Louvered Aluminum Smart Canopy features motorized roof louvers that rotate at the touch of a button. Angle the louvers to follow solar movement, open them completely for sunbathing, or close them tight to form a 100% watertight roof during rainstorms.
How to Make It
- Engineered Installation: Install a prefabricated architectural aluminum pergola system anchored onto a concrete foundation slab.
- Motorized Louvers: Mount interlocking extruded aluminum roof louvers connected to an internal 12V motor drive shaft.
- Gutter Integration: Ensure internal gutter channels inside the perimeter beams route rainwater down through hollow support posts.
- Smart Controls: Wire system to a wall switch, smartphone app, or automatic rain sensor that closes louvers at the first raindrop.
- Integrated Lighting: Clip dimmable LED strip lights directly into the undersides of the louver blades for sleek night illumination.
Tips and Variations
- Rain Sensor: A built-in rain sensor is essential; it protects outdoor furniture cushions automatically if rain starts while you are away.
- Heater Mounting: Mount infrared electric patio heaters directly to the upper frame beams for cold winter night usability.
- Variation: Choose a dual-color finish—matte black frame with contrasting warm wood-grain textured louvers.
Needs to Make That Thing
- Prefabricated motorized louvered aluminum pergola kit
- Integrated 12V motor and rain sensor module
- Concrete pad foundation anchors
- Dimmable outdoor LED strip light kit
- Infrared electric patio heaters (optional)
17. The Rustic Timber Frame Fire Pit Canopy
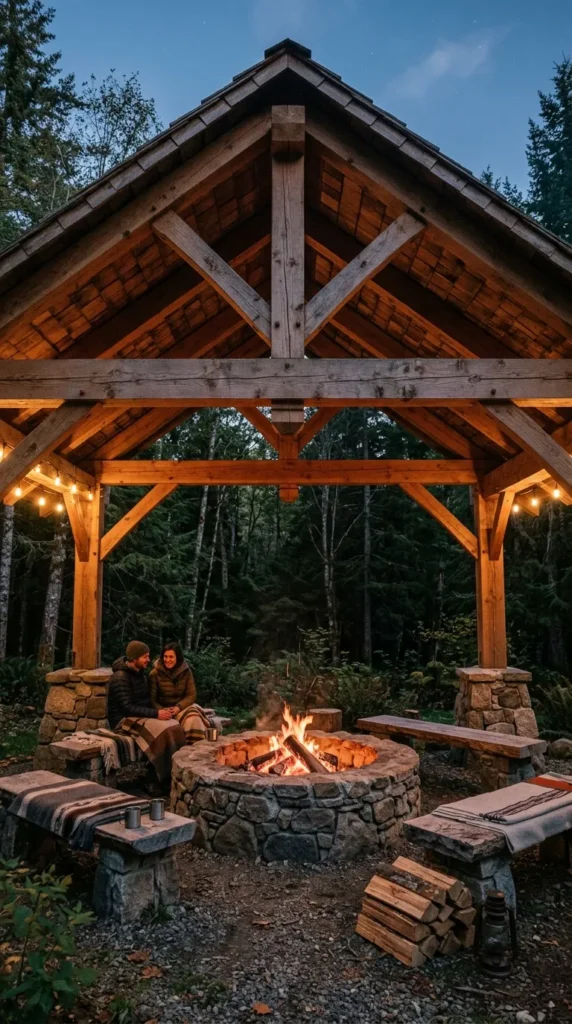
What This Idea Means
Designed to anchor outdoor evening warmth, the Rustic Timber Frame Fire Pit Canopy places a wide timber shelter directly over an outdoor stone fireplace or fire pit ring. Featuring high cathedral ceiling pitches and open sides, it offers a cozy gathering spot protected from rain, falling leaves, and damp night air.
How to Make It
- High Pitch Frame: Construct a heavy timber frame featuring steep 10:12 pitch roof gables to ensure high overhead clearance above fire embers.
- Open Center Vent: Include a cupola roof vent or high peak clearance so smoke escapes freely without accumulating inside.
- Roofing Material: Cover rafters with cedar shakes or slate tiles that complement natural woodland landscapes.
- Fire Pit Center: Build a circular stone fire pit ring in the center, ensuring a minimum 7-foot clearance from fire to timber roof beams.
- Built-in Seating: Frame circular stone or wooden bench seating around the fire pit within the canopy’s perimeter.
Tips and Variations
- Fire Safety: Treat all interior wooden roof beams with non-toxic fire-retardant clear spray coatings.
- Spark Screen: Always place a mesh spark arrestor dome over the fire pit opening to prevent rising embers from touching timber rafters.
- Variation: Replace the open fire pit with an outdoor stone chimney built directly into the rear wall of the canopy.
Needs to Make That Thing
- Heavy rough-sawn Douglas fir or cedar timbers
- Cedar shake or natural slate roof shingles
- Fieldstone masonry mix for fire pit
- Metal spark arrestor screen dome
- Fire-retardant clear wood treatment spray
- Built-in stone bench materials
18. The Fairytale Curved Thatch Roof Pavilion
What This Idea Means
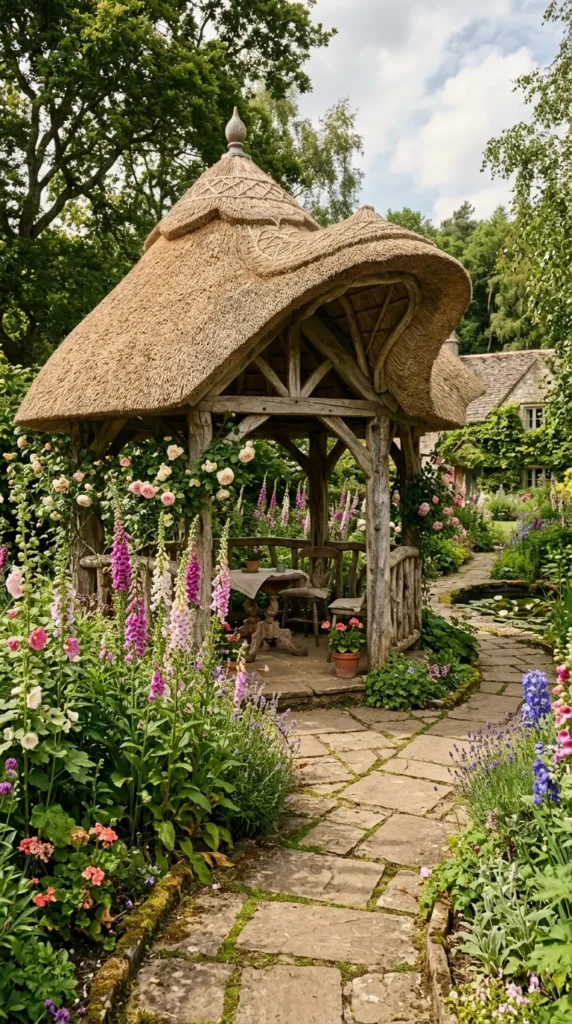
Straight out of a storybook, the Fairytale Curved Thatch Roof Pavilion replaces rigid geometric angles with organic, sweeping curves and thick thatched roofing. Surrounded by cottage gardens, blooming foxgloves, and winding flagstone paths, this canopy feels like a enchanted forest hideaway.
How to Make It
- Curved Timber Frame: Steam-bend or construct curved timber roof rafters that swoop upward gracefully at the corners.
- Thatch Layering: Apply synthetic or natural water-reed thatch roofing in dense overlapping layers, building a soft 8-inch roof thickness.
- Rustic Posts: Support the roof using un-peeled, natural tree trunk posts showing authentic bark texture and wood knots.
- Organic Eaves: Trim thatch edges into rolling, wave-like curves along the eaves rather than sharp straight lines.
- Storybook Detailing: Install a heavy timber bench inside, flanked by copper lantern lights and climbing honeysuckle.
Tips and Variations
- Synthetic Thatch: Synthetic reed thatch lasts over 20 years, offers total waterproofing, and does not attract nesting birds compared to natural straw.
- Natural Post Sealing: Coat raw tree trunk posts with clear exterior preservative to stop bark peeling over time.
- Variation: Add a small stone chimney protruding through the thatched roof for a cozy wood-stove installation.
Needs to Make That Thing
- Natural round tree trunk support posts
- Curved steam-bent roof rafters
- Synthetic or natural water-reed thatch panels
- Clear exterior wood preservative
- Flagstone pathway pavers
- Vintage copper lanterns
19. The Floating Cantilever Modern Canopy
What This Idea Means
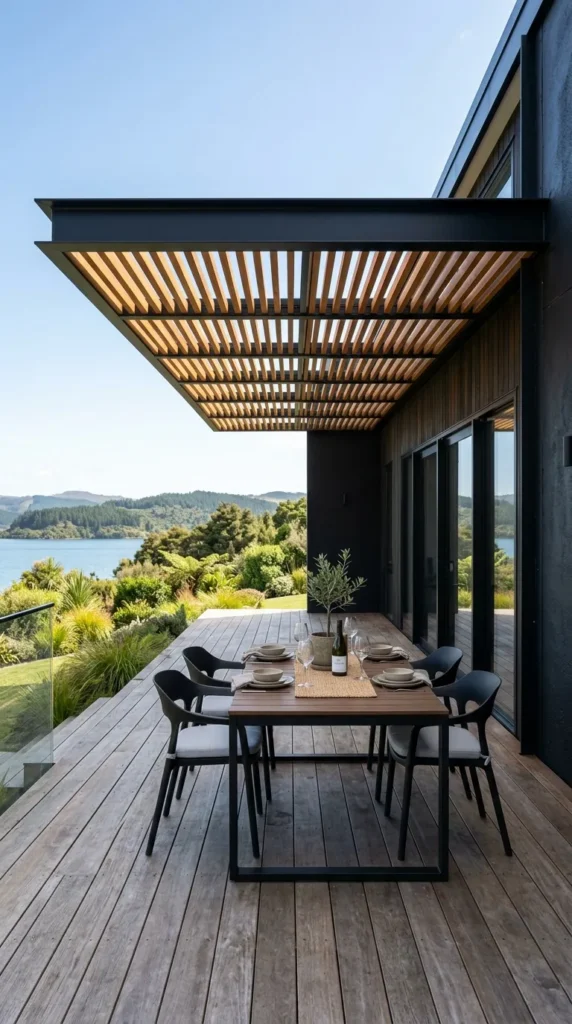
Defying gravity with minimalist elegance, the Floating Cantilever Modern Canopy features a roof structure anchored entirely from one side, eliminating front vertical support posts. This creates wide, unobstructed views and open floor space ideal for compact urban patios or seamless poolside lounging.
How to Make It
- Deep Footing: Pour a heavy, steel-reinforced concrete counterweight foundation deep under the back installation zone.
- Steel Frame: Bolt thick structural steel L-shaped posts to the footing, extending forward overhead without front supports.
- Roof Panel: Attach a lightweight aluminum or slatted composite timber roof panel to the cantilevered steel arms.
- Sleek Finishes: Paint all metalwork in matte charcoal gray or bronze to emphasize clean lines.
- Space Optimization: Place outdoor dining tables or sun loungers underneath without having to navigate around corner posts.
Tips and Variations
- Engineering Precision: Always consult a structural engineer to calculate proper foundation counterweights based on roof length and wind uplift forces.
- Integrated Blind: Install a drop-down vertical solar shade inside the floating front edge to block low afternoon sun angles.
- Variation: Combine wood-composite slats with embedded LED light strips along the floating cantilever undersides.
Needs to Make That Thing
- Reinforced concrete counterweight foundation
- Custom structural steel cantilever frame
- Lightweight composite timber or aluminum roof panels
- Heavy anchor bolts and rebar cage
- Matte charcoal exterior enamel
- Drop-down vertical solar shade
20. The Eco-Friendly Living Green Roof Canopy
What This Idea Means
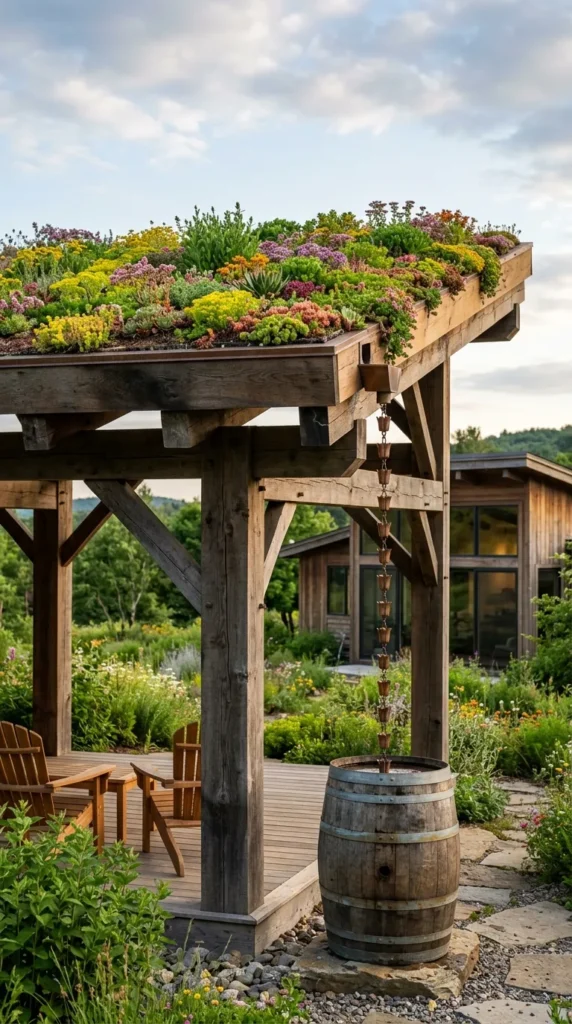
Combining environmental sustainability with striking architectural visual appeal, the Eco-Friendly Living Green Roof Canopy features a flat or gently sloped roof planted with hardy sedums, succulents, and local wildflowers. This canopy blends into garden landscapes, insulates seating below, and provides a habitat for pollinators.
How to Make It
- Reinforced Joists: Build a heavy-duty load-bearing timber frame using 2×8 or 2×10 roof joists designed to support wet soil weight (30+ lbs/sq. ft.).
- Waterproof Membrane: Lay a continuous, root-permeable-resistant EPDM rubber membrane over the wooden roof deck, wrapping edges upward into a tray shape.
- Drainage Layer: Lay drainage matting, filter fabric, and a 4-inch layer of lightweight green roof soil substrate.
- Planting: Plant drought-tolerant sedums, creeping thyme, and local meadow flowers across the soil layer.
- Rain Collection: Route roof drainage spouts directly into an adjacent decorative rain barrel or garden rain chain setup.
Tips and Variations
- Plant Selection: Use hardy sedums; they store water efficiently, require no regular mowing, and thrive in full sun conditions.
- Structural Load: Ensure structural framing accounts for maximum winter snow load layered on top of wet soil.
- Variation: Integrate small off-grid solar panels alongside green roof vegetation to power warm LED night lighting.
Needs to Make That Thing
- Heavy 2×8 or 2×10 structural load-bearing timber joists
- EPDM rubber waterproof membrane
- Root barrier film and green roof drainage matting
- Lightweight green roof engineered soil mix
- Pre-grown sedum mats or succulent plugs
- Decorative rain chain or collection barrel
Discover more from Mrs Celebs
Subscribe to get the latest posts sent to your email.