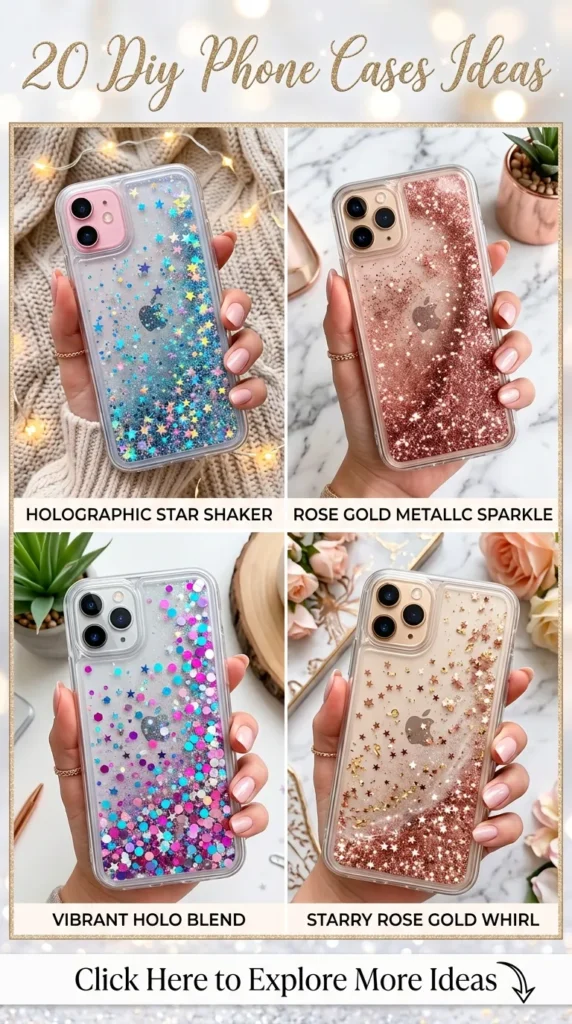
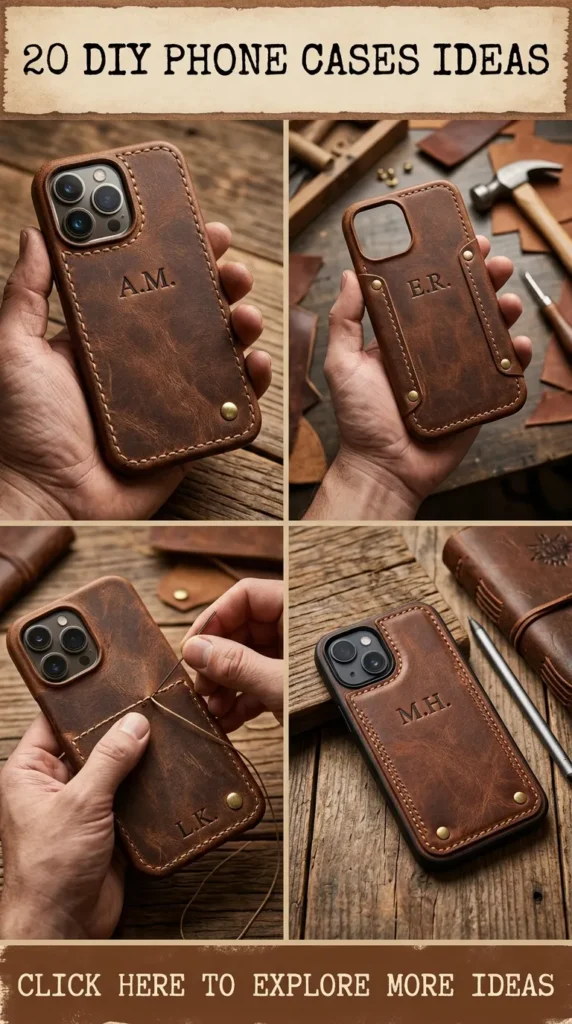
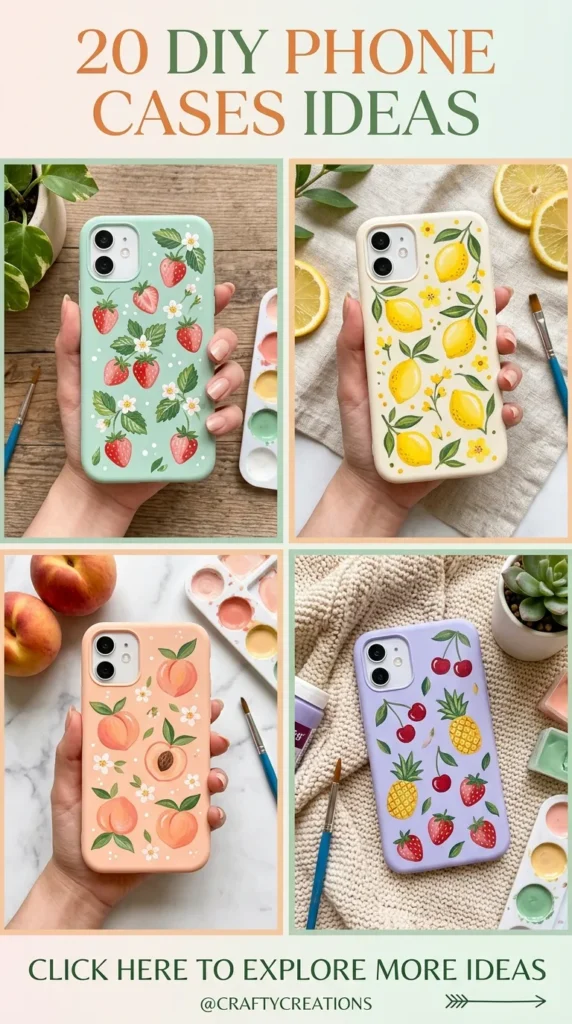
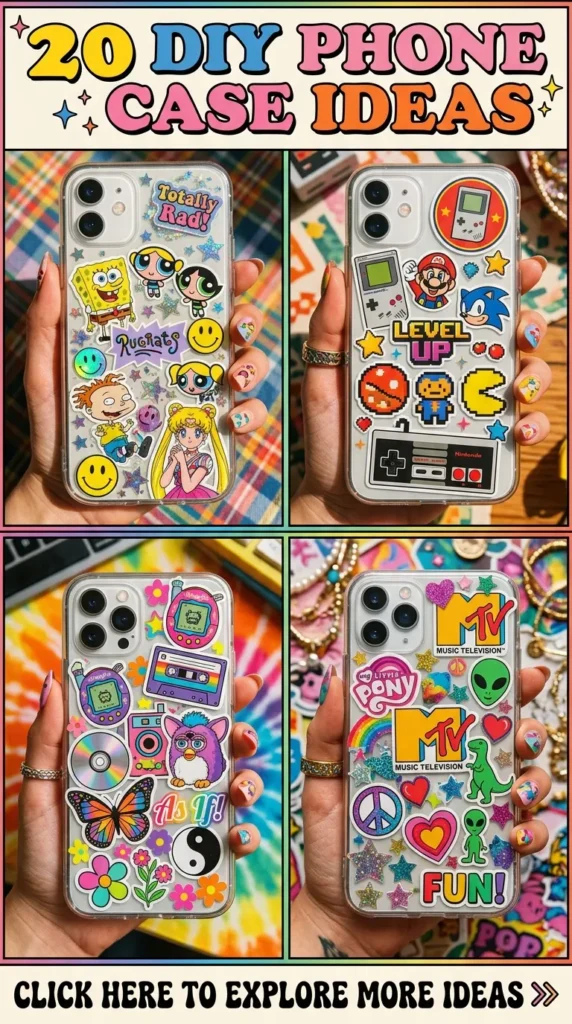
Personalizing a phone case is one of the most accessible ways to blend everyday functionality with self-expression. A custom case serves as a portable mood board, an artistic outlet, and a statement piece that complements your daily wardrobe.
Below is an extensive handbook featuring 20 tactile, durable, and aesthetic DIY phone case projects designed to elevate clear and plain blanks into bespoke accessories.
Essential Starter Kit: Tools & Materials
Before beginning any project, gather a reliable set of foundational tools to ensure clean finishes and long-lasting durability:
- Case Blanks: Clear flexible TPU cases, rigid polycarbonate hard-shells, or matte silicone cases in neutral tones.
- Surface Preparation: 70% to 90% Isopropyl alcohol and lint-free microfiber cloths to eliminate oils, dust, and fingerprints.
- Adhesives: Two-part clear casting epoxy resin, UV resin with a 36W UV/LED curing lamp, industrial craft adhesive (E6000 or B-7000 with precision applicator tips), and matte/gloss Mod Podge.
- Precision Tools: Micro-tip craft tweezers, silicone-tipped sculpting tools, precision craft knives with fresh #11 blades, masking tape, and silicone mixing cups.
- Finishing & Safety: Nitrile gloves, a fine-mist clear acrylic sealing spray, and a ventilated workspace.
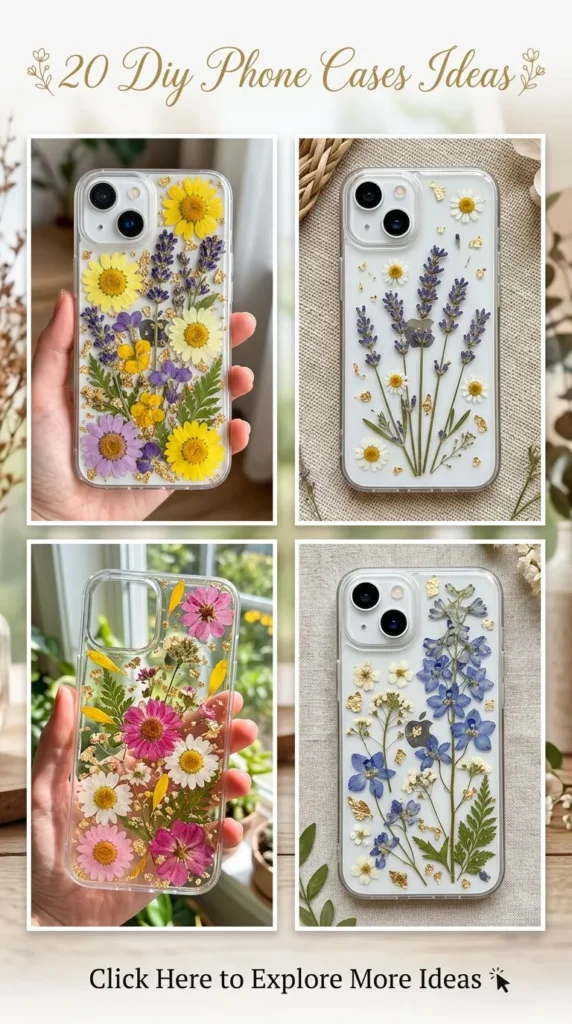
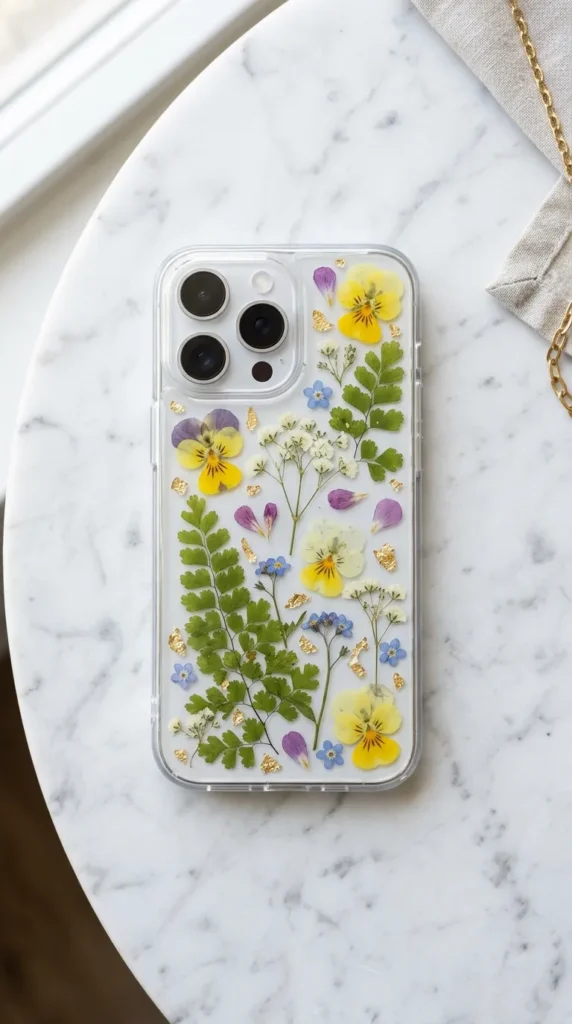
1. Botanical Meadow: Real Pressed Wildflowers & Clear Epoxy
Concept & Aesthetic Vision
The Botanical Meadow case captures preserved nature within a glass-like shell. Drawing inspiration from vintage herbarium sheets and cottagecore aesthetics, this design suspends delicate botanical specimens—such as baby’s breath, miniature pansies, laceflowers, and maidenhair fern fronds—inside an ultra-glossy resin layer.
Materials Required
- Clear hard-back TPU/PC hybrid phone case
- Assorted dry, flat-pressed flowers and foliage
- Two-part clear casting epoxy resin (or clear UV craft resin)
- Fine-tip tweezers, wooden stir sticks, and silicone mixing cups
- Toothpick and a heat tool or lighter (for popping bubbles)
Step-by-Step Instructions
- Prep the Surface: Clean the exterior surface of your clear case using isopropyl alcohol. Allow it to air-dry completely in a dust-free area.
- Dry Layout: Place the clear case flat. Using tweezers, test different floral arrangements directly on the case back before applying adhesive. Keep thicker stems near the edges and delicate petals centered.
- Tack Down the Botanicals: Place a tiny dot of clear craft glue or UV resin behind each pressed leaf and flower. Lightly press them onto the case to secure their positions and prevent floating during the resin pour.
- Mix the Resin: Mix your two-part epoxy resin according to package directions (typically a 1:1 ratio by volume), stirring gently for three full minutes to minimize air entrapment.
- Pour and Spread: Slowly pour a small puddle of resin along the center spine of the case. Use a flat wooden stick or silicone brush to guide the resin outward toward the edges, ensuring it covers all flower surfaces without spilling over the camera ring or perimeter lip.
- De-gas and Cure: Hover a small torch or heat gun roughly 4 inches above the resin for 1–2 seconds to burst surface micro-bubbles. Cover the case with a clean upside-down plastic container to shield it from ambient dust. Allow it to cure undisturbed for 24 to 48 hours.
Pro Tips & Creative Variations
- Color Preservation: Seal dried flowers with a light mist of matte acrylic sealer prior to resining to avoid dark, wet spots on thin white or yellow petals.
- Gilded Accents: Incorporate small flecks of gold leaf among the botanical leaves for subtle luminescence.
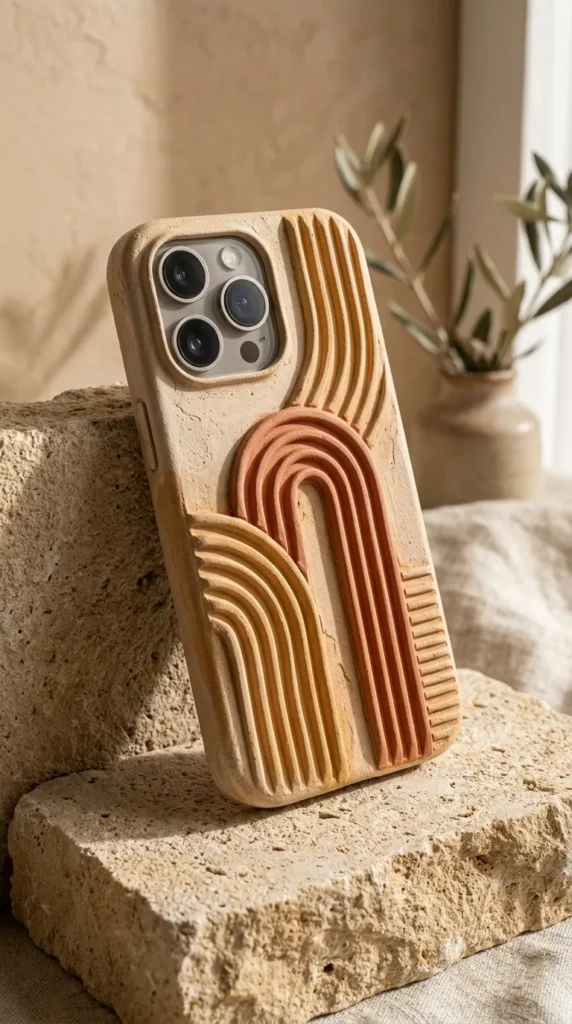
2. Tuscan Terracotta: Textured Plaster & Mediterranean Arches
Concept & Aesthetic Vision
Inspired by sun-bleached European architecture and minimalist organic interiors, this tactile design features raised geometric arches, soft sweeping curves, and an earthy, sand-textured finish reminiscent of ancient clay facades.
Materials Required
- Rigid, solid-color phone case (cream, taupe, or warm stone)
- Fine modeling paste or dimensional plaster medium
- Palette knives with flexible angled blades
- Medium-grit and ultra-fine sandpaper
- Matte acrylic paints in beige, raw umber, and warm terracotta
- Ultra-matte polyurethane varnish
Step-by-Step Instructions
- Surface Abrasion: Lightly scuff the entire back of the hard phone case using medium-grit sandpaper. Wipe clean with rubbing alcohol to ensure mechanical adhesion.
- Base Layer Sculpting: Scoop a dollop of modeling paste onto the case. Use an angled palette knife to build up 2 mm to 3 mm thick raised arches and stepped platforms.
- Texture Application: Tap the flat face of the palette knife against the wet paste to create subtle, weathered stucco textures across flat areas.
- Drying: Let the paste air-cure completely at room temperature for 12 to 18 hours until rock-hard.
- Color Blending: Wash a dilute mixture of raw umber and terracotta acrylic paint over the dried relief. Use a damp cloth to buff away paint from high points, creating natural shadow and depth inside recessed grooves.
- Matte Sealing: Apply two light coats of non-yellowing ultra-matte varnish to lock in the plaster and prevent moisture absorption.
Pro Tips & Creative Variations
- Sand Blending: Fold a teaspoon of fine silica sand directly into your modeling paste before application to achieve a coarser stone finish.
- Color Blocking: Paint individual structural arches in contrasting muted pastels, such as sage green and dusty rose.
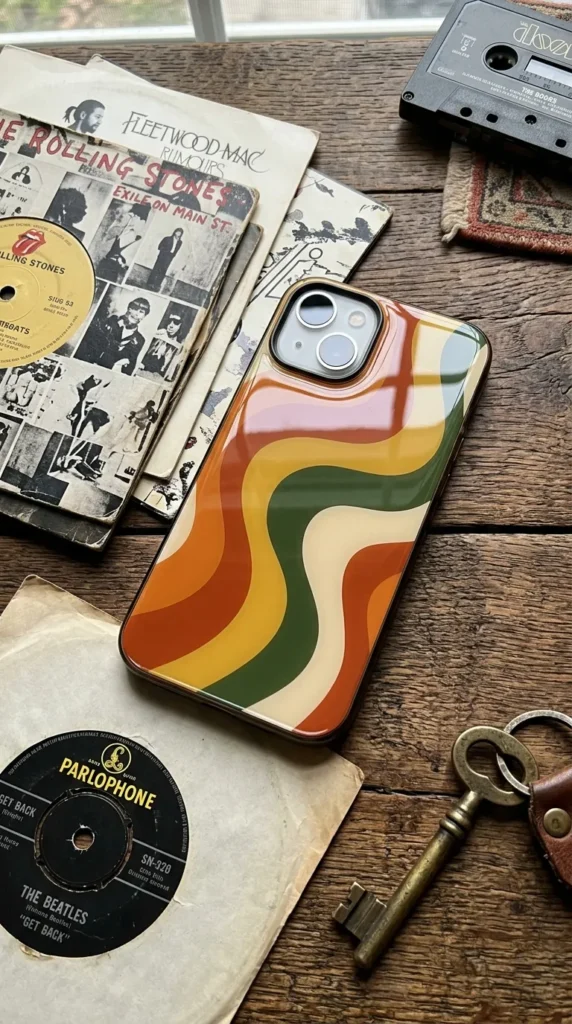
3. High-Gloss Retro Swirls: 70s Waves & Vibrant Enamels
Concept & Aesthetic Vision
Energetic, fluid, and nostalgic, this aesthetic harnesses wavy, intertwining lines influenced by late-60s and 70s psychedelic poster design. Alternating bands of deep moss, mustard yellow, warm cream, and rich burnt orange form a groovy, fluid statement.
Materials Required
- Matte plastic or polycarbonate phone case
- Fine-point acrylic paint pens or multi-surface oil-based enamel markers
- Precision liner brush and liquid acrylics
- Masking or fine-line automotive vinyl tape
- High-gloss liquid clear coat or UV topcoat
Step-by-Step Instructions
- Prepare Base: Scuff the hard case lightly with 1000-grit wet sandpaper and clean with alcohol.
- Sketch Contour Lines: Use a light watercolor pencil to map out smooth, rhythmic, S-shaped waves across the back of the case.
- Color Blocking: Fill each ribbon of the design with opaque paint pens or fluid acrylics using a liner brush. Apply 2–3 thin, uniform layers rather than one heavy coat, allowing 20 minutes between passes.
- Refine Edges: Once dry, trace the seam lines between colors with a crisp white, black, or metallic bronze fine-line pen to sharpen definition.
- Gloss Topcoat: Apply a leveling layer of high-gloss clear epoxy resin or triple-thick brush-on gloss glaze. Cure fully to yield a glassy, reflective surface.
Pro Tips & Creative Variations
- Colorway Adaptation: Shift from retro warm tones to an icy cool palette featuring lavender, baby blue, matcha green, and optic white.
- Negative Space: Create swirls on a transparent clear case, letting the original phone’s metallic backplate show through as one of the colored stripes.
4. Vintage Decoupage: Romantic Ephemera & Antique Postage
Concept & Aesthetic Vision
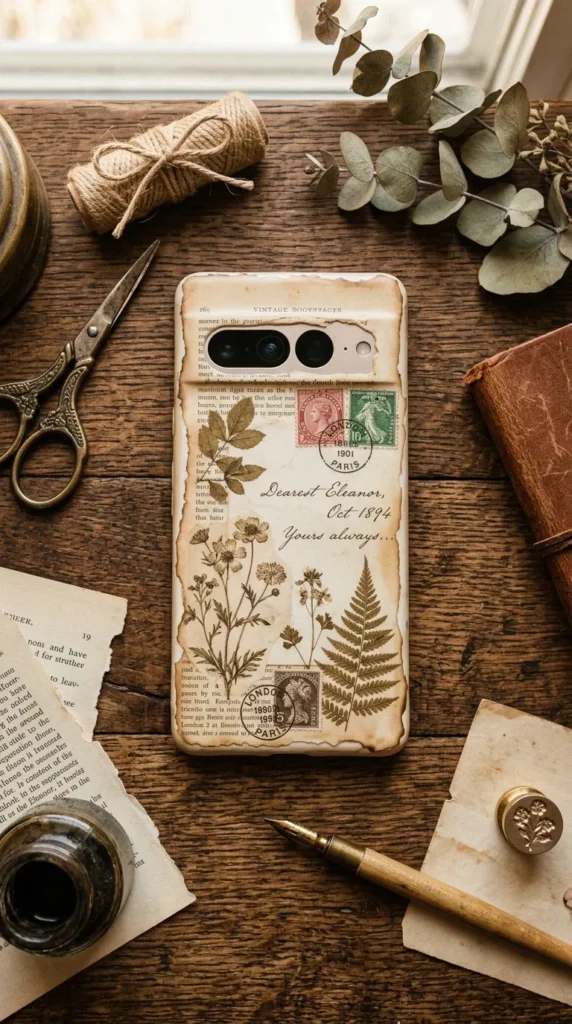
This design layers antique botanical diagrams, vintage cancellation stamps, handwritten love letters, and old book pages into a tactile, nostalgic collage. It turns your tech into an artifact reminiscent of a flea-market discovery.
Materials Required
- Solid white or clear phone case
- Assorted vintage ephemera: authentic old stamps, dictionary clippings, music sheets, botanical illustrations
- Matte Mod Podge or decoupage medium
- Flat synthetic brush
- Distress ink pad (tea stain or walnut brown)
- Satin clear finishing spray
Step-by-Step Instructions
- Source & Prep Ephemera: Tear paper clippings by hand along the edges to create soft, feathered paper fibers rather than hard scissor cuts.
- Age the Edges: Lightly drag an ink pad or a brewed tea bag along the torn edges of each paper piece to create an antique, sun-aged gradient.
- Dry Layout: Arrange and layer the clippings, overlapping corners until the composition feels balanced and fully covers the rear surface.
- Adhere Layers: Apply a thin, even coat of Mod Podge to the case back. Place down the base papers first, smoothing out trapped air bubbles with your thumb from the center outward.
- Seal the Surface: Brush two generous layers of Mod Podge across the entire decoupage, letting it dry for 45 minutes between coats.
- Protective Coat: Spray the cured decoupage with a weather-resistant satin acrylic sealer to guard against moisture and hand oils.
Pro Tips & Creative Variations
- Parchment Thinning: If using heavy paper or magazine stock, peel away the bottom layer of paper backing after wetting it slightly to make it more pliable around case contours.
- Foil Stamping: Add tiny flecks of antique bronze gilding leaf along the margins between torn paper layers.
5. Cosmic Agate Slice: Liquid Marble & Gold Leaf Veining
Concept & Aesthetic Vision
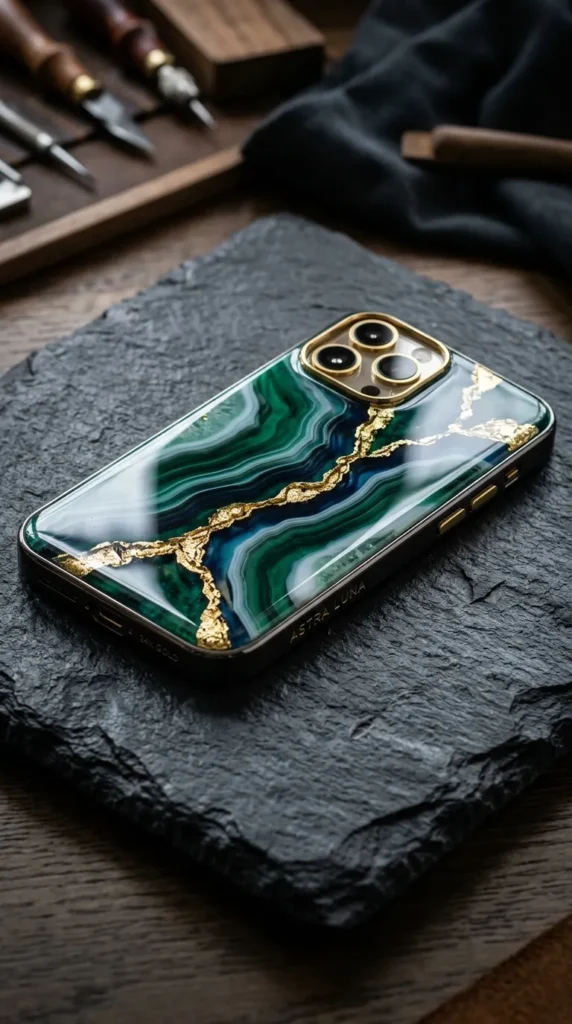
Emulating the polished cross-section of a natural geode, this project combines translucent resin tinting, fluid acrylic marble veins, and jagged fissures of shimmering metallic leaf to evoke natural rock formations.
Materials Required
- Clear or white hybrid phone case
- Pouring acrylic paints or alcohol inks (deep emerald, navy, or amethyst paired with white)
- Imitation gold leaf sheets and metal leaf sizing glue
- Two-part clear epoxy resin
- Fine detailing liner brush and isopropyl alcohol spray
Step-by-Step Instructions
- Base Pour Setup: Elevate the phone case on top of two small cups over a silicone work mat.
- Blend Inks & Fluid Paint: Mix small batches of clear resin tinted with transparent blue/green alcohol inks alongside an opaque white resin batch.
- Pour Agate Bands: Pour concentric rings of tinted and opaque resins across the case back. Use a popsicle stick to gently drag through the rings, creating fluid geode bands.
- Texturize Cells: Lightly spritz a mist of 91% rubbing alcohol onto the wet resin to generate cellular lacing patterns across the surface.
- Gilding Veins: Once the resin reaches a tacky, gel-like state (roughly 3–4 hours in), lay torn flakes of gold leaf along selected fracture lines using dry tweezers.
- Top Flood Coat: After full curing (24 hours), apply a final, razor-thin clear resin flood coat to seal the gold leaf beneath a flat lens of gloss.
Pro Tips & Creative Variations
- Raw Crystal Border: Glue crushed glass shards or raw mini quartz chips around the outer perimeter of the camera bumper before pouring the final topcoat.
- Monochrome Quartz: Use shades of slate gray, smoke, translucent milk, and silver leaf for an icy marble aesthetic.
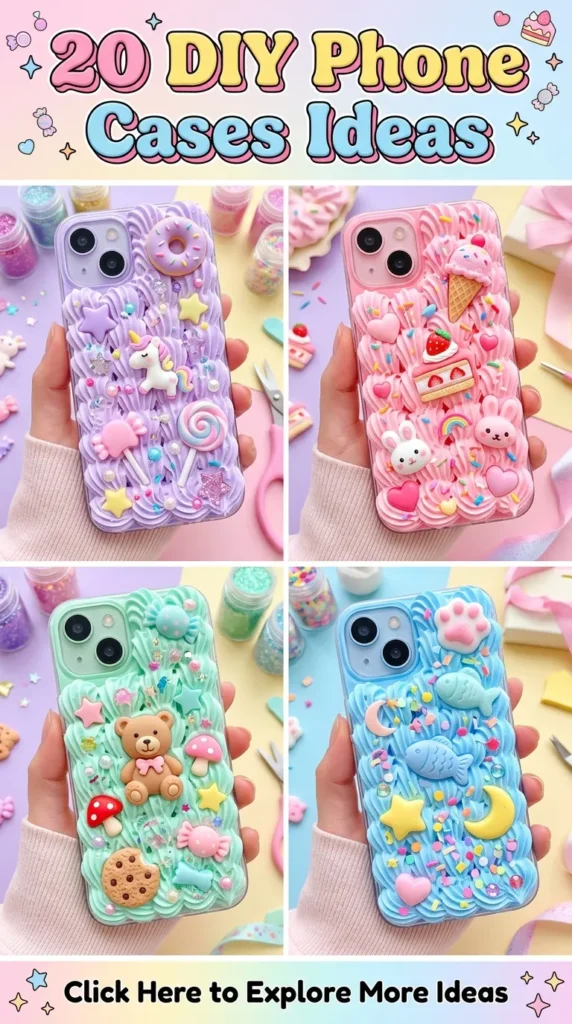
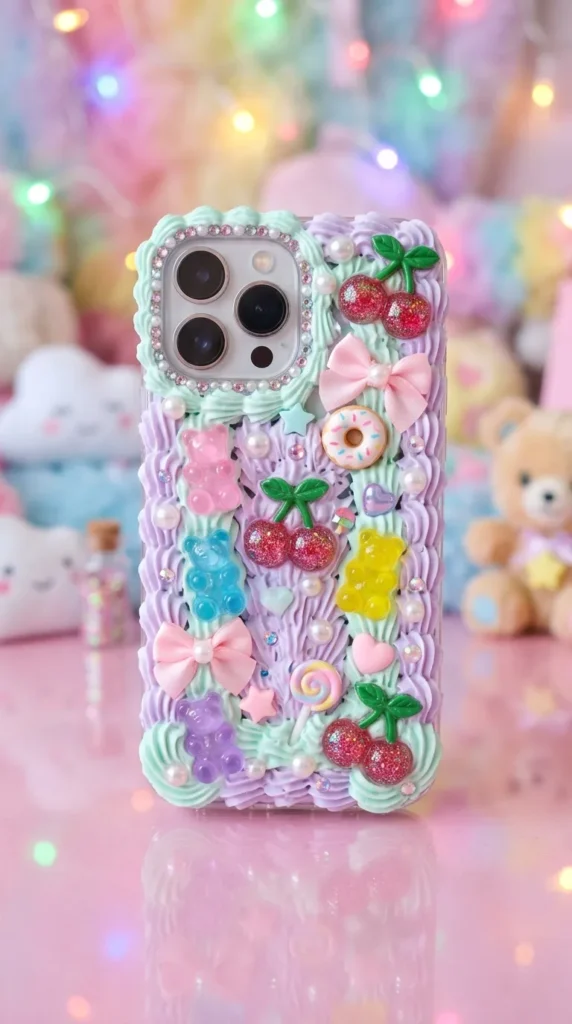
6. Y2K Chunky Decoden: Whipped Clay, Cabochons & Pearl Beads
Concept & Aesthetic Vision
An homage to Harajuku decoden culture and early 2000s maximalism, this tactile, dimensional case uses piping clay formulated to mimic cake frosting, adorned with pastel charms, faux pearls, and miniature plastic confections.
Materials Required
- Sturdy opaque hard plastic phone case
- Piping cream clay (Deco Cream) with assorted star and round piping tips
- Assorted resin cabochons (bows, gummy bears, cherries, heart charms)
- Mixed sizes of flat-back faux half-pearls
- Pointed tweezers
Step-by-Step Instructions
- Prep Case: Lightly sand the hard case backing and wipe it dry.
- Attach Piping Tip: Secure your preferred star tip onto the piping cream clay bag. Squeeze out a test strip onto scrap cardboard to check the consistency.
- Pipe the Frosting: Pipe overlapping ruffles, rosettes, or shell borders across the entire back of the case, working smoothly from top to bottom.
- Embed Charms: Immediately press the heaviest resin cabochons into the wet clay bed using firm, gentle downward pressure.
- Scatter Pearls: Use fine-tip tweezers to nestle smaller filler pearls and rhinestones into the gaps between larger charms.
- Cure: Allow the piped cream clay to air-dry at room temperature for 48 to 72 hours. Do not use heat tools, as rapid drying can cause the clay to crack.
Pro Tips & Creative Variations
- Ombré Frosting: Load two contrasting clay colors (such as baby blue and lavender) side-by-side into the same piping bag for two-tone frosting swirls.
- Clean Camera Clearance: Always keep the clay boundary at least 3 millimeters away from the camera lens bezel to prevent casting shadows in wide-angle photos.
7. Moody Monochrome: Abstract Line Art & Negative Space
Concept & Aesthetic Vision
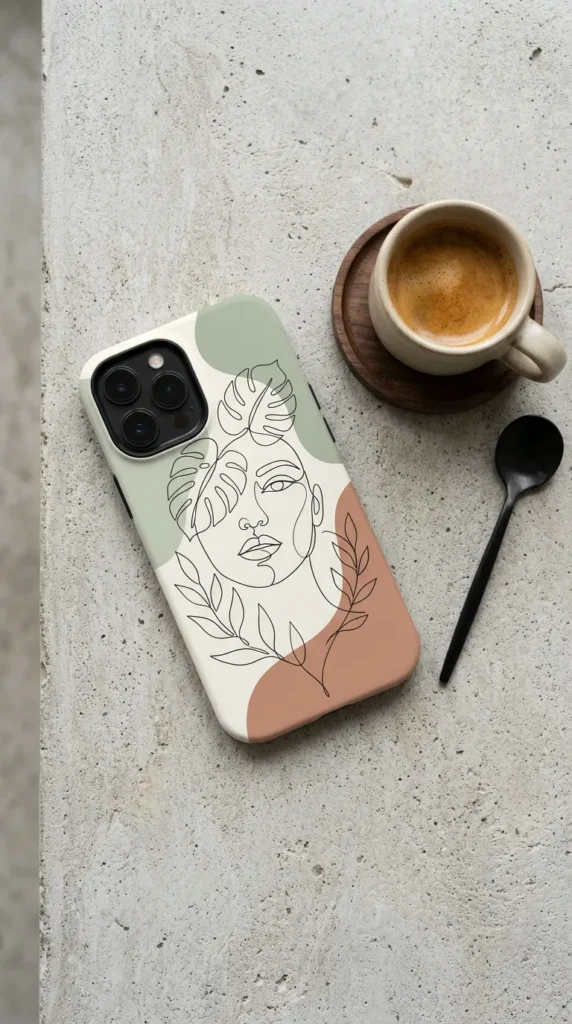
Rooted in mid-century Scandinavian illustration and modern contour drawing, this case pairs continuous single-line figures, botanical contours, or abstract faces with raw negative space.
Materials Required
- Clear or solid matte white phone case
- Ultra-fine tip oil-based paint marker (0.5 mm or 0.7 mm, black)
- Tracing paper, graphite transfer pencil, or printout guide
- Rubbing alcohol and cotton swabs (for spot corrections)
- Matte clear coat sealer spray
Step-by-Step Instructions
- Formulate Design: Draw or print out a continuous line illustration scaled precisely to your phone’s dimensions, taking the camera opening into account.
- Transfer Guide: If using a clear case, slip the printed sketch directly underneath the transparent back to use as a direct tracing guide. For opaque cases, shade the back of the paper with a soft graphite pencil, tape it over the case, and trace the line firmly to transfer a light graphite outline.
- Draw Continuous Lines: With steady, moderate pressure, trace the lines using your oil-based black paint pen. Strive for a fluid, unbroken motion.
- Correct Mistakes: If a line wobbles, immediately dip a pointed cotton swab in rubbing alcohol to wipe away the error and redraw the stroke.
- Dry & Protect: Allow the oil-based ink to cure for 6 hours. Apply two light mists of matte acrylic sealing spray to prevent the linework from wearing off with daily handling.
Pro Tips & Creative Variations
- Earthy Tone Blocks: Paint irregular, soft-edged color splotches in ochre, olive, or terracotta behind the linework before drawing the final contours.
- Dual-Line Metallic: Accentuate key facial or leaf contours with a secondary line of mirror-finish gold or silver chrome ink.
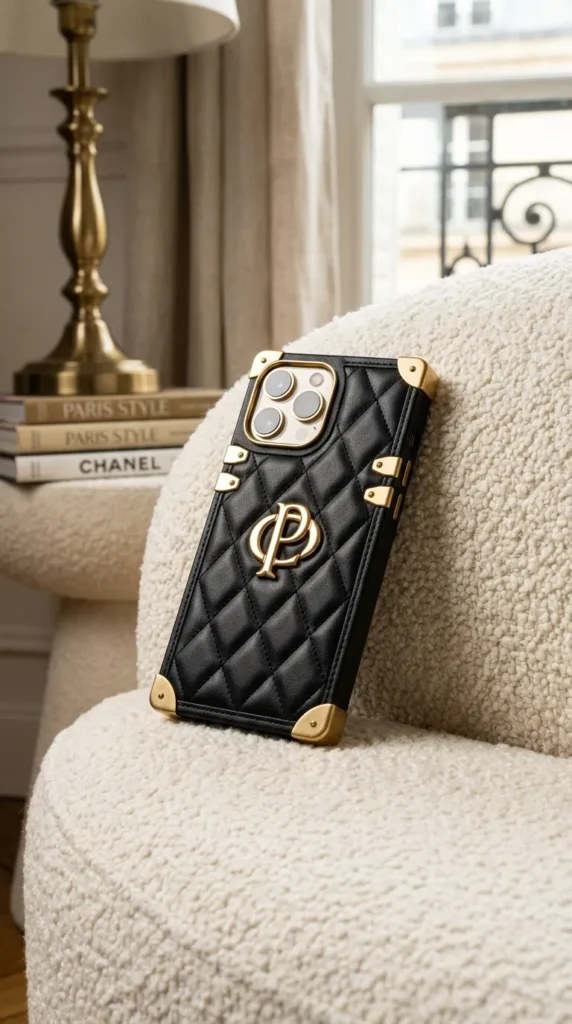
8. Parisian Chic: Quilted Faux Leather & Gold Monograms
Concept & Aesthetic Vision
Channelling haute couture leather goods, this case features a padded diamond-quilted faux leather panel accented with gold corner protectors and a personalized metallic monogram.
Materials Required
- Hard phone case with a flat back recess
- Thin vegan leather (PU leather) in black, cream, or blush
- Thin craft foam sheet (1 mm thickness)
- Flexible leather contact cement or heavy-duty double-sided adhesive film
- Sewing machine or fine-line scoring tool
- Metal adhesive monogram charms and vintage book corners
Step-by-Step Instructions
- Template Cutting: Trace your phone case’s flat back dimensions onto paper, factoring in the camera cutout. Cut your PU leather and thin foam to this exact outline.
- Quilt Pattern Scoring: Sandwich the foam behind the vegan leather. Mark diamond grid lines using tailor’s chalk. Sew down the lines using matching thread, or firmly press a heated dull scoring tool along a metal ruler to emboss diamond grooves into the faux leather.
- Adhere Layers: Coat the back of the quilted panel and the phone case backplate with contact cement. Allow it to become tacky for 3 minutes, then align and press firmly together.
- Install Corner Hardware: Dab jewelry glue onto the inside notches of miniature metal corners and slide them over the perimeter edges of the leather panel.
- Affix Monogram: Center your metal monogram letters and press them into the leather bed with industrial adhesive. Weight down the assembly under a flat book for 4 hours.
Pro Tips & Creative Variations
- Thread Accents: Use a contrasting metallic gold thread on matte black leather for a luxury tailored look.
- Card Pocket: Stitch an angled horizontal slip pocket onto the leather panel before mounting it to hold an essential transit or payment card.
9. Denim Patchwork: Upcycled Textile Collage & Raw Edge Fringe
Concept & Aesthetic Vision
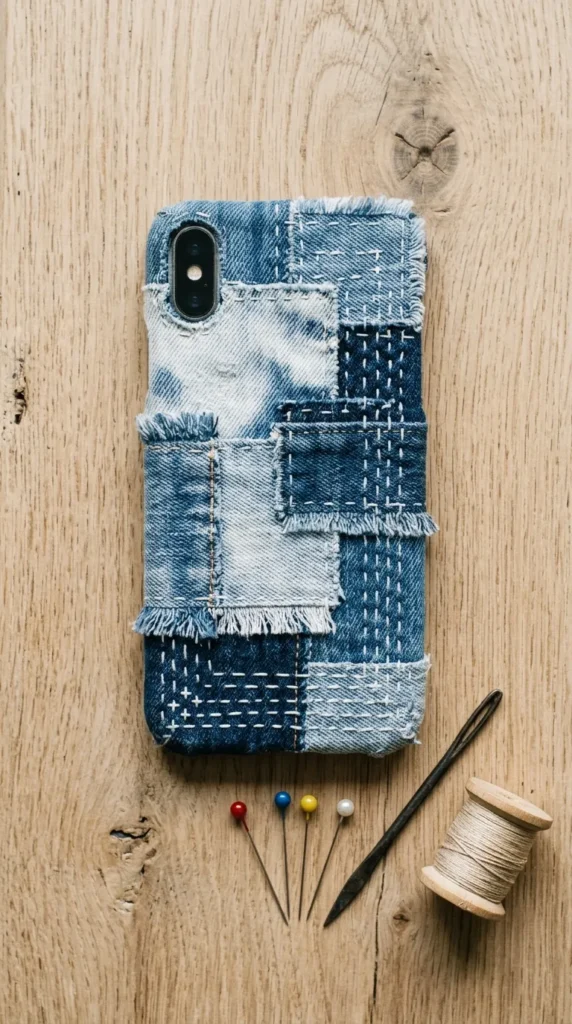
An eco-conscious, streetwear-inspired design constructed from fragments of repurposed vintage denim. Contrasting washes, exposed selvedge lines, and frayed textile edges create a rich tactile experience.
Materials Required
- Flexible TPU phone case
- Discarded denim garments across multiple washes (stonewash, indigo, raw, bleached)
- Fabric adhesive or flexible craft glue
- Rotary fabric cutter and self-healing mat
- Embroidery needle and thick sashiko or denim thread
Step-by-Step Instructions
- Fabric Harvesting: Cut your denim scrap into varied geometric shapes: small rectangles, diagonal strips, and chevron bands.
- Fraying the Edges: Use an embroidery needle or seam ripper to pull horizontal threads from the patch borders, exposing raw fringed edges.
- Accent Stitching: Hand-sew small Japanese Sashiko patterns (crosses, parallel dashes) through selected patches using cream thread.
- Collage Assembly: Coat the back of the case with a smooth layer of fabric glue. Lay down your denim patches, overlapping the frayed margins to create dynamic visual layers.
- Trim Edges: Allow the glue to cure for 4 hours. Flip the case over and trim any excess fabric flush with the phone case perimeter using a fresh craft blade.
- Edge Sealing: Run a microscopic bead of clear fabric glue or seam sealant along the cut perimeter to prevent unraveling.
Pro Tips & Creative Variations
- Jean Pocket Feature: Salvage the miniature watch/coin pocket from an old pair of jeans and center it onto the case back to double as a functional lip-balm holder.
- Bleach Stenciling: Paint micro checkerboards or leaf shapes onto dark indigo scraps with diluted bleach before gluing.
10. Checkered Retro Picnic: Soft Pastel Gingham Hand-Paint
Concept & Aesthetic Vision
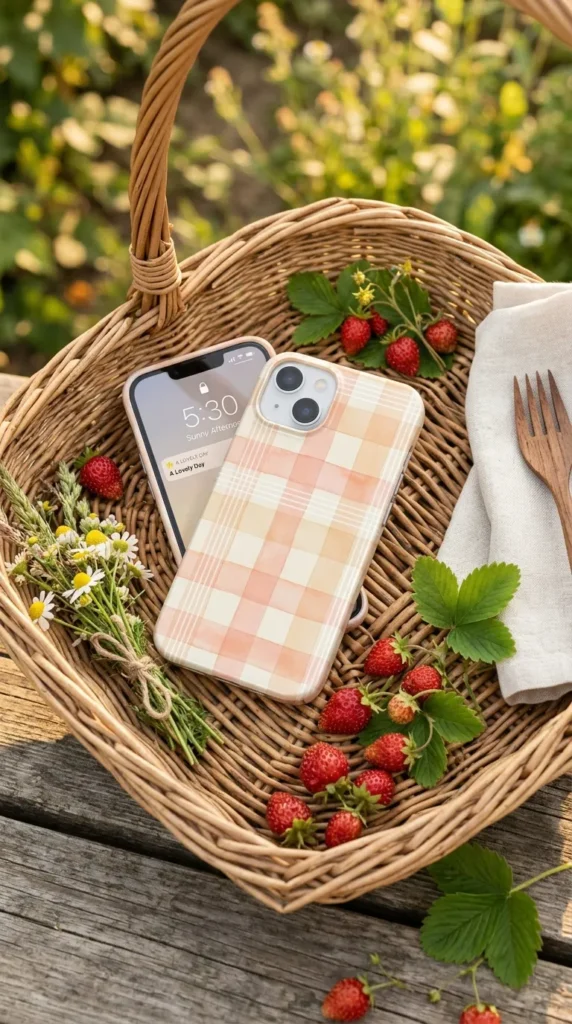
Bright, playful, and cheerful, the gingham checker pattern evokes spring picnics and indie-pop fashion. Translucent intersecting vertical and horizontal brushstrokes produce a classic layered check effect.
Materials Required
- Solid white or pastel-toned matte phone case
- Semi-translucent acrylic craft paints (e.g., lavender, peach, or mint)
- Flat wash brush (1/4-inch or 1/2-inch wide)
- Grid ruler and low-tack painter’s tape
- Satin protective topcoat spray
Step-by-Step Instructions
- Grid Layout: Use a light watercolor pencil to draw evenly spaced vertical and horizontal balance lines across the case back.
- First Stripe Series: Tape off alternating vertical sections. Dip your flat brush in slightly diluted, semi-transparent paint and lay down consistent vertical stripes in single, clean strokes. Let dry for 15 minutes.
- Horizontal Intersection: Tape off and paint the alternating horizontal stripes with the same semi-translucent paint. The overlapping points will naturally double in opacity, creating the iconic gingham gingham check.
- Accent Line: Once the base grid is dry, use a fine liner brush and an opaque cream or contrasting hue to paint a thin pinstripe through the center of every primary check band.
- Seal: Allow paint to dry for 2 hours, then seal the entire surface with two even coats of satin acrylic varnish.
Pro Tips & Creative Variations
- Wavy Grid Variant: Hand-paint the checkerboard freehand without painter’s tape, intentionally allowing the stripes to wobble slightly for an expressive, hand-drawn look.
- Micro Charm Accents: Superglue miniature strawberry or daisy resin flat-back charms at select grid intersections.
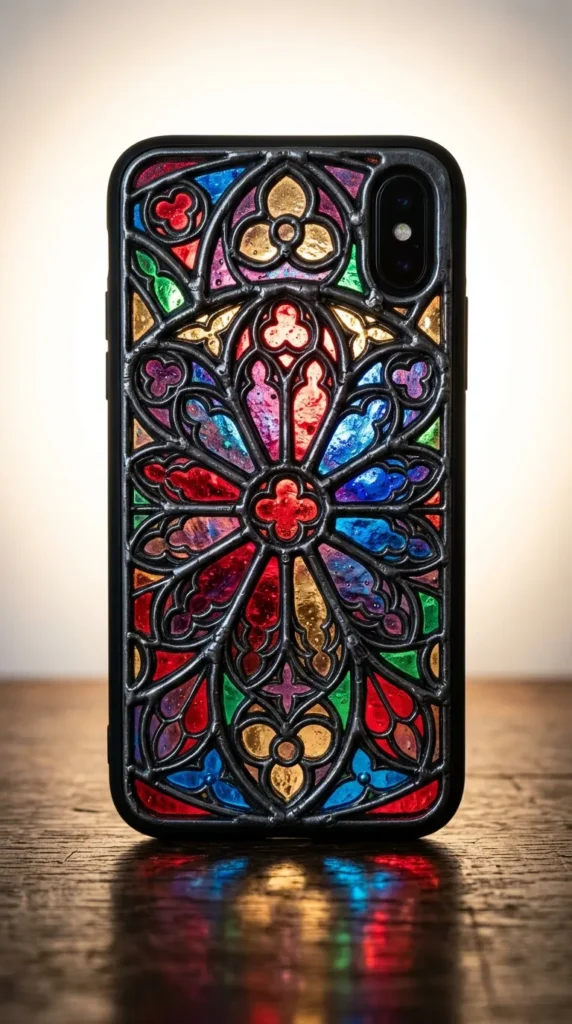
11. Stained Glass Cathedral: Translucent Jewel Tones & Puffy Outlines
Concept & Aesthetic Vision
Echoing gothic stained glass windows, this design employs bold, raised lead-like black boundaries filled with jewel-toned translucent lacquers that glow as light passes through a clear phone case.
Materials Required
- Transparent clear hard-back phone case
- Dimensional liquid leading (pewter or black puffy glass liner)
- Translucent glass paints or tinted UV resins (cobalt, ruby, emerald, amber)
- Pattern stencil or botanical/geometric mandala guide
- Toothpicks
Step-by-Step Instructions
- Insert Template: Tape your stained-glass pattern inside the transparent phone case so it is visible through the plastic.
- Pipe the Leading Lines: Hold the liquid leading bottle like a pencil at a 45-degree angle. Squeeze with consistent pressure to lay raised 1 mm to 2 mm black bead lines along the pattern contours. Let dry for 8 hours until completely set.
- Color Mixing: Prepare small drops of transparent glass paint or resin tinted with glass stain colors.
- Flood the Cells: Use a toothpick or fine brush to drop tinted lacquer into each enclosed cell formed by the raised black outlines. Let the color flow cleanly to the edges of the dams without bubbling.
- Cure: Allow the glass paints to cure per manufacturer instructions (or UV cure if using resin) until crystal-clear, hard, and transparent.
Pro Tips & Creative Variations
- Iridescent Medium: Mix a tiny drop of translucent shimmer dust into clear glass paint to mimic historic opalescent art glass.
- Mirror Accents: Paint the design directly onto a reflective silver mirror phone case for added brilliance.
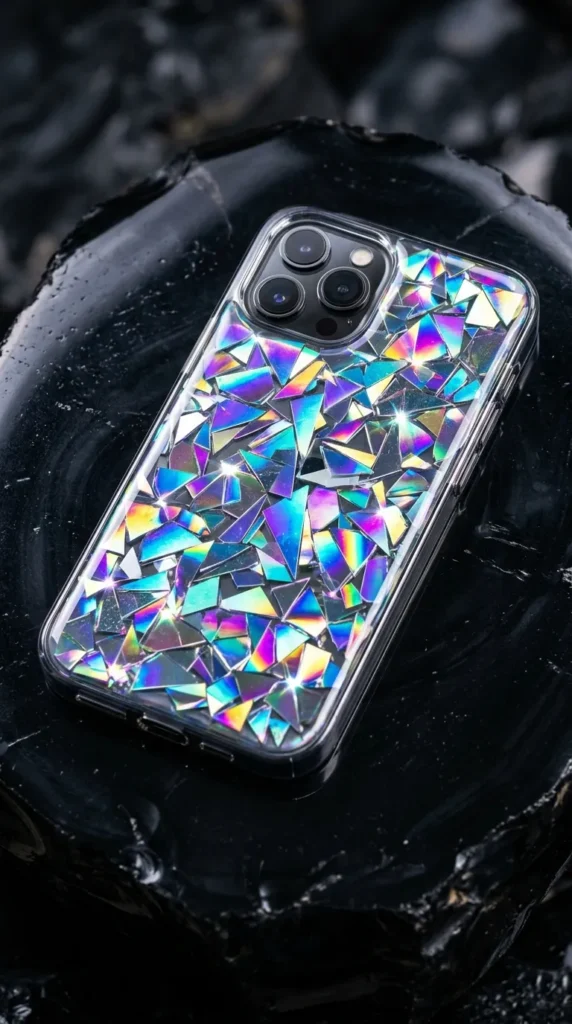
12. Holographic Opal Core: Broken CD Shards & Aurora Film
Concept & Aesthetic Vision
Capturing the look of precious Australian opals and crushed crystals, this technique repurposes the micro-grooved polycarbonate foil of old compact discs or crinkled holographic cellophane under deep, clear gloss.
Materials Required
- Black or dark-colored phone case
- Blank, unrecorded DVD-R or CD scraps (or crushed aurora opal craft film)
- Heavy-duty kitchen shears
- Two-part high-gloss epoxy resin
- Fine chameleon/iridescent mica powder
- Fine tweezers
Step-by-Step Instructions
- Harvest Iridescent Shards: If using a CD/DVD, gently separate the clear plastic layer using a utility blade to expose the rainbow reflective metallic foil. Cut the foil into irregular triangular fragments ranging from 2 mm to 10 mm in size.
- Base Coat: Paint the phone case with an opaque coat of black or deep midnight navy acrylic paint to maximize contrast for the holographic foil.
- Mosaic Assembly: Brush a thin layer of clear adhesive over the case. Using tweezers, place the holographic shards onto the wet surface in a mosaic pattern, leaving hairline gaps between pieces.
- Dust the Gaps: Lightly brush a trace amount of iridescent chameleon mica powder into the spaces between the shards.
- Resin Encapsulation: Level the case and pour a generous flood coat of clear epoxy resin over the entire mosaic. Cover to protect from dust and cure for 24 hours until smooth to the touch.
Pro Tips & Creative Variations
- Cellophane Alternative: Crinkle up sheets of dichroic glass-effect nail art film and flatten them out before applying resin for a softer, organic opal appearance.
- Galaxy Accent: Blend deep purple alcohol ink clouds around the edges of the shard field before pouring the final clear coat.
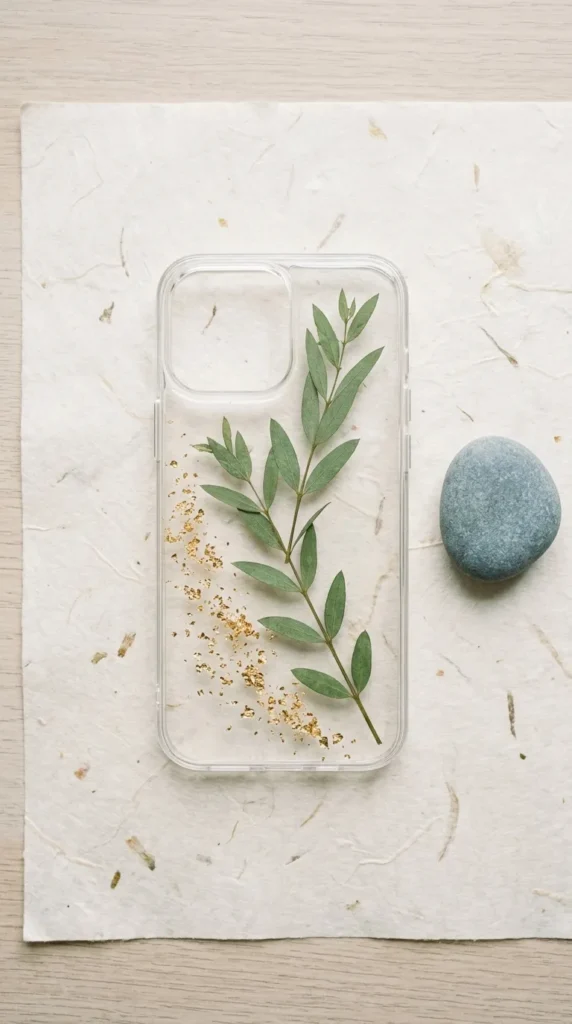
13. Pressed Greenery & Gold Leafing: Minimalist Zen Herbarium
Concept & Aesthetic Vision
Focusing on tranquility, negative space, and botanical precision, this aesthetic features isolated specimen leaves—such as Japanese maple, eucalyptus, or wild ferns—anchored by delicate, asymmetrical drifts of 24k gold leafing over a transparent case.
Materials Required
- Ultra-clear hybrid phone case
- Pressed specimen foliage (single branch of eucalyptus, olive leaf, or mini Japanese maple)
- Loose composition gold leaf sheets
- Gold leaf sizing adhesive (or clear craft glue)
- UV resin or two-part epoxy casting resin
- Soft gilding mop brush and fine tweezers
Step-by-Step Instructions
- Clean the Canvas: Wipe the interior and exterior of the clear case with isopropyl alcohol.
- Foliage Placement: Position the primary botanical specimen along the long edge of the case, allowing the natural curve of the stem to follow the frame.
- Affix Botanicals: Lightly tack the back of the stem and leaf nodes down using minimal dots of clear UV resin, then cure under the UV lamp for 10 seconds.
- Apply Gilding Leaf: Dab traces of sizing glue along the base of the stem and in soft speckles across one corner. Press loose gold leaf sheets onto the tacky zones using a dry, soft mop brush. Buff away excess gold dust.
- Protective Resin Flood: Pour clear casting resin across the back surface, coaxing the resin to the edges with a silicone tool.
- Final Cure: Torch any bubbles and allow to set under a dust cover for 24 to 36 hours.
Pro Tips & Creative Variations
- Silver Leaf & Eucalyptus: Pair silvery blue-green spiral eucalyptus with genuine silver leaf on a dark phone body for an icy look.
- Minimalist Calligraphy: Add a tiny handwritten script label (such as the Latin botanical name) beneath the pressed specimen before sealing.
14. Cottagecore Cross-Stitch: Embroidered Mesh & Floral Motifs
Concept & Aesthetic Vision
Tactile, nostalgic, and intricate, this design transforms a perforated canvas phone case into a working grid for traditional counted cross-stitch embroidery, displaying colorful pixel-like floral patterns.
Materials Required
- Specialty perforated mesh phone case (pre-drilled with grid holes)
- Six-strand cotton embroidery floss in botanical shades
- Size 24 or 26 blunt tapestry needles
- Cross-stitch design chart (sized to case dimensions)
- Embroidery scissors and felt backing sheet
Step-by-Step Instructions
- Chart Adaptation: Plan your floral pattern on a grid sheet to match the exact hole count and camera cutout of your perforated case.
- Thread Preparation: Cut an 18-inch length of embroidery floss and separate it into 2 or 3 strands depending on hole diameter. Thread your blunt tapestry needle.
- Stitching Technique: Working row by row, stitch diagonal half-stitches (
/) across the grid, then return back across (\) to form uniform cross-stitches (X). Maintain consistent thread tension to avoid warping the case. - Tucking Ends: Do not tie bulky knots on the back. Instead, weave working thread tails securely through the back of existing stitches on the inside of the case.
- Inside Lining: Cut an ultra-thin piece of self-adhesive felt or microfiber paper to the interior dimensions of the case and smooth it down over the back of the stitches to protect your phone from friction.
Pro Tips & Creative Variations
- Glow-in-the-Dark Accent: Weave fluorescent or phosphorescent threads into key petal highlights or celestial stars within the pattern.
- Ribbon Embroidery: Substitute 2 mm silk ribbon for cotton floss on larger mesh cases to form three-dimensional puffed ribbon roses.
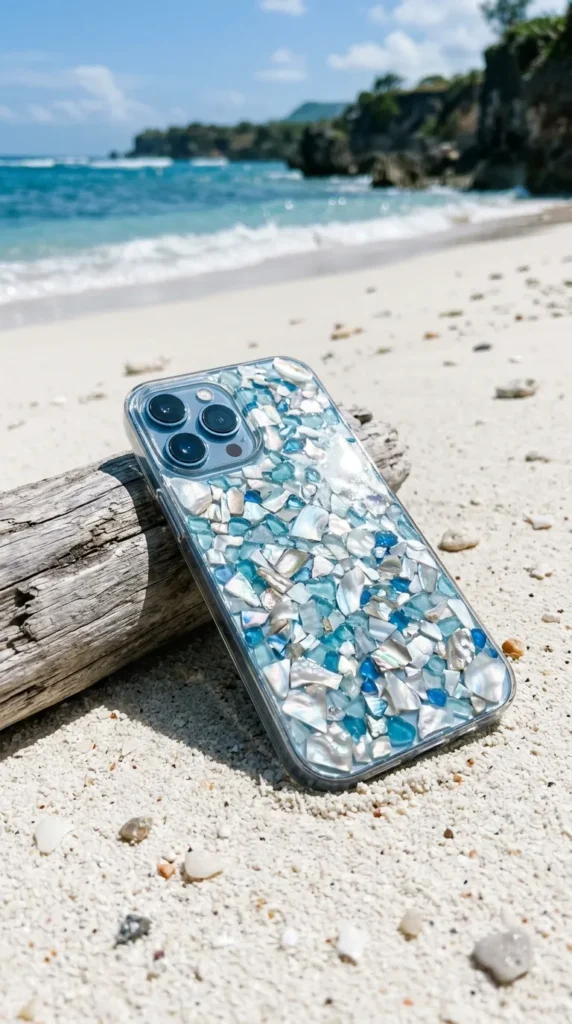
15. Coastal Seashell Mosaic: Crushed Capiz & Mother-of-Pearl Inlay
Concept & Aesthetic Vision
Inspired by traditional Asian mother-of-pearl lacquerware and sun-drenched coastal shorelines, this case embeds fragments of authentic sea shells, paua shells, and crushed capiz into a smooth, glossy surface.
Materials Required
- Solid white or pastel ocean-blue phone case
- Crushed mother-of-pearl flakes, capiz shell chips, and mini real flat shell slices
- Industrial clear craft glue (E6000 or B-7000)
- Two-part clear leveling epoxy resin
- Fine iridescent glitter powder
- Fine-point tweezers
Step-by-Step Instructions
- Sort Shell Pieces: Sort shell fragments by thickness, prioritizing flatter chips to ensure they sit flush beneath the resin.
- Adhesive Grid: Lightly coat the case with clear adhesive. Using tweezers, assemble the shell pieces into interlocking mosaic patterns or swirling tidal formations.
- Sparkle Highlights: Lightly sprinkle microscopic iridescent dust over the adhesive gaps between shells to add depth.
- First Resin Coat: Pour a generous layer of clear epoxy resin over the shells, guiding it across the entire flat backplate to submerge the chips.
- Sand & Second Coat: If any sharp shell edges protrude after curing, gently sand them flush with 400-grit wet sandpaper, wipe clean, and apply a thin gloss flood coat to restore full clarity.
Pro Tips & Creative Variations
- Raw Sandy Beach: Blend genuine sterilized beach sand with clear resin along the bottom quarter of the case to mimic a sandy ocean shore.
- Black Lacquer Base: Embed shimmering paua shell on a pitch-black case base for high-contrast iridescence.
16. Whimsical Polymer Clay Charms: 3D Miniature Sculptures
Concept & Aesthetic Vision
Playful, expressive, and tactile, this design features custom oven-baked polymer clay sculptures—such as miniature avocados, sunny-side-up eggs, daisies, and toadstools—bonded directly onto a hard-shell case.
Materials Required
- Hard polycarbonate phone case
- Premium polymer clay in varied colors
- Clay shaping tools, roller, and silicone detailers
- Baking sheet and parchment paper
- Industrial multi-surface adhesive (two-part epoxy glue or B-7000)
- Glossy or satin water-based clay glaze
Step-by-Step Instructions
- Sculpting Miniatures: On a clean tile or mat, roll and sculpt your polymer clay miniatures, keeping them under 4 mm in total thickness with a completely flat backside.
- Baking: Place the finished clay pieces on parchment paper and bake in a dedicated craft oven according to package instructions (typically 275°F / 135°C for 15–30 minutes). Let cool completely.
- Glaze: Paint the cooled clay figures with two coats of gloss or satin glaze to bring out the colors and add durability.
- Case Preparation: Lightly scuff the spots on the phone case where the charms will go using a piece of sandpaper.
- Bonding: Apply two-part epoxy adhesive to the flat base of each charm and press firmly onto the case. Allow the bond to cure for 24 hours.
Pro Tips & Creative Variations
- Liquid Clay Detailing: Use bakeable liquid polymer clay to create realistic syrup or sauce drips over miniature breakfast or dessert charms.
- Pastel Matte Finish: Skip the glaze and dust raw clay with soft dry pastels before baking to create a soft, velvety texture.
17. Gothic Dark Academia: Wax Seal, Baroque Filigree & Velvet
Concept & Aesthetic Vision
Echoing historic libraries and vintage correspondence, this dark academia concept combines crushed black velvet or antique book cloth textures with bronze filigree charms and a hand-stamped wax seal.
Materials Required
- Hard-back phone case
- Adhesive-backed black velvet flocking paper or deep burgundy book cloth
- Sealing wax beads with a brass stamp seal
- Vintage bronze or antique brass filigree metal corner wraps
- B-7000 industrial craft glue
- Metallic gold rubbing paste (Gilders Paste or Rub ‘n Buff)
Step-by-Step Instructions
- Velvet Application: Measure and trim the adhesive velvet sheet to fit neatly within the rear borders of the case. Smooth down to eliminate bubbles.
- Cast the Wax Seal: Melt flexible sealing wax (formulated for shipping, so it does not crack under pressure) on a spoon over a tea candle. Pour onto a silicone mat, press with your metal stamp, and allow it to cool for 60 seconds before peeling off.
- Highlight Details: Lightly rub metallic gold pigment wax over the raised relief of your wax seal and across the details of the metal filigree charms.
- Mount Metal Accents: Apply B-7000 glue to the underside of the brass filigree corners and press them firmly over the velvet corners.
- Affix Central Seal: Center the wax seal on the velvet backplate and bond with a generous dab of industrial adhesive. Let dry flat for 12 hours.
Pro Tips & Creative Variations
- Pressed Fern Inset: Sandwich a tiny pressed woodland fern frond directly underneath the hot wax seal before stamping.
- Faux Book Spine: Glue a vertical strip of textured brown leather along the left rail of the case to mimic a miniature antique tome.
18. Neon Pop Art: Bold Hand-Painted Color Blocking & Acrylic Wash
Concept & Aesthetic Vision
Inspired by 1980s Memphis Design and classic pop art, this design features saturated neon tones, hard geometric intersections, bold drop shadows, and high-energy brushstrokes.
Materials Required
- Solid white hybrid phone case
- Fluorescent and high-pigment heavy-body acrylic paints (hot pink, electric lime, cobalt, bright canary)
- Precision flat brushes and angular shaders
- Low-tack masking tape
- Fine-tip permanent black marker
- High-gloss clear polyurethane spray
Step-by-Step Instructions
- Sectioning: Apply low-tack masking tape across the case to section off bold, overlapping geometric fields (triangles, diagonals, intersecting circles).
- Paint Saturated Blocks: Apply opaque neon and primary colors within the taped zones. Lay down two coats for complete coverage, drying 15 minutes between applications.
- Peel Clean Lines: Carefully peel the tape back at a sharp 45-degree angle while the second coat is slightly damp to ensure crisp, clean edges.
- Add Drop Shadows: Paint hard-edged black drop shadows along one side of each geometric shape to create an energetic, pop-art graphic depth.
- Doodle Accents: Use a fine black paint marker to add floating squiggles, micro-crosses, and confetti dots around the geometric color blocks.
- Gloss Seal: Spray the case with three thin coats of high-gloss polyurethane clear spray to unify the finish and lock in neon vibrancy.
Pro Tips & Creative Variations
- Matte vs. Gloss Contrast: Brush matte varnish over the primary blocks, then dot high-gloss resin over the squiggles for contrasting surface textures.
- Blacklight Active: Use UV-reactive neon acrylic paints that light up vividly under blacklight environments.
19. Ethereal Cloudscape: Soft Gradient Sunset & Fluffy Puffed Clouds
Concept & Aesthetic Vision
A dreamy, peaceful aesthetic that captures the magic of a pastel sunset. Soft gradients of lavender, baby pink, and buttercup yellow provide the backdrop for soft, hand-textured white cumulus clouds.
Materials Required
- Solid white or pastel-toned phone case
- Soft synthetic blending makeup sponges
- Matte acrylic paints in pastel pink, soft violet, warm peach, sky blue, and titanium white
- Dense round stencil brush
- Ultra-matte protective spray
Step-by-Step Instructions
- Base Gradient: Dab damp makeup sponges into pink, lavender, and peach paints. Sponge the colors across the case in horizontal bands, stippling where the colors meet to blend them into a smooth, seamless twilight sky.
- Build Sky Depth: Let the base gradient dry for 20 minutes. If needed, apply a second pass of stippling to deepen color transitions.
- Stipple Base Clouds: Dip the dry tip of a round stencil brush into titanium white. Dab off excess paint on scrap paper, then gently stamp fluffy cloud silhouettes across the lower third of the sunset sky.
- Add Sunset Highlights: Lightly glaze the underside of the clouds with a touch of pastel peach and violet paint to reflect the evening light.
- Distant Stars: Load a stiff toothbrush with watered-down white paint, then flick the bristles over the top of the case to scatter fine celestial stars across the sky.
- Matte Finish: Protect your painting with two even coats of ultra-matte clear acrylic spray.
Pro Tips & Creative Variations
- Metallic Crescent: Paint a delicate metallic gold or silver crescent moon high up in the evening sky gradient.
- Dimensional Clouds: Fold modeling paste into your white paint to create physical, raised-relief clouds on the case back.
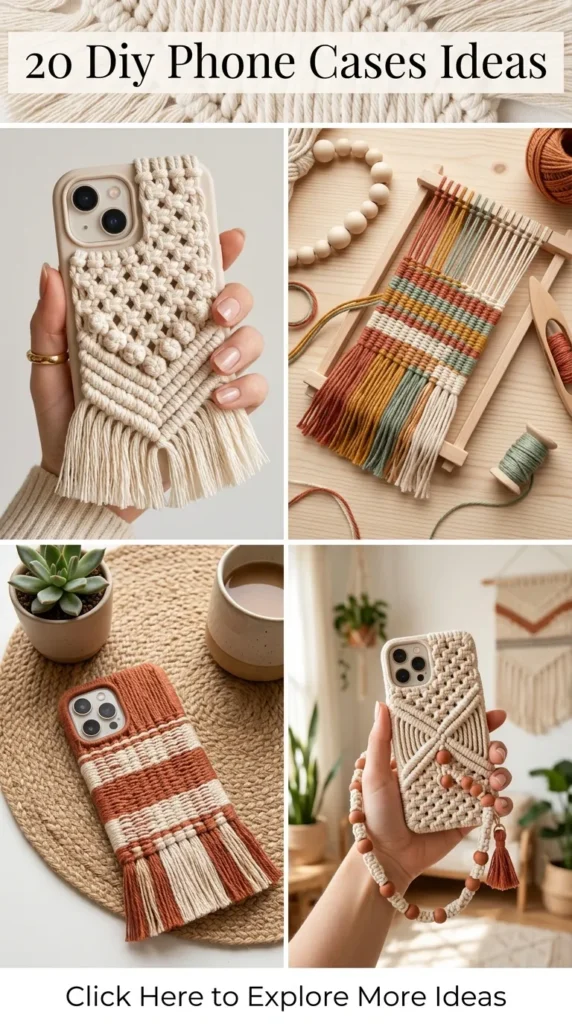
20. Raw Bohemian Macramé: Knotted Cords & Fringed Micro-Tassels
Concept & Aesthetic Vision
Warm, organic, and bohemian, this textile case mounts intricate micro-macramé knotwork directly onto a textured surface, featuring small square knots, spiral chains, and soft frayed fringe tassels.
Materials Required
- Rigid phone case with a raised outer lip
- 0.5 mm to 1.0 mm waxed cotton cord or Brazilian macramé cord in ecru, sage, or clay
- Cork board and macramé T-pins (for holding knots during work)
- Thread snips and fine-tooth comb
- Permanent clear textile/jewelry glue (Aleene’s or B-7000)
Step-by-Step Instructions
- Anchor Foundation: Pin a horizontal holding cord securely onto your cork board.
- Knot the Tapestry: Mount working cords using lark’s head knots. Form micro-diamond patterns using diagonal double half-hitch knots and alternating square knots, sizing the weave to fit within the backplate of the case.
- Taper the Edges: End the knotting in a dynamic V-shape point toward the bottom center.
- Cut & Fray Tassels: Cut the dangling cord ends to a 1.5 cm fringe. Use a fine-tooth comb to gently brush out the cord plies into a soft, fluffy fringe.
- Adhere Weave: Coat the backplate of the phone case with a thin layer of industrial craft adhesive. Carefully lift your finished macramé panel and press it firmly into the glue bed.
- Trim & Seal: Allow the adhesive to cure for 12 hours. Apply a drop of clear seam sealer on the rear cut cord edges to prevent the weave from loosening during daily use.
Pro Tips & Creative Variations
- Wooden Micro-Beads: Slide small 3 mm unfinished natural wooden beads onto working strands before tying final half-hitch knots.
- Dip-Dye Fringe: Dip just the bottom centimeter of the frayed fringe tassels into a cup of natural tea or fabric dye for a soft ombré dip-dyed look.
Technical Comparison of DIY Methods
| DIY Case Project | Primary Medium | Difficulty Level | Cure / Dry Time | Durability Rating | Best For |
| 1. Pressed Wildflowers | Real Foliage & Epoxy | Moderate | 24–48 Hours | High (Hard Shell) | Cottagecore & Nature Enthusiasts |
| 2. Tuscan Terracotta | Modeling Paste & Acrylic | Easy | 12–18 Hours | Medium-High | Minimalist & Earthy Aesthetics |
| 3. High-Gloss Retro | Acrylic Pens & Enamel | Easy | 6–12 Hours | High (With Topcoat) | Vibrant 70s Fashion Lovers |
| 4. Vintage Decoupage | Paper Ephemera & Mod Podge | Easy | 4–6 Hours | Medium (Water Resistant) | Nostalgic & Antique Collectors |
| 5. Cosmic Agate | Alcohol Inks & Gold Leaf | Advanced | 24 Hours | High (Gloss Lens) | Geode & Crystal Admirers |
| 6. Chunky Decoden | Piping Cream & Cabochons | Moderate | 48–72 Hours | Medium (3D Fragile) | Y2K & Maximalist Sweet Styles |
| 7. Moody Monochrome | Fine Paint Markers | Easy | 6 Hours | High (With Sealant) | Scandinavian & Minimalist Design |
| 8. Parisian Chic | PU Leather & Monograms | Moderate | 4 Hours | Very High | Luxury & Classic Wardrobes |
| 9. Denim Patchwork | Upcycled Denim Fabric | Easy | 4 Hours | High | Eco-Friendly Streetwear |
| 10. Checkered Picnic | Translucent Acrylic Paint | Easy | 2–4 Hours | High (With Sealant) | Playful & Trendy Outfits |
| 11. Stained Glass | Puffy Liner & Glass Paint | Moderate | 12–24 Hours | High | Art Lovers & Bright Sunlight |
| 12. Holographic Opal | CD Shards & Casting Resin | Advanced | 24 Hours | High (Impact Resistant) | Futuristic & Prismatic Accents |
| 13. Minimalist Zen | Specimen Leaves & Leafing | Moderate | 24 Hours | High | Understated Naturalist Appeal |
| 14. Cottagecore Stitch | Cotton Floss & Mesh Case | Moderate | Immediate | High (Washable Base) | Crafters & Needlepoint Fans |
| 15. Coastal Seashell | Shell Shards & Clear Epoxy | Moderate | 24–36 Hours | High | Beach & Ocean Summer Vibes |
| 16. Clay Charms | Polymer Clay & Glaze | Moderate | 24 Hours | Medium (Raised Relief) | Quirky, Custom 3D Art Lovers |
| 17. Dark Academia | Wax Seal & Velvet Fabric | Easy | 12 Hours | Medium-High | Historic, Gothic & Cozy Moods |
| 18. Neon Pop Art | Heavy Acrylic & Paint Pens | Easy | 3–6 Hours | High (With Gloss) | Energetic & Modern Wardrobes |
| 19. Ethereal Cloud | Blended Acrylic Stippling | Easy | 2–4 Hours | High (With Sealant) | Calming, Dreamy Cloudscapes |
| 20. Raw Macramé | Cotton Cord & Fringe | Advanced | 12 Hours | Medium (Keep Dry) | Boho-Chic & Textile Explorers |
Maintenance and Durability Best Practices
To keep your handmade phone case looking fresh and structurally sound over time, keep these practical care tips in mind:
- Avoid Extreme Heat: Keep epoxy resin and polymer clay cases away from high-heat environments (like car dashboards in direct summer sunlight) to prevent resin softening or premature yellowing.
- Gentle Cleaning: Clean the exterior using a damp microfiber cloth moistened with cool water and mild dish soap. Avoid harsh solvents, acetone, or pure alcohol sprays on painted or varnished surfaces.
- Pocket Care: For cases with 3D elements (such as decoden cream, polymer clay charms, or macramé), avoid sliding them into tight denim pockets. Slip them into a dedicated purse pouch or jacket pocket to minimize snagging.
- Periodic Resealing: If you notice matte or satin topcoats wearing smooth from frequent hand friction, spray on a fresh mist of acrylic sealer to maintain long-term moisture and dirt resistance.