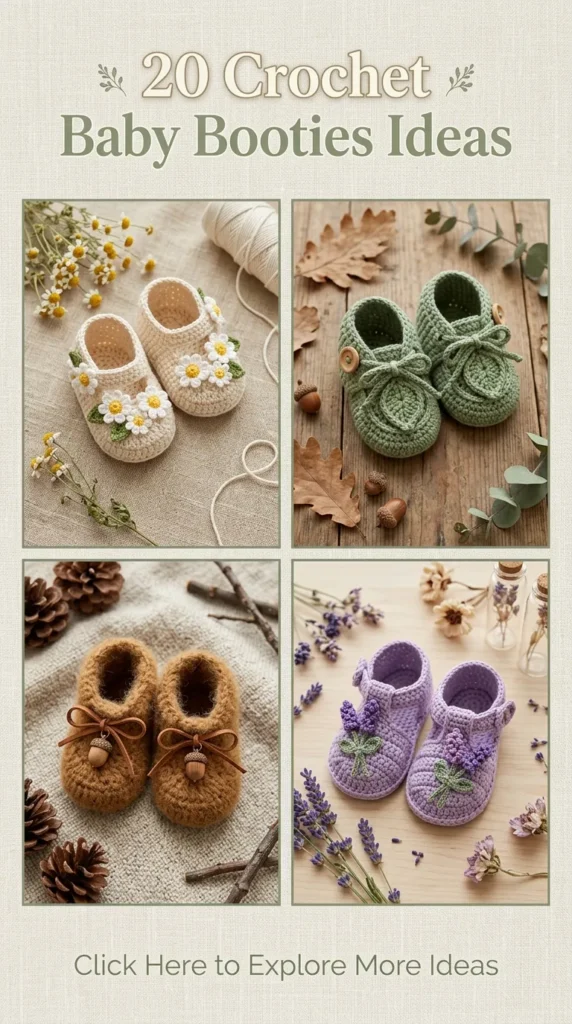
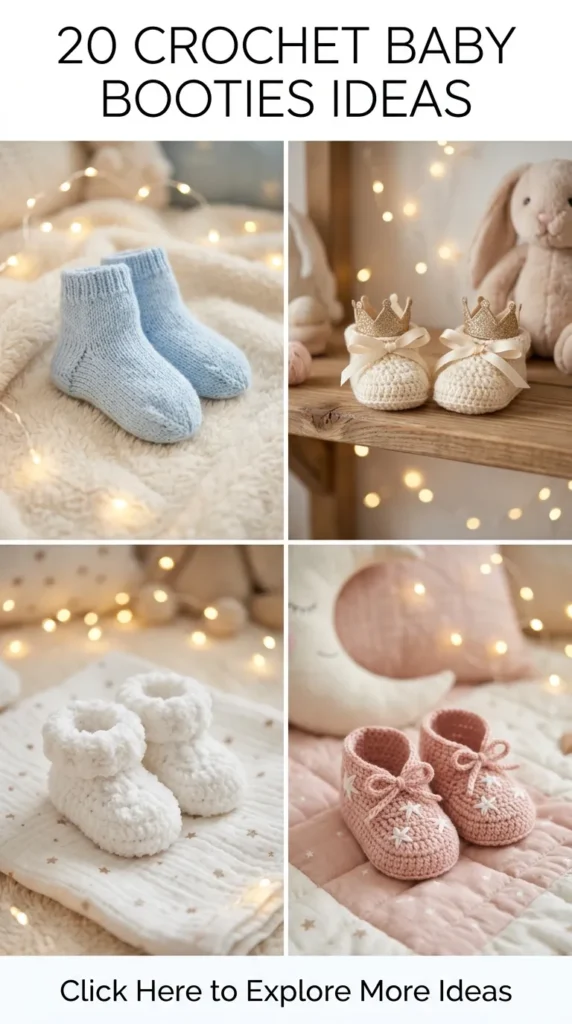
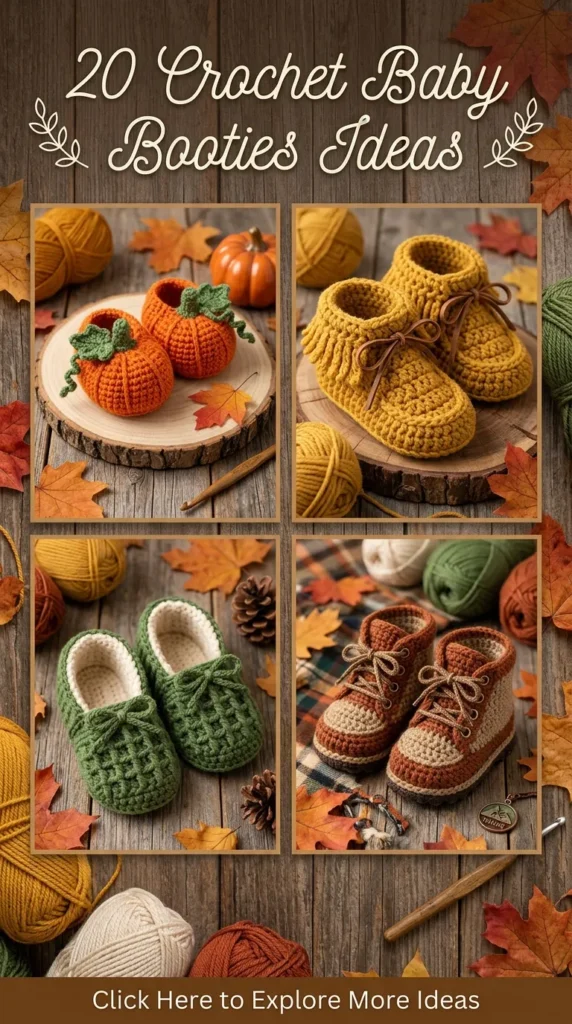
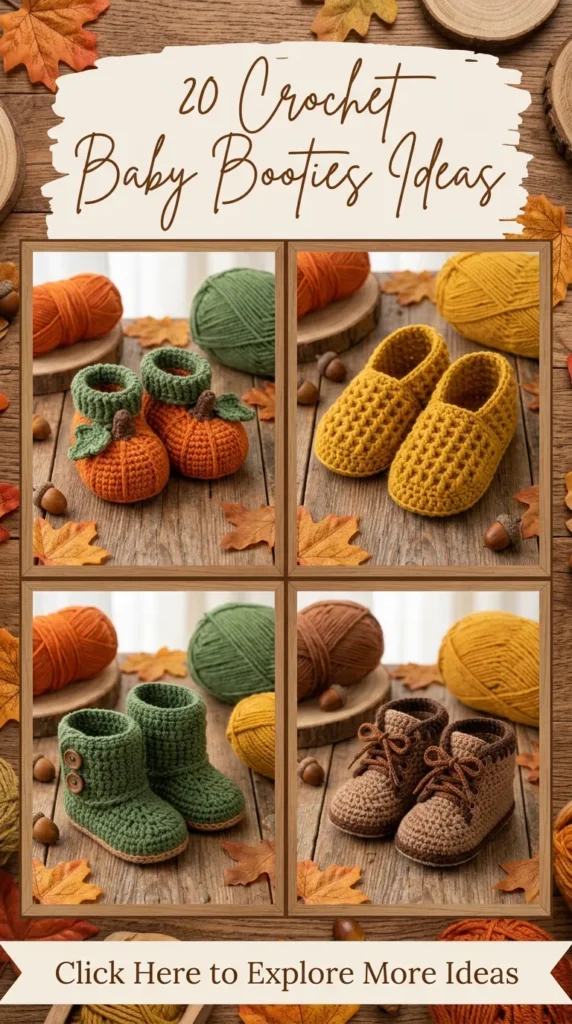
Artisanal infant footwear combines ergonomic support, tactile comfort, and timeless styling. Moving past generic synthetic baby shoes, modern aesthetic crochet baby booties focus on natural, breathable fibers, sculptural stitch definitions, muted neutral color palettes, and heirloom-level finishing techniques. Discover twenty curated, boutique-grade crochet baby bootie ideas designed for milestone photography, contemporary nursery styling, baby shower gifts, and treasured keepsakes.
1. Minimalist Oatmeal Ribbed Fold-Over Ankle Booties
What This Idea Means
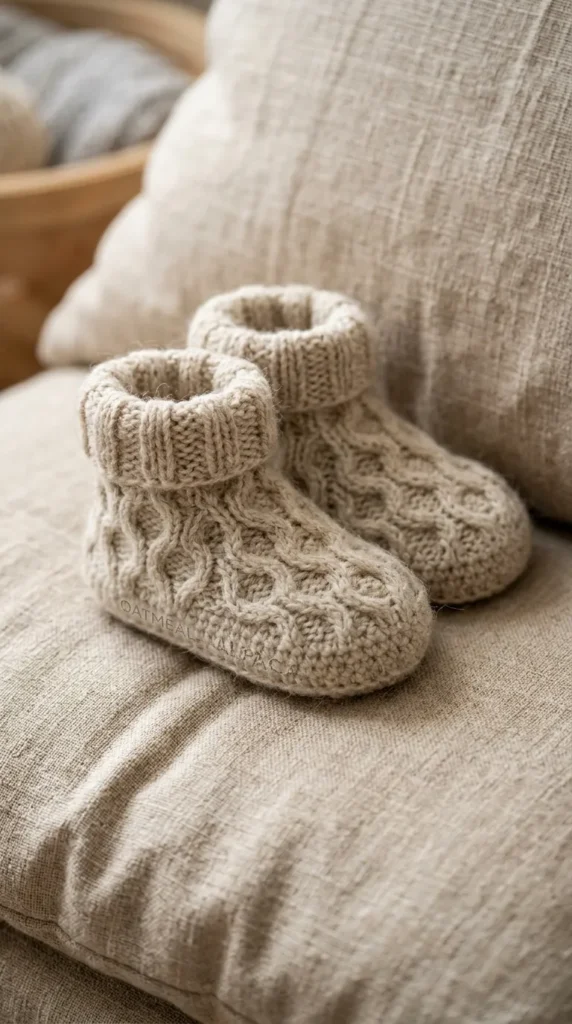
This design captures modern Scandinavian simplicity with a clean, functional silhouette. The folded ribbed cuff mimics fine-gauge knitwear, offering natural, gentle elasticity that stays secure on active baby feet without constrictive elastic bands.
Materials Needed
- 50 g Sport-weight 100% Superwash Extra-Fine Merino Wool in Oatmeal Heather
- 3.25 mm (US D/3) ergonomic crochet hook
- 2 locking stitch markers
- Tapestry needle and soft tape measure
How to Make It
- Sole Base: Work an oval foundation chain with double-ended rounded increases using half double crochet (hdc) to create an ergonomic footbed.
- Transition Ridge: Work one round of single crochet through the back loop only (blo-sc) around the perimeter to form a sharp 90-degree upright sole ridge.
- Upper Vamp Shaping: Work three continuous rounds of plain moss stitch, then execute centered front-toe invisible decreases across two rows to shape the foot bridge.
- Ankle Shaft: Work upward in continuous rounds for 2.5 inches in uncreased single crochet.
- Fold-Over Ribbing: Work 1.5 inches of slip-stitch back-loop-only (blo-slst) ribbing around the top cuff.
- Finishing: Fold the ribbed cuff downward across the ankle joint and weave in all yarn ends inside the interior sole ridge.
Tips and Variations
- Secure Fit: Weave a hidden length of thin elastic thread through the inner transition row below the fold-over cuff for extra hold on active infants.
- Two-Tone Contrast: Work the sole and foot base in warm sand while rendering the fold-over ribbed cuff in creamy ivory.
- Sole Grip: Apply tiny dots of clear, non-toxic liquid silicone craft sealant along the exterior sole base for non-slip grip on wood floors.
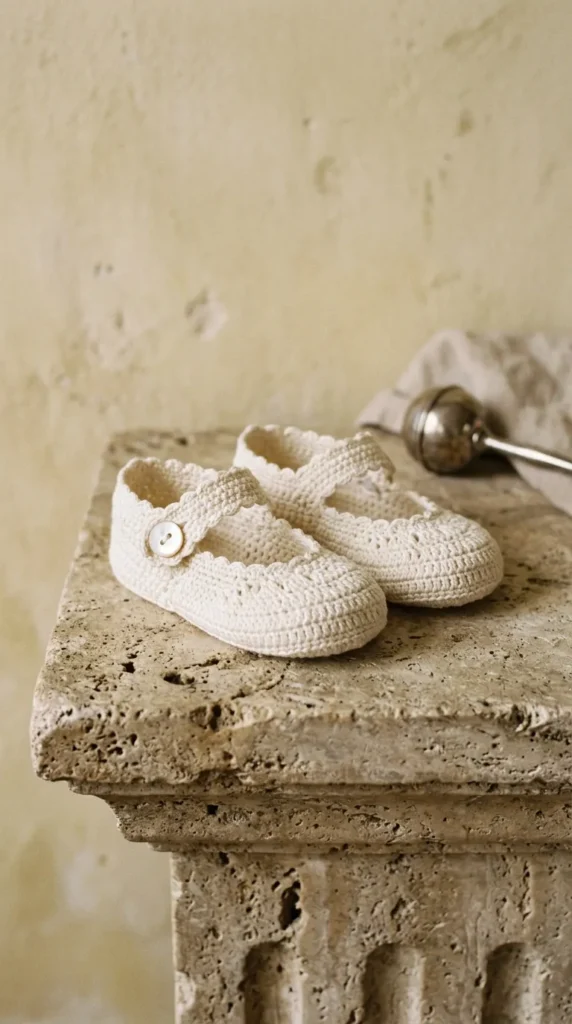
2. French Vintage Mary Jane Slippers with Mother-of-Pearl Buttons
What This Idea Means
An homage to mid-century European nursery footwear, this design features a delicate low-cut silhouette, a structured rounded toe box, and an arch-crossing strap fastened with an iridescent mother-of-pearl shell button.

Materials Needed
- 40 g DK-weight 100% Egyptian Giza Cotton in Antique Alabaster
- 3.00 mm (US C/2) crochet hook
- 2 genuine freshwater flat mother-of-pearl buttons (10 mm)
- Sewing needle and matching cotton sewing thread
How to Make It
- Oval Footbed: Crochet a double-layered solid single-crochet sole for structure and comfort.
- Side Walls: Work two low rounds of waistcoat knit-look stitches around the outer sole perimeter.
- Toe Vamp Contouring: Create a separate curved toe cap using cluster decreases, then join it seamlessly to the side walls with flat slip stitches.
- Heel Cup: Build up the rear heel cup with short-row single crochet turns to prevent slippage.
- Instep Strap: Pick up stitches on the medial heel edge, crochet a 14-chain strap with a reinforced buttonhole eyelet at the tip, and fasten it across the instep.
- Button Attachment: Secure the shell button on the lateral side using reinforced cross-stitches.
Tips and Variations
- Picot Trim: Add a micro-picot lace border around the low-cut foot opening for antique flair.
- Strap Customization: Replace the single transverse strap with dual crossing X-straps for added stability.
- Velvet Accents: Use micro-velvet ribbon as the cross-strap instead of crocheted yarn.
3. Heritage Aran Cable-Knit Style Winter Boots
What This Idea Means
Bringing classic cable craftsmanship to footwear, these high-shaft winter booties showcase miniature front-post rope cables and diamond relief stitches that provide extra thermal insulation around the infant’s lower leg.

Materials Needed
- 75 g Worsted-weight 100% Highland Wool in Creamy Ecru
- 4.00 mm (US G/6) crochet hook
- Cable needle or metallic locking stitch markers
- Tapestry needle
How to Make It
- Sturdy Sole: Crochet a dense, wide-toe oval sole using linked double crochet for maximum warmth and structure.
- Wall Foundation: Work one round of back-post single crochet (bpsc) to create a defined base rim.
- Cabled Ankle Shaft: Establish an 8-stitch front-post double crochet (fpdc) central rope cable running up the front of the ankle, framed by side honeycomb waffle panels.
- Upper Leg Height: Continue the cable pattern upward for 3.5 inches to reach mid-calf.
- Top Border: Finish the upper rim with two rounds of 1×1 front-and-back-post half double crochet ribbing.
- Steam Block: Lightly steam the shaft with an iron held 2 inches away to open up the cable relief definition without flattening the loft.
Tips and Variations
- Sherpa Lining: Line the interior shaft with a scrap of organic bamboo fleece or unbleached sherpa for alpine insulation.
- Rustic Closure: Add a side slit to the shaft fastened with two miniature hand-carved cedar wood toggle buttons.
- Contrast Sole: Work the bottom sole in slate grey while keeping the cabled shaft in ecru.
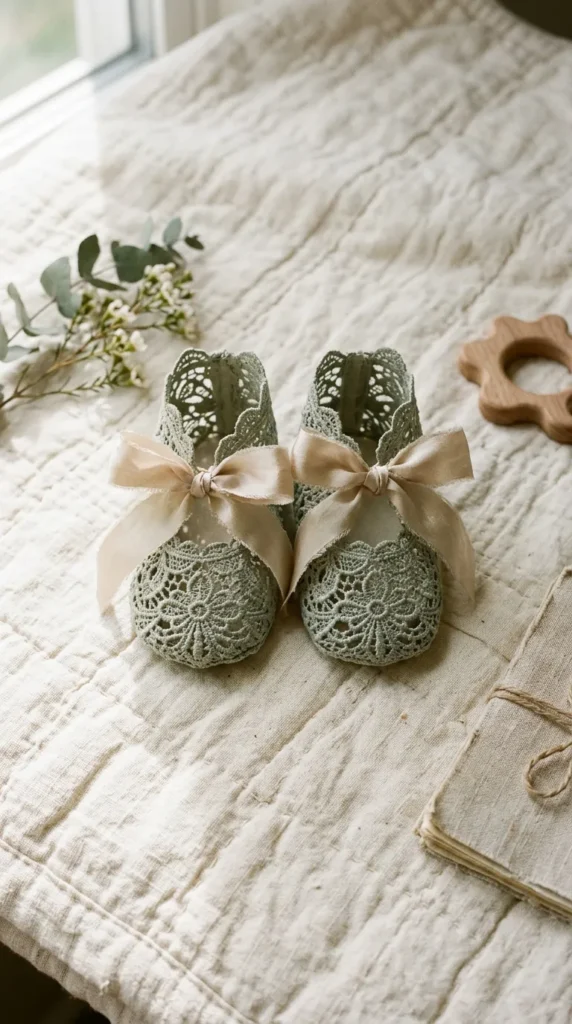
4. Tuscan Olive Leaf Filigree Lace Booties
What This Idea Means
Lightweight and breathable, these open-work lace booties are designed for warm-weather milestones. They incorporate delicate open filigree leaf eyelets across the instep and ankle, creating a delicate, garden-inspired shoe.
Materials Needed
- 40 g Fingering-weight 100% Mulberry Silk-Cotton blend in Muted Sage
- 2.50 mm (US B/1 or C/2) steel crochet hook
- 1 yard of 1/4-inch silk habotai ribbon in Champagne
- Tapestry needle
How to Make It
- Lace Footbed: Crochet a lightweight single-crochet sole, keeping tension firm.
- Lower Wall: Work a single round of extended single crochet to set the foundation for the lace work.
- Filigree Toe Box: Work an open lace pattern resembling stylized olive leaves across the front toe box using treble-crochet clusters and chain arches.
- Lace Shaft: Continue the leaf motif in the round around the ankle for 2 inches.
- Drawstring Eyelets: Crochet a continuous row of open window eyelets (dc, ch 1, sk 1) at the base of the ankle.
- Ribbon Tie: Thread the champagne silk habotai ribbon through the eyelet row and tie into a bow across the front.
Tips and Variations
- Fiber Selection: Silk-cotton blends provide a natural sheen that catches light on delicate lace arches.
- Heirloom Gift Set: Pair with a matching Tuscan olive leaf lace bonnet for newborn christening gifts.
- Beaded Accents: String tiny glass seed pearls onto the yarn before crocheting, sliding one bead into each leaf center cluster.
5. Moccasin-Style Suede-Sole Slippers with Jute Cord Ties
What This Idea Means
Combining rustic woodland design with durable natural materials, these booties feature a pre-punched genuine suede leather base joined directly to a textured moss-stitch crochet upper, tied off with raw jute or leather cord.
Materials Needed
- 50 g DK-weight 100% Unmercerized Pima Cotton in Warm Desert Sand
- Pair of pre-punched oval baby suede leather soles (3.5 or 4 inches)
- 2.75 mm (US C/2) and 3.50 mm (US E/4) crochet hooks
- 1 yard of 2 mm genuine round leather cord or soft waxed jute twine
How to Make It
- Sole Connection: Use the 2.75 mm hook to pick up stitches through the pre-punched holes in the suede sole using single crochet.
- Upper Transition: Switch to the 3.50 mm hook and work three rounds of herringbone half double crochet (hhdc) upward around the sole perimeter.
- Moccasin Tongue: Crochet a separate U-shaped instep tongue in textured seed stitch.
- Whipstitch Assembly: Join the tongue to the front foot walls using visible whipstitching with matching cotton yarn for an authentic moccasin finish.
- Ankle Collar: Work two rounds of textured single crochet around the back heel and sides of the ankle.
- Lacing: Weave the leather cord through the side collars and over the tongue, knotting the ends securely.
Tips and Variations
- Suede Care: Use pre-treated washable suede or vegan micro-suede bases to allow gentle hand-washing.
- Fringe Detail: Add a 1-inch tiered yarn fringe around the ankle collar for a classic bohemian moccasin look.
- Raw Wool Upper: Substitute cotton with rustic unspun Icelandic wool for cozy winter styling.
6. Botanical Wildflower Embroidered Desert Desert Booties
What This Idea Means
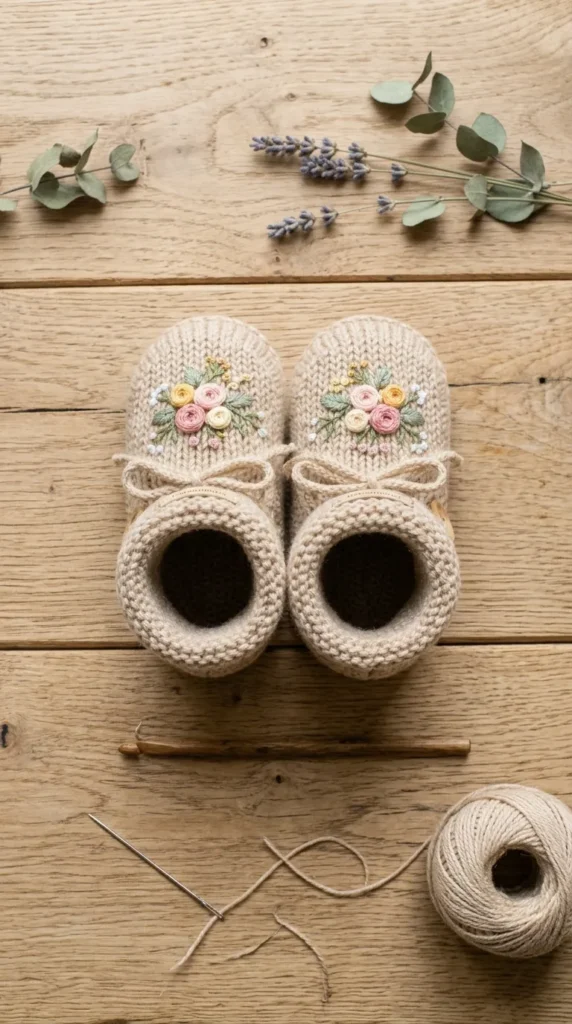
A smooth, plain-stitch crochet bootie serves as a canvas for delicate surface embroidery. Hand-stitched French knot wild roses, lazy daisy leaves, and fine stem branches turn miniature shoes into keepsake botanical art.
Materials Needed
- 50 g Sport-weight Cashmere-Merino blend yarn in Warm Biscuit
- 6-strand stranded cotton embroidery floss in Dusty Rose, Ochre, Moss Green, and Cream
- 3.25 mm (US D/3) crochet hook
- Size 7 embroidery crewel needle
- 2 mini coconut shell buttons (10 mm)
How to Make It
- Smooth Base Bootie: Crochet a classic structured ankle bootie using waistcoat stitch (knit stitch) to produce a flat, untextured fabric face.
- Side Split Opening: Leave a clean 1.5-inch slit along the lateral ankle side during construction for the button tab closure.
- Design Mapping: Lightly trace simple botanical branches across the outer side panels of each bootie using a water-soluble fabric marker.
- Floral Hand Embroidery: Stitch lazy daisy loops for flower petals, French knots for floral buds, and delicate green backstitches for stems.
- Inside Lining: Apply a tiny square of ultra-soft, iron-on fusible backing behind the embroidery inside the bootie to protect tiny toes from snagging threads.
- Button Fastening: Sew the coconut button on the ankle tab to complete the closure.


Tips and Variations
- Seasonal Botanicals: Embroider tiny acorns and pine sprigs for autumn, or miniature daisies and forget-me-nots for spring.
- Monogram Initial: Replace the side flower bouquet with a delicate single-letter Victorian script monogram.
- Knit-Look Gauge: Keep crochet waistcoat stitches loose so the embroidery needle glides smoothly between fiber strands without splitting yarn.
7. Alpine Chunky Sherpa-Cuff Nordic Boots
What This Idea Means
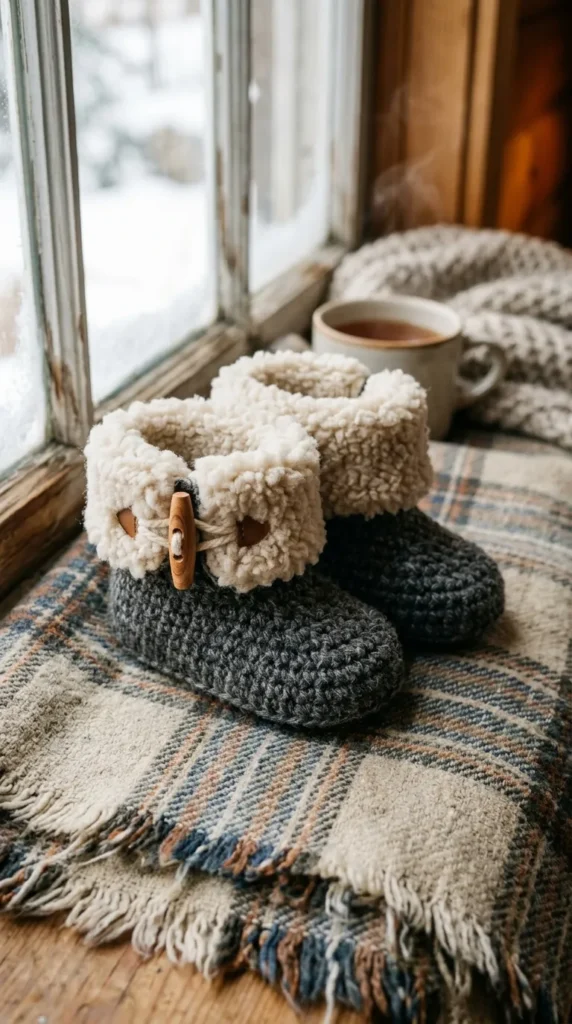
Designed for colder weather, these booties pair a structured charcoal heather foot base with an oversized, ultra-plush faux-sherpa textured cuff that hugs the baby’s calf.
Materials Needed
- 50 g Worsted-weight 100% Wool in Charcoal Heather
- 30 g Fluffy boucle or faux-fur yarn in Natural Raw Fleece
- 4.00 mm (US G/6) and 5.00 mm (US H/8) crochet hooks
- 2 natural horn or wooden toggle buttons (15 mm)
How to Make It
- Sturdy Footbed: Crochet the sole in charcoal wool using dense half-double crochets.
- Foot Wall & Vamp: Work the shoe walls in thermal stitch, decreasing sharply at the toe bridge to create a snug, structured foot pocket.
- Yarn Transition: Fasten off the charcoal wool at the ankle and attach the fluffy boucle yarn using the 5.00 mm hook.
- Sherpa Cuff: Work 3 inches of loose half-double crochet rounds upward with the boucle yarn to build a thick, cloud-like fleece cuff.
- Toggle Accent: Sew a small natural wooden toggle button along the outer ankle joint as a decorative detail.
- Roll-Down Styling: Fold the top half of the sherpa cuff down to expose a thick ring of fleece at the ankle.
Tips and Variations
- Boucle Visibility: When working with novelty fleece or boucle yarn, feel the stitches with your fingers rather than relying solely on visual tracking, as loop definition is hidden.
- Outdoor Sizing: Size up one footbed increment (approx. 0.5 inches) so these boots can be worn over thick cotton onesie footies.
- Lining Warmth: Work a double-thick sole with an internal felted wool insert sandwiched between layers for outdoor winter warmth.
8. Parisian Scalloped Edge Ballet Flat Slippers
What This Idea Means
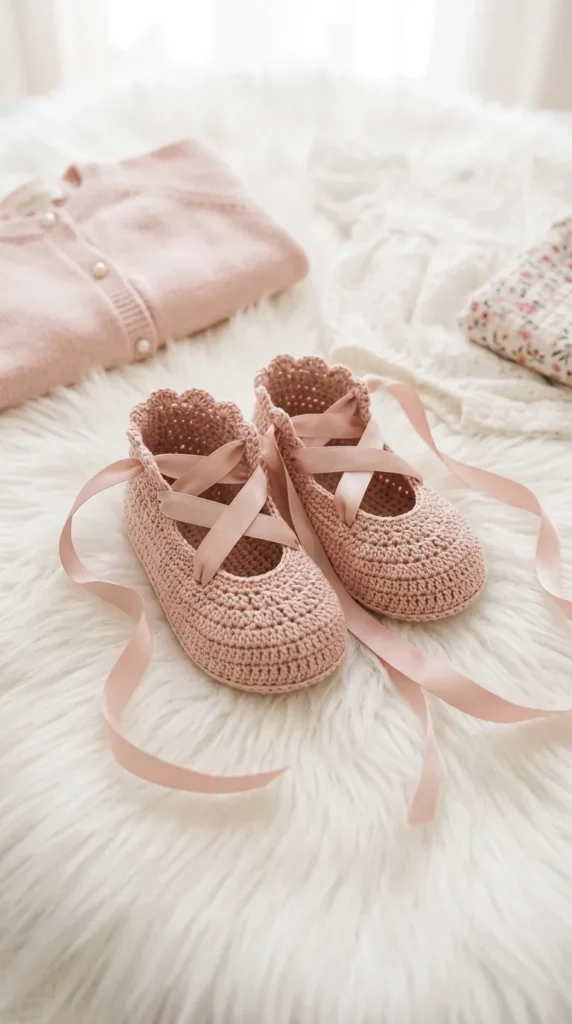
Inspired by classic French ballerina shoes, these low-profile slippers feature a curved, feminine toe scoop, seamless side arches, and delicate scalloped borders framed with a satin ankle ribbon wrap.
Materials Needed
- 40 g Fingering-weight Mercerized Cotton in Muted Ballet Blush Pink
- 2.50 mm (US B/1 or C/2) crochet hook
- 1.5 yards of 1/2-inch double-faced satin ribbon in Dusty Blush
- Tapestry needle and anti-fray liquid for ribbon ends
How to Make It
- Streamlined Sole: Crochet a slender, contoured oval sole base using tight single crochet.
- Low-Profile Upper: Work two rounds of slip-stitch back-loop walls around the perimeter to keep the shoe profile low.
- Ballet Vamp: Form a short, curved front toe box that dips low over the foot bridge.
- Scalloped Collar: Work a delicate shell stitch pattern (5 dc into one loop, skip 1, sc, skip 1) along the entire top rim of the slipper opening.
- Ribbon Loops: Attach two discreet crocheted thread loops on the inside heel and side walls.
- Ankle Ties: Thread the satin ribbon through the loops, wrap criss-cross around the baby’s lower leg, and tie in a soft bow.
Tips and Variations
- Sole Cushion: Insert a cut oval of natural cotton batting between two crocheted sole layers for a soft step.
- Toe Embellishment: Sew a tiny handmade silk ribbon rosebud onto the center-front scalloped toe.
- Monochrome Neutrals: Work this pattern in champagne or ivory for christening and formal wedding celebrations.
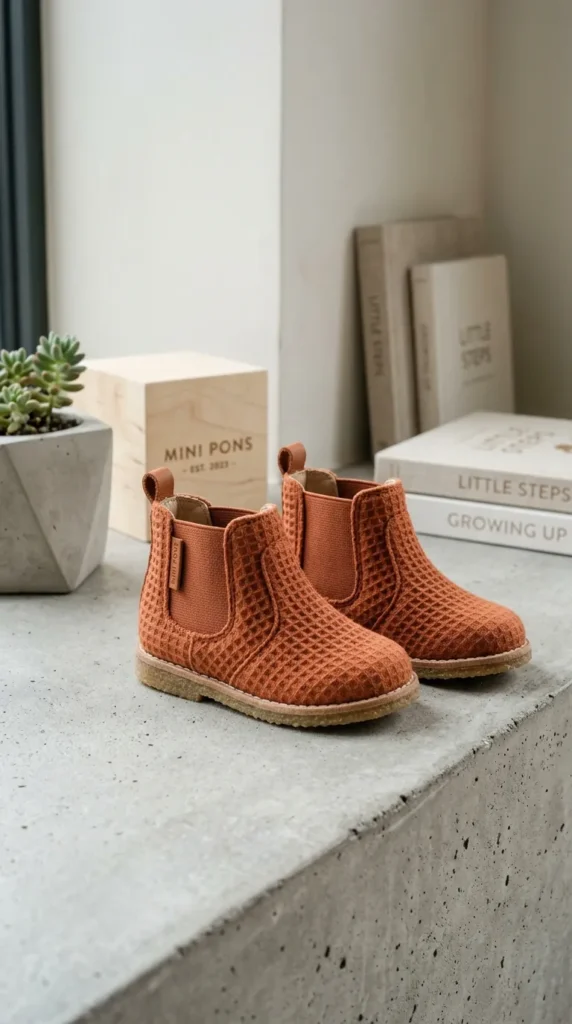
9. Minimalist Textured Waffle Chelsea Boots
What This Idea Means
A miniature take on the timeless Chelsea boot, this design features structured 3D waffle-textured side panels, a rounded toe box, and functional elasticized side gussets for easy on-and-off dressing.
Materials Needed
- 60 g DK-weight Organic Cotton-Bamboo blend in Terracotta Clay
- 3.50 mm (US E/4) crochet hook
- Small strip of thin elastic cord (0.8 mm)
- Tapestry needle and stitch markers
How to Make It
- Firm Footbed: Crochet an oval sole with linked half-double crochet to prevent gapping.
- Lower Rand: Work one round of blo-sc to frame the vertical shoe base.
- Waffle Body: Work the foot and ankle shaft in three-dimensional waffle stitch (alternating 1 front-post dc with 2 standard dc).
- Chelsea V-Notch: Split the ankle collar on both lateral and medial sides to create two V-shaped side notches.
- Elastic Gusset Integration: Crochet a ribbed bridging webbing over thin elastic cord across the V-notches to mimic Chelsea stretch panels.
- Pull Tabs: Crochet two small 1-inch loop tabs and anchor them securely to the top front and rear collar rims.
Tips and Variations
- Easy Dressing: The elasticated side gussets allow the boot opening to widen easily over baby heels without requiring buttoning.
- Color Blocking: Make the pull tabs and elastic side panels in contrasting charcoal grey while the boot body stays terracotta.
- Weatherproof Base: Coat the bottom sole with liquid rubber latex for water-resistant protection during light outdoor use.
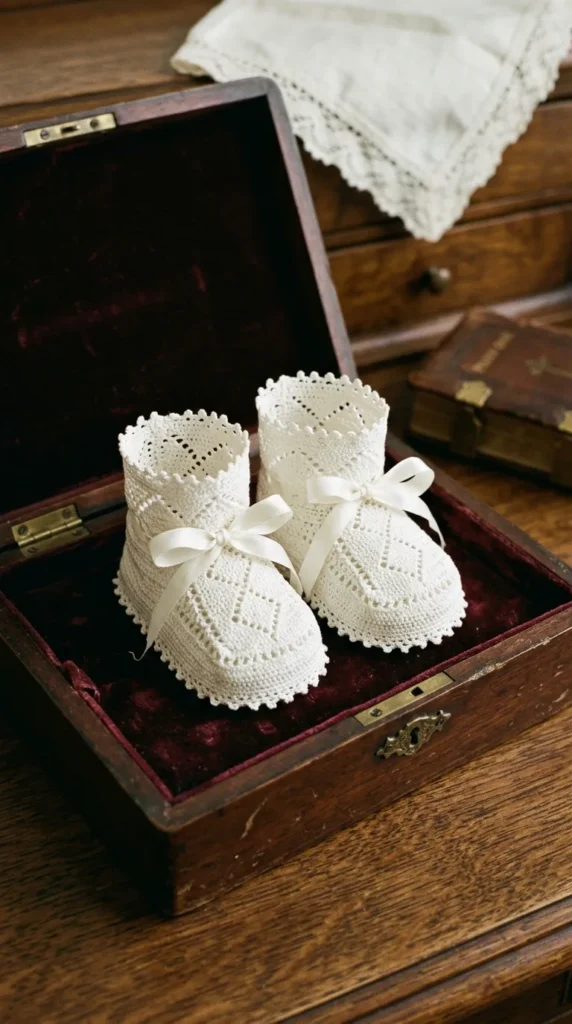
10. Victorian Pointelle Lace Christening Booties
What This Idea Means
Designed as a formal heirloom piece, these tall christening booties feature delicate pointelle diamond lace, open eyelet patterns, scalloped picot trims, and pure silk ties that preserve traditional christening layette aesthetics.
Materials Needed
- 40 g Lace to Fingering-weight 100% Egyptian Giza Mercerized Cotton in Bright Milk White
- 2.25 mm (US B/1) steel crochet hook
- 1 yard of 3/8-inch pure silk satin ribbon in White
- Blocking pins and foam styling blocks
How to Make It
- Lace Footbed: Crochet a clean, tight single-crochet sole to support the open-work structure above.
- Pointelle Toe Box: Construct the front vamp with diamond lace eyelets, framing the central foot arch with picot clusters.
- High-Shaft Lace: Work upward from the ankle for 3 inches in an open French pointelle trellis pattern.
- Top Picot Crown: Finish the top edge with a regal crown of 5-double-crochet fan shells topped with delicate 3-chain picots.
- Lacing Channel: Thread the pure silk ribbon through the open eyelet row at the ankle base.
- Block & Shape: Pin and steam block the booties on miniature foot forms to open every pointelle diamond lace window.
Tips and Variations
- Generational Keepsake: Store the completed booties in an acid-free archival keepsake box alongside baby milestone mementos.
- Lining Layer: Slip a sheer organza inner bootie inside to highlight the white lace pattern against skin.
- Pearl Trims: Sew micro seed pearls along the peaks of each top picot shell for formal ceremony styling.
11. Retro 1970s Earth-Toned Suede-Look Fringe Booties
What This Idea Means
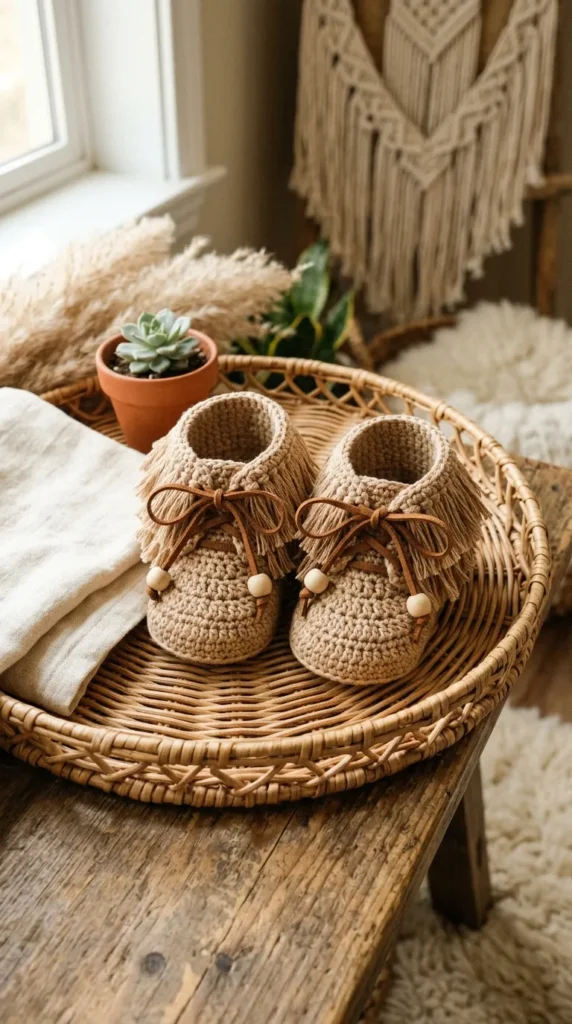
Bringing free-spirited bohemian retro style to baby fashion, these booties feature warm earth tones, a flat-stitch suede-textured foot base, and double-tiered swishy yarn fringe wrapped around the ankle shaft.
Materials Needed
- 60 g DK-weight Brushed Alpaca-Cotton blend in Warm Camel Mustard
- 3.50 mm (US E/4) crochet hook
- 3-inch cardboard fringe-wrapping template
- Sharp fabric shears and tapestry needle
How to Make It
- Footbed Construction: Crochet a standard oval sole using half double crochet.
- Seamless Foot Body: Work the shoe walls and vamp in dense granite stitch (moss stitch) to achieve a flat, brushed-suede look.
- Shaft Extension: Work plain single-crochet rounds upward around the ankle for 2 inches.
- Fringe Preparation: Wrap yarn around the 3-inch cardboard guide and cut along one edge to yield uniform 6-inch yarn strands.
- Tiered Fringe Attachment: Fold two strands in half and loop-knot them through the front loops of two separate horizontal rows on the ankle shaft to create two full fringe tiers.
- Fringe Trim: Comb the fringe flat with your fingers and trim the ends evenly using sharp fabric shears.
Tips and Variations
- Multi-Color Boho: Alternate fringe strands between Mustard, Rust Ochre, and Forest Green for a retro colorway.
- Brushed Texture: Gently brush the fringe strands with a clean wire pet slicker brush to turn yarn plies into soft, fluffy faux-suede tassels.
- Wood Bead Finish: Thread a single raw wooden bead onto the center fringe strands across the front bridge.
12. Cozy Waffle-Rib Wrap Booties with Wooden Toggle Button
What This Idea Means
An asymmetric wrap-around bootie designed for quick dressing and an adjustable fit. The wide side wing folds across the front ankle and fastens securely with a rustic wooden toggle button.
Materials Needed
- 65 g Worsted-weight 100% Superwash Merino in Dusty Moss Green
- 4.00 mm (US G/6) crochet hook
- 2 hand-carved olive wood or cedar toggle buttons (20 mm)
- Tapestry needle and stitch markers
How to Make It
- Sole: Crochet a thick, double-soled base using back-loop single crochet.
- Heel & Toe Box: Work three rounds of waffle stitch, shaping the toe bridge with centered decrease clusters.
- Asymmetric Wrap Wing: Once reaching the ankle line, leave the medial side flat while extending the lateral panel into a wide, 3-inch wrap-around flap.
- Toggle Loop: Crochet a reinforced 5-chain cord loop along the tapered edge of the wrap flap.
- Button Attachment: Fasten the olive wood toggle to the opposite side of the bootie ankle.
- Perimeter Border: Finish all wrap edges with a clean round of slip stitches for crisp borders.
Tips and Variations
- Adjustable Sizing: Place two different toggle buttons side-by-side to allow the wrap to adjust as the infant’s foot grows.
- Faux Shearling Edge: Line the inner edge of the wrap flap with ivory boucle yarn so a hint of fleece shows when buttoned.
- Solid Neutrals: Slate grey, rust terracotta, and warm oat make great gender-neutral color options.
13. Minimalist Modern Derby Baby Shoes with Waxed Cotton Laces
What This Idea Means
A miniature take on formal menswear footwear, these baby Derby shoes feature classic side-quarter wings, a structured heel counter, and thin round waxed-cotton cord lacing over a neat front tongue.
Materials Needed
- 50 g Sport-weight 100% Cotton-Linen yarn in Deep Charcoal Slate
- 3.00 mm (US C/2) crochet hook
- 1 pair of 2 mm thin round waxed cotton shoe laces (black or dark brown)
- Metal eyelet setter and four 3 mm brass eyelet rings (optional)
How to Make It
- Contoured Sole: Crochet a firm, double-layered single crochet footbed.
- Welt Ridge: Work a crisp round of slip stitches around the top edge of the sole to mimic a leather shoe welt.
- Toe Vamp & Tongue: Work the center front toe box in dense waistcoat stitch, continuing upward into a free-standing rectangular tongue.
- Side Quarters: Crochet two separate side quarter panels starting at the heel and wrapping around the flanks, leaving the center front open.
- Eyelet Holes: Crochet two small eyelet holes (or set miniature brass metal eyelets) along the front edge of each side quarter.
- Lacing: Thread the waxed cotton cord through the eyelets and tie in a tailored front bow.
Tips and Variations
- Contrast Welt: Crochet the outer welt line in natural tan yarn to simulate traditional leather soles.
- Soft Interior: Line the inside sole with a thin piece of natural felt for extra cushioning.
- Matte Monotones: Use all-black or all-cream palettes for formal ring-bearer outfits.
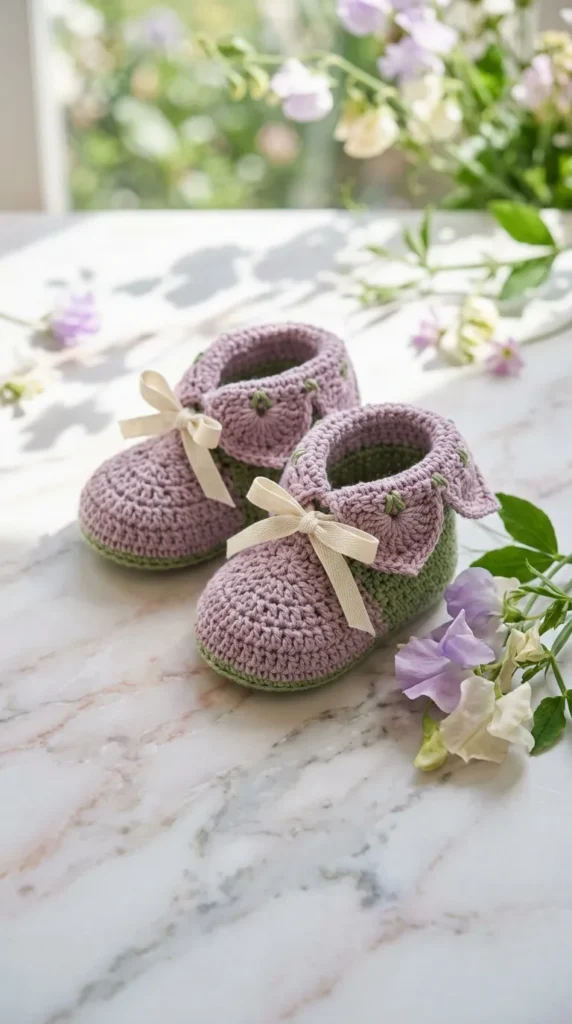
14. Sweet Pea Blossom Fold-Over Floral Booties
What This Idea Means
Inspired by spring blooms, these booties feature a layered, petal-like fold-over ankle collar that mimics opening sweet pea blossoms, finished in soft pastel gradients.
Materials Needed
- 50 g Fingering-weight Bamboo-Cotton yarn in Soft Dusty Lilac
- 20 g Contrast yarn in Pale Meadow Green (for the sole base)
- 2.75 mm (US C/2) crochet hook
- Tapestry needle and stitch markers
How to Make It
- Green Calyx Sole: Work the base sole in pale meadow green to represent the flower stem and base calyx.
- Body Transition: Switch to soft lilac yarn and work the foot walls upward in smooth half double crochet.
- Petal Collar Construction: At the ankle line, divide the upper rim into three overlapping petal flaps worked in fan-treble stitches.
- Curved Edging: Finish the petal borders with a row of slip stitches to create a curved, natural petal rim.
- Fold-Over Styling: Fold the petal flaps outward and downward so they rest naturally around the ankle.
- Center Accent: Secure the base of each petal fold with a tiny yarn knot or glass seed bead.
Tips and Variations
- Color Gradients: Use variegated ombré yarn that shifts naturally from pale cream to deep lilac across the petals.
- Rosebud Variation: Replace the three open petals with a continuous spiraled rose petal collar.
- Spring Layette: Pair with a matching floral leaf bonnet for spring milestone photo sessions.





15. Nordic Fair Isle Tapestry Snowflake Booties
What This Idea Means
Carrying Scandinavian folk knitting traditions into crochet, these booties use multi-color tapestry crochet to showcase geometric snowflake and star patterns around the ankle shaft.
Materials Needed
- 40 g Main Color (MC) Sport-weight wool in Denim Blue
- 20 g Contrast Color (CC) Sport-weight wool in Snow White
- 3.25 mm (US D/3) crochet hook
- Tapestry needle for managing color floats
How to Make It
- Solid Foot Base: Crochet a sturdy single-color sole and low foot walls in Denim Blue.
- Toe Decreases: Shape the front vamp cleanly with hidden decreases to keep the footbed neat.
- Tapestry Shaft: Transition to the ankle shaft, working in continuous rounds of modified split single crochet (waistcoat stitch).
- Fair Isle Color Chart: Follow a 12-stitch repeating geometric Scandinavian snowflake chart, carrying the secondary yarn along the back of the work.
- Top Ribbing: Complete the bootie with four rounds of 1×1 post-stitch ribbing in solid Snow White.
- Finishing: Weave in color floats inside the shaft and steam lightly to set the geometric pattern.
Tips and Variations
- Tension Gauge: Keep carried yarn floats relaxed across the interior to avoid puckering the snowflake pattern.
- Traditional Colorways: Try classic combinations like Charcoal and Cream, or Burgundy and Ecru.
- Ankle Pom-Poms: Attach two micro yarn pom-poms on twisted cords that tie around the ankle.
16. Chunky Honeycomb Cable Slipper Booties
What This Idea Means
Focusing on rich, tactile texture, these slipper booties are covered in an all-over raised hexagonal honeycomb cable pattern that traps warmth and provides a plush, cushioned feel.
Materials Needed
- 70 g DK-weight 100% Superfine Alpaca yarn in Natural Oatmeal
- 3.75 mm (US F/5) crochet hook
- Cable needle or stitch markers
- Tapestry needle
How to Make It
- Cushioned Sole: Crochet a double-thick sole using linked half double crochets for extra padding.
- Honeycomb Base: Work one round of back-post stitches to establish the upper shoe boundary.
- Honeycomb Cable Texture: Work alternating front-post treble cross stitches over regular half double crochets in an 8-row repeating hexagonal lattice.
- Toe Shaping: Integrate decreases smoothly into the honeycomb pattern across the front toe bridge.
- Low Ankle Cuff: Finish the opening with two clean rounds of twisted single crochet (crab stitch) for a firm border.
- Block: Lightly steam block to open the hexagonal cable relief without flattening the soft alpaca fibers.
Tips and Variations
- Alpaca Softness: 100% alpaca fiber offers exceptional warmth and softness against delicate infant skin without itching.
- Bedside Slippers: Style these as indoor crib slippers for nursery loungewear.
- Two-Tone Relief: Work the recessed background stitches in soft grey while keeping the raised honeycomb ridges in ivory.
17. Victorian T-Bar Heirloom Booties with Pearl Beads
What This Idea Means
A formal classic, the T-bar bootie combines a longitudinal toe strap with a transverse ankle strap, forming a balanced T-shape across the foot that is embellished with seed pearl beads.
Materials Needed
- 40 g Fingering-weight 100% Silk-Cotton yarn in Soft Pearl Ivory
- 2.50 mm (US B/1 or C/2) crochet hook
- 2 freshwater flat pearl buttons (10 mm)
- 12 tiny glass seed pearls (pre-strung onto yarn)
- Tapestry needle
How to Make It
- Heirloom Sole: Crochet a refined, dense single-crochet oval sole.
- Low-Cut Walls: Work two shallow rounds of slip-stitch back loop to form the low-profile shoe walls.
- Vertical T-Bar: Crochet a narrow 4-stitch vertical strap running from the front toe tip straight up to the mid-instep, sliding three pre-strung seed pearls into the center.
- Heel Cup: Build a structured heel cup at the back with short-row turns.
- Transverse Ankle Strap: Extend a horizontal strap from the heel, pass it through the top loop of the vertical T-bar, and secure with a buttonhole.
- Pearl Button: Sew the pearl button onto the outer ankle to complete the closure.
Tips and Variations
- Secure Pearls: Ensure pre-strung pearls are locked in place with tight single crochet stitches to keep them secure.
- Christening Match: Pair with traditional white silk or cotton christening gowns for milestone ceremonies.
- Ribbon T-Bar: Replace the vertical crocheted strap with a strip of 1/4-inch silk grosgrain ribbon.
18. Mediterranean Espadrille Crochet Booties with Jute Rim
What This Idea Means
Inspired by Spanish summer footwear, these espadrille booties feature a dual-material design: a natural braided jute rope sole base paired with a light, breathable cream cotton crochet upper.
Materials Needed
- 40 g DK-weight 100% Unbleached Raw Cotton in Clean Ecru
- 20 g Thin 2-ply natural polished jute twine (or jute-look yarn)
- 3.50 mm (US E/4) and 2.75 mm (US C/2) crochet hooks
- Tapestry needle and sharp scissors
How to Make It
- Jute Sole: Use the 3.50 mm hook and jute twine to crochet a firm, rustic oval sole base.
- Sole Rand: Work one round of tight single crochet around the jute sole edge to create an authentic braided espadrille rim.
- Cotton Upper Transition: Switch to the 2.75 mm hook and unbleached cotton yarn, picking up stitches along the inner loop of the jute edge.
- Espadrille Toe Cap: Work a classic closed toe cap using alternating rows of single crochet and cluster decreases.
- Open Heel & Ankle Ties: Crochet a separate back heel cup, extending the top corners into two long, 10-inch braided cord ties.
- Ankle Wrap: Wrap the soft cotton cord ties criss-cross around the baby’s ankle and tie in a bow.
Tips and Variations
- Jute Softness: Choose polished, fine-gauge craft jute twine or soft jute-spun cotton to ensure the sole is gentle on infant skin.
- Two-Tone Nautical: Crochet the front toe cap in navy blue cotton and the heel cup in ecru for a coastal look.
- Slip-Resistant: Apply dots of non-toxic fabric grip paint along the bottom of the jute sole for traction.
19. Bohemian Suede Fringe Ankle Moccasins
What This Idea Means
A cozy, festival-inspired design featuring an ankle-high shaft wrapped in double-layered fluttery fringe, tied with a braided leather cord and natural wooden beads.
Materials Needed
- 60 g Sport-weight 100% Pima Cotton in Warm Desert Sand
- 3.25 mm (US D/3) crochet hook
- 4 natural unvarnished wooden beads (6 mm)
- 1 yard of 1.5 mm round suede leather cord
- Tapestry needle and fringe comb
How to Make It
- Foot Base: Crochet a sturdy oval sole using half double crochet.
- Moccasin Body: Work the lower foot in continuous rounds of textured moss stitch.
- High Shaft: Build the ankle shaft straight upward for 2.5 inches.
- Integrated Fringe Tier: Attach 4-inch yarn fringe tassels through the front loops around the top collar and mid-ankle line.
- Drawstring Channel: Weave the round suede cord through the base of the ankle shaft.
- Beaded Ends: String a wooden bead onto each end of the suede cord, knotting the tips securely to keep the beads in place.
Tips and Variations
- Trimmed Asymmetry: Trim the fringe slightly shorter at the front toe and longer toward the back heel for dynamic movement.
- Warm Fall Palette: Use rich seasonal shades like Burnt Orange, Mustard Ochre, or Deep Rust.
- Safety First: Ensure all beads are firmly double-knotted and tested before dressing infants.
20. Heirloom Irish Crochet Rosebud Layette Booties
What This Idea Means
Showcasing traditional Irish lace techniques, these heirloom booties feature a three-dimensional layered crochet rosebud motif on the front toe, framed by delicate open-work picot lace and a satin ribbon tie.
Materials Needed
- 40 g Lace-weight 100% Mercerized Cotton in Antique White
- 2.00 mm (US 4 steel) crochet hook
- 1 yard of 1/4-inch double-faced satin ribbon in Pale Champagne
- Tapestry needle and small embroidery scissors
How to Make It
- Lace Footbed: Crochet an intricate, fine-gauge single-crochet sole base.
- Lower Wall: Work two rounds of fine double-crochet mesh along the outer boundary.
- 3D Irish Rosebud: Crochet a separate miniature 3-tiered Irish cabbage rose motif with layered petals worked behind front loops.
- Toe Integration: Mount the 3D rose securely onto the front toe bridge using an invisible whipstitch.
- Picot Ankle Shaft: Work 2 inches of delicate picot arch mesh upward around the ankle.
- Ribbon Finish: Weave the champagne satin ribbon through the ankle mesh and tie in a front bow below the rosebud.
Tips and Variations
- Generational Layette: Pair with a matching Irish lace christening bonnet and gown for a complete baptismal ensemble.
- Two-Tone Rose: Crochet the base bootie in antique white while making the rosebud petals in pale blush pink.
- Leaf Accents: Add two tiny emerald-green crocheted leaves tucking out from behind the front rosebud.